Help with a Taper Attachment cross feed screw?

brasssmanget

Active User
H-M Supporter Gold Member
Joined
Feb 7, 2012
Messages
541
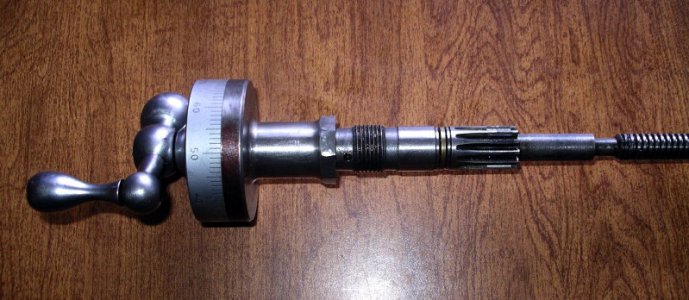
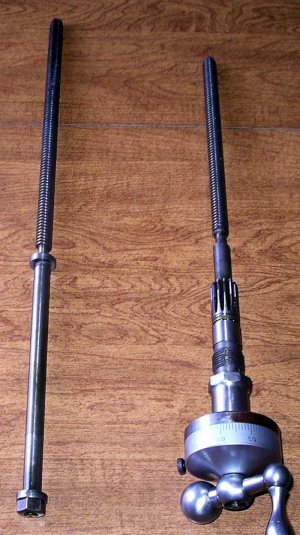
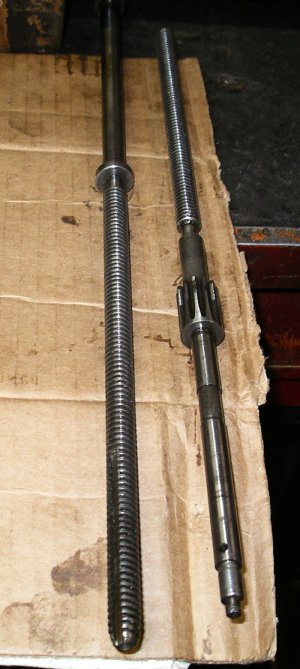
I added a taper attachment to my SB 10L about a week ago, and decided today to change out the cross feed screw. I've run into a bit of a dilemma, as naturally they don't just swap out. I'm not sure how to dis-assemble one and regroup it into the other, or if perhaps I can't even do that with what I have. Looking for help on (1) taking the original screw assembly apart, and (2) after that getting the longer one in the lathe and working. It seems like it has to come apart somehow, but I'm not seeing the right sequence. :eek: Can anybody help or shed some light on what I need to do?

Thanks in advance. I love a challenge, but I like to have some clue as to what I am supposed to do :biggrin:

Here's what I have here -
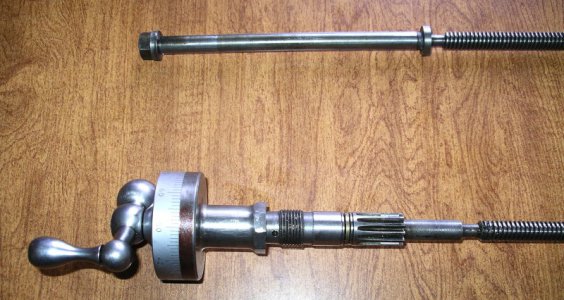
cfscrew03.JPGcfscrew02.JPGcfscrew01.JPG

cfscrew03.JPG cfscrew02.JPG cfscrew01.JPG
 
On my 13" the taper attactment screw is 2 parts, The one you show with the dial is like mine was before I changed it.

Your new one should hace 2 parts, And it doesn't evenhave a drive gear for the cross feed on it.

You can go here and get all the info you need on a 10L. http://www.wswells.com/index.html


Paul
 
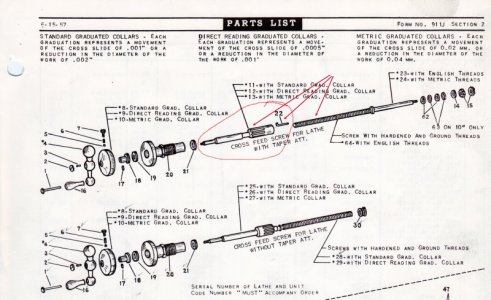
Thanks Paul. I did figure out the dial had a pin in the hole under the tightening thumbscrew. I managed to get everything apart. Near as I can tell one is supposed to somehow use the parts from the old screw, as far as dial, drive gear, etc., but holy cow, nothing is easy about this modification I think! (chuckle) According to my sheet there are different parts for taper and non-taper screws, so I guess I'll have to find the right one or adapt some how. Cannot quite put my finger on the groove/slot/key way on the long taper screw threads and it's function. I'm sure it has to do with sliding in and out of the cross slide set-up, but I don't know....... I'll figure it all out eventually.

Mean time my lathe is down & out of action - I don't like that! :biggrin:

cfs05.JPGcfsdata_s.jpg

cfs05.JPG cfsdata_s.jpg
 
I forgot to tell you about the pin.:whistle:

The threaded shaft with the key way slides into the part you have circled. If the one you have already doesn't come apart you'll need to find one. You could mod the old one if needed, Cut it off bore it out and cut a internal key way.Do you have another Lathe?

Paul
 
Unfortunately I only have have the one lathe. I can cut the old screw OK and bore it on this lathe, but cutting the key way will be a problem for me. I may be able to do something on my small bench top mill with it, but we'll have to give that some serious debate before trying it. I'll start looking for the other front part that I need. Dang-it!! Nothing is ever easy, lol.:biggrin:
 
Well, I purchased the second half of what I needed (shaft w/spline) and spent a fair amount of time getting everything back together. Due to some rough areas in the machining I ran into a spline meshing problem where if I tightened down the top of the carriage to the apron it snugged up the cross feed to the point it wouldn't move. I'm guessing it's just some teeth and slots that need some break-in time. I did file out the slots slightly, and that helped a lot, so I'm pretty sure that's where that problem is.

Other than that, all went quite well, and I turned a piece of aluminum today with the taper attachment just to get the feel of it. It worked great. Now I have to study some data to see how to turn certain lengths and diameters, like M2, M3, etc accurately. Gosh I love these lathes - sure wish I had gotten unto them many years ago. We never even had a shop class in school for them, so my only brush with a lathe was a wood turning Shopsmith saw.

One thing I have noticed. I have a lot more small metal slivers lately!! :biggrin:
 
Glad to hear you got it sorted out. You'll love that taper attachment.

Paul
 
The gear mesh problem is caused by the gear that drives the crossfeed. When South Bend built these lathes they had different size gears to compensate for variations in the machines. The gear will be marked with a M(minus) or P(plus) with a number value for how much it over or under the standard size or a S for standard.
 
Back
Top