- Joined
- Dec 24, 2020
- Messages
- 1,038
A couple of recent threads have brought up the idea of moving lathes, and the difficulties involved as well as ways to handle the task. This is one way, inspired by some others I've seen online.
By way of background, I'll be the first to admit, I killed my first lathe and it was entirely my fault. I had the lathe on two heavy furniture dollies and was going to move it about 20ft on smooth concrete....no sweat, right? After all, I'd done that several times previously without a problem. All was well until I got to a seam in the concrete. I pushed on the lathe, it moved and the dolly didn't....I stepped out of the way as the lathe rolled onto it's back and pivoted maybe 30* while doing so. When people say it happens in the blink of an eye, they mean it....literally a second or so and it's on the ground. I just barely got out of the way of the pivoting part (I actually pushed off something with my hand when it started, but can't recall what). Unfortunately, the overhead door got a big dent, the concrete got some big chips and the lathe got a cracked headstock casting....totally ruined. Luckily, I was able to help a bunch of other guys with parts for their lathe, so it wasn't a complete loss. I was very lucky because just before it happened I realized I was trapping myself and switched sides of the lathe. If I hadn't moved....well, it would have landed on me in some shape or fashion, and I probably would have sat there for a couple of hours until my wife came to look for me....not good!
I vowed I wasn't going to make such a stupid choice again. At the very least, if I had run straps around the lathe and under the dollies it probably wouldn't have been a problem, but that's still pretty iffy. A strap pulling down won't keep something from sliding sideways very well.
What I've done since then is something similar to what Tom/Ox Tools shows on a video making a saddle with wheels, all thread and angle iron. The nice thing about his method is that it's adjustable for different size lathes. Mine is a bit more permanent, but can be reused if you put some thought into it.
I recently brought home a Logan 6510H that I wanted to be able to move safely. This is a 14" machine with a short bed (28" between centers) that weighs a bit over 1,600lbs...short and stout is how I would describe it. There was a bit of a loading incident (not my fault) that caused some minor damage, but it's fixed now. Now that I'm sure it's working properly I'm to the point of doing some additional cleaning, possibly painting the cabinet and then I'm going to move it into the shop side of my building for use. I expect this will take a while since I've got a working lathe and and lots of projects lined up. That means it's probably going to get moved multiple times. Because of this I wanted to make a saddle with wheels for the Logan like I did for my Clausing 6913 (14 x 48) since it worked so well. I would have used the saddle I made for the Clausing, but that's one of the projects lined up, so it's still on it.
For background, I have the front door off because it had a dent (now fixed) and the side covers off for cleaning an inspection. I have the motor mount loose so I could move the belts off the pulleys to check their condition. The entire back of the cabinet is coated in dried cutting oil so I wanted to be able to roll it over a tarp for cleaning. Depending on how that goes I may paint the cabinet, front door and side covers...we'll see. On to how I set it up to move:
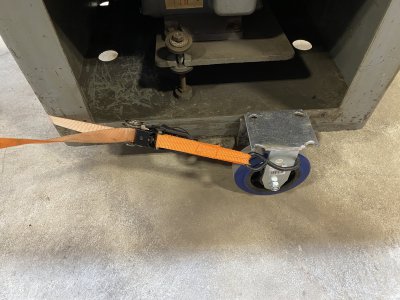
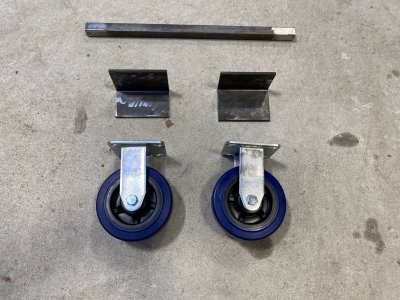
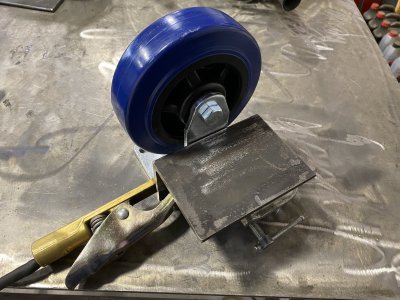
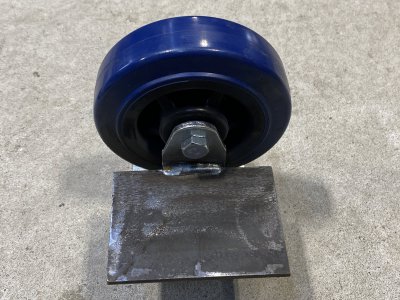
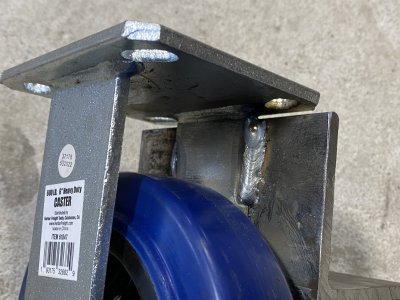
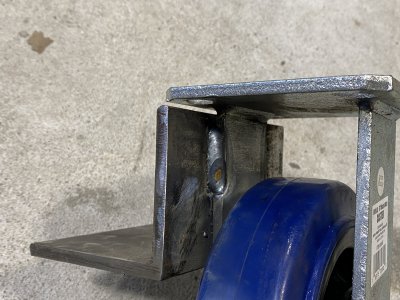
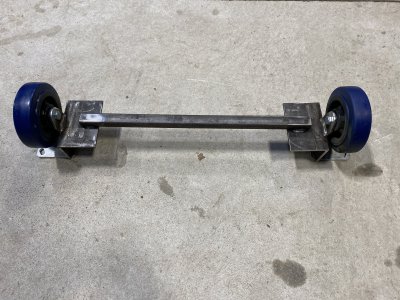
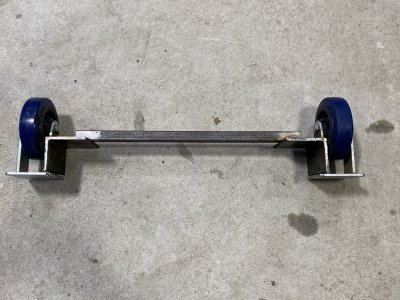
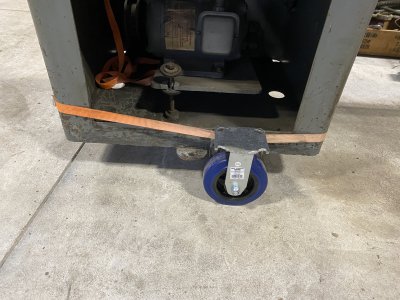
I used a couple of pieces of 3/8" thick angle iron, two 6" wheels from Harbor Freight and welded those onto the angle. I then used some 1" square 3/16" tubing for the spacer to keep the distance correct. I like 1/2" more than the width of the base just so it fits easily. I don't heavily weld the spacer on since it's not taking much load and I'll eventually cut it off to use the setup on something else. You want to just lift the machine enough to get the saddle underneath....as soon as there's some weight on the saddle it will level itself. I used a strap to help hold the saddle but I'm going to change how the strap is oriented to better keep the saddle from moving towards the tailstock. I have never seen the lathe move on a saddle like this, but a little extra security doesn't hurt.
Keep in mind, when the lathe is raised up (I used a crane) and you're going to put the saddle under it, you are IN the danger zone. I put cribbing under the side I'm going to be on (not shown) so that if the lathe falls, it should roll away from me. I adjust the height I raise the lathe to be able to get the saddle under it and not have much space between the base and the cribbing....can take a few tries.
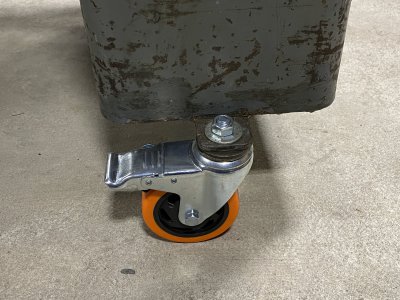
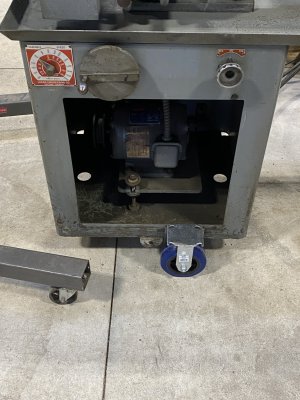
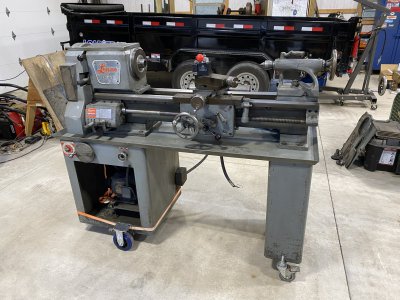
This lathe has footpad tabs with holes so I mounted two stem-mount casters in the tailstock end tabs. These casters are a bit light for the job so I have some coming that are rated for 300lbs each, which should be fine. It's not exactly level, so it's taking some weight off the tailstock end. On lathes without the exposed footpad tabs I've used a variety of methods for the tailstock end. I've used a heavy furniture dolly, but strapped it from both directions to keep it in place (and still hated it!). I've even used two skates meant for holding snow plows (sort of looks like car mover skates). They have a groove for the blade that you can set the frame on which keeps it from moving off the skate, but a strap is still smart. Even better is something like the saddle with fixed tires, but adapted to casters so steering is easier. The short version is that the tailstock end can take some creativity, but luckily it's the lighter end and isn't quite as critical. If the headstock end is solid on the saddle it would take quite a bit for the lathe to roll over (still possible).
This setup is very stable and moves easily. One hand and you can roll it around without much effort. I still go very slowly when making more than just a minor direction change...sometimes it takes a bit to get the casters rotated and pointed where you want them (and the same).
Here are some pics....I apologize in advance for the background clutter. No making fun of my welds (far from perfect)


