Material choice for test indicator clamp

durableoreo

H-M Supporter - Gold Member
H-M Supporter Gold Member
Joined
May 3, 2020
Messages
229
What is an idea material for the snugs and clamps of a test indicator stand?

I'm making a clamp that has a dovetail for a test indicator on one end and a socket-type joint on the other end. Drawing attached. Fairly small, 1/2" square and about 1-1/2" long. I was working on a "setup part" yesterday and didn't have very good results. I was using ye olde A108 from McMaster. It sprung a fair amount when I cut the slits. This made me wonder if I was using the right material.

I may heat treat the final item. At least case harden. Would I be better off with O-1 or A-2 than cold-roll? I like pre-hard 4140 but is it right for this application? What would you suggest?
 

Attachments

  • tool_post_indicator_arm 2 Drawing v10.pdf
    131.3 KB · Views: 52
Cold rolled will always spring when slit like this unless annealed first. Other than that it is a perfectly acceptable material for the application. If you wish to harden it, O-1 would be a good choice, but I would draw it back significantly to avoid brittle fracture. Case hardening CRS might be problematic. Many hobby machinists are prone to over-thinking material selection.
 
Last edited:
Cold rolled will always spring when slit like this unless annealed first. Other than that it is a perfectly acceptable material for the application. If you wish to harden it, O-1 would be a good choice, but I would draw it back significantly to avoid brittle fracture. Case hardening CRS might be problematic. Many hobby machinists are prone to over-thinking material selection.

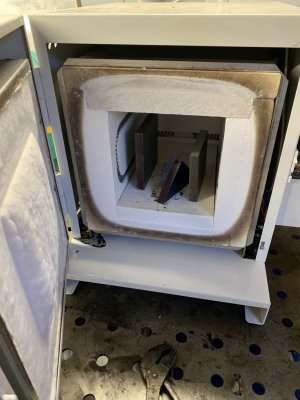
OK. I don't know why I didn't start with annealing. 1600 oF for 30 min.

IMG_6524.jpeg

Have you had trouble case hardening CRS, even after annealing?
 
OK. I don't know why I didn't start with annealing. 1600 oF for 30 min.

View attachment 432380

Have you had trouble case hardening CRS, even after annealing?
That's the way.

Re: case hardening, I was envisioning the way most of us do it, with a torch. It's easy to overheat and melt thin sections.
 
Is the part to hold an indicator in a lathe toolpost?
 
Is the part to hold an indicator in a lathe toolpost?

Yes.

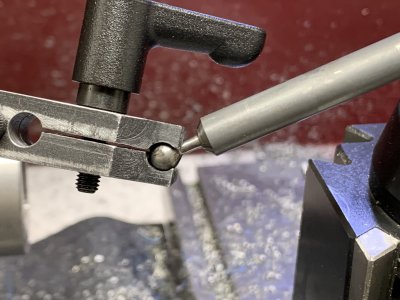
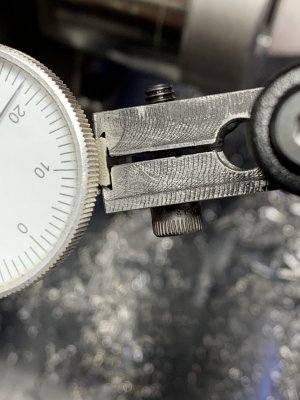
Unfortunately, the part with the dovetail is not quite right. Seems too stiff. I need to spring it open 0.040 to get the ball in. The other two parts are fine, if a little too flexible. (I programmed Fusion to make the wall thickness 1/8 x D where D is the diameter of the post that it rides on.) Maybe I can fix it with larger holes at the end of the slots. Or maybe it's fine as-is. I have some TESA indicator clamps that are very stiff. So try it out...
 
I can't add to the material suggestions above but here is a tip for simple indicating on a lathe that may be useful in the future.
Hold a swivel spigot indicator in the tailstock chuck to check o/d + i/d + face runout, very quickly and easy without any extra tooling. The indicator stylus is automatically geometrically aligned with the machine axis which makes small holes and diameters simple.
 
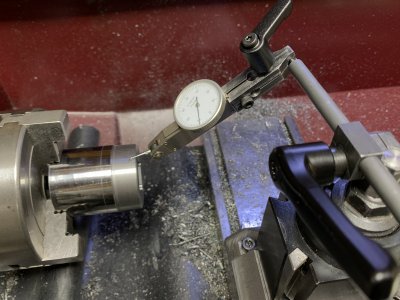
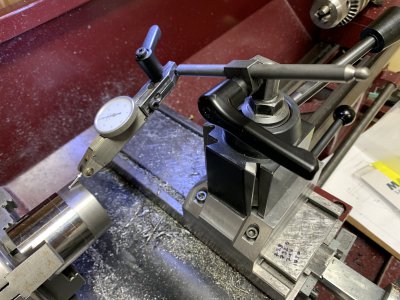
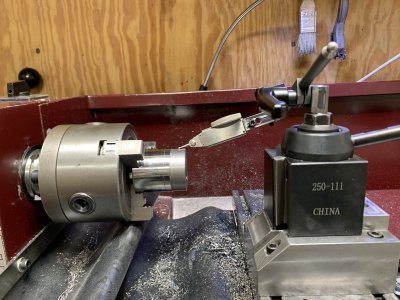
Knobs came today. The larger one is Kipp and the smaller one is really too short to give enough leverage. Turns out, it's also not necessary. The ball is tungsten carbide and lapped very smooth, so no adjustment is needed. If I made another one, I might try a cam type closure.

The whole setup is a little... tall. I'm really reaching down to the work. And the ball-socket joint is fine except for this particular arrangement. where I want to measure runout AND be able to read the dial. Maybe I'll make another part but put the dovetail at a 45-deg angle.

IMG-6643.jpgIMG-6639.jpgIMG-6640.jpg

To deal with the stiffness of the flextures, I drilled the hole at the end of the slit to a larger diameter. Probably should have used an endmill. And the setup required feeler guages in the slit. After enlarging the holes, the slots close 0.015 with reasonable tension on a 8-32 screw. The slots spring open so maybe there is no need to heat treat.

IMG-6641.jpg

IMG-6642.jpg
 
Back
Top