-
Welcome back Guest! Did you know you can mentor other members here at H-M? If not, please check out our Relaunch of Hobby Machinist Mentoring Program!
You are using an out of date browser. It may not display this or other websites correctly.
You should upgrade or use an alternative browser.
You should upgrade or use an alternative browser.
Parting Geometry
- Thread starter mickri
- Start date
- Joined
- Nov 15, 2016
- Messages
- 943
Nice! Mid Winter drops to around 1-3 C occasionally 0 and Summer is 30-35 C. Brother is involved with mining in the interior of Oz and can see 45 - 50 C regularly that a bit too hot.
- Joined
- Dec 20, 2012
- Messages
- 9,422
My take on this is that a front mounted tool tilts and lifts the front of the cross slide to the extent the gibs will allow. With a rear mounted tool, the opposite occurs and the rear of the cross slide is pressed down, coming in contact with the saddle and thereby increasing rigidity. My belief is that the tool post stud acts as a fulcrum.
It must be over 10 years by now but I actually bought a B&S 3" face, tenths reading dial indicator specifically to test this on my Sherline lathe; I wanted a big dial so I could see movement. It would have been so much better if I had a load cell but I don't. The Sherline does not have a compound; the tool post bolts directly to the cross slide. The lathe also has a tapered gib that was very well adjusted on my lathe. Still, when I parted from the front I saw a minute movement of the needle in the positive direction, meaning the front of the cross slide was elevated when parting. When parting from the rear, there was zero movement of the needle; the rear of the cross slide remained in solid contact with the saddle.
This crude experiment jives with my experience. A rear mounted parting tool post increases rigidity by transferring the tangential cutting forces to the structure of the lathe. As the forces try to lift the front of the tool post, they are transferred to the rear of the tool post by the tool post stud that acts as a fulcrum. That force pushes down on the rear of the cross slide and any play between the contact surfaces of the cross slide and saddle are taken up. From that point there is nowhere else for the forces to go but into the structure of the lathe. This is what I believe enables a little Sherline lathe to part work that it should not be able to part with such ease.
It is also why a Sherline lathe sucks when parting from the front. As the rear of the tool post rises up and takes up what little space there is between the slides and the gib, the tool digs in and tangential forces increase. Chatter and dig ins result, which is why Sherline owners have so much trouble parting from the front. I believe that the more space (wear, poor construction, whatever) there is in the area of the gib and slides or the sloppier the fit of the gibs, the greater the chances of movement and the more trouble the lathe will have when parting from the front.
My rear mounted parting tool has a ledge that bears on the edge of the cross slide; it cannot turn under load. The cutting edge of the tool is also precisely located on the spindle centerline of this specific lathe. The tool is rigidly held and cannot bend vertically, at least not enough to matter, even with an excessively long overhang. All this, coupled with the beneficial transfer of forces that I believe occurs, allows this tool to part stuff that a little lathe like this should not be able to do. And it can part at very high speeds, up to 2-3 times normal turning speeds for the material.
How this works has been debated ad nauseum for years. However it works, the fact remains that it works, period.
- Joined
- Aug 22, 2012
- Messages
- 4,114
I could visibly see the flexing when parting (or trying to) on my 9x20 and snapped many blades.
Nothing helped cure it till I built a solid plinth and took the top slide out the equation whereupon parting became almost a pleasure.
Nothing helped cure it till I built a solid plinth and took the top slide out the equation whereupon parting became almost a pleasure.
- Joined
- Oct 31, 2016
- Messages
- 2,644
I agree with your analysis to a certain extent. If you put the DI on the blade close to where it is contacting the work I would think that there would be nil downward movement on the front side and measurable upward movement on the backside. This doesn't take into account the backlash which I think plays a big part. The cross slide on my lathe has .006 backlash and the compound has .008 backlash. Depending on how the cross slide and compound are oriented I could have anywhere from .006 up to .014 of movement towards the work. Front side or backside would be the same. The difference between the front side and backside is that on the front side the blade can't move down. The blade can only move into the work as the backlash is taken up. The slight upward angle of my parting tool holder aggravates the problem. On the backside the blade is free to move up as the backlash is taken up. Instead of getting jammed into the work it rides up over the work.
Why I am going through this mental exercise is because I don't think that I have the skill level to make a backside parting blade holder for my lathe. It would require machining precise parallel dovetails, fitting gibs and somehow attaching it to the cross slide or the cross slide lead screw. I think that I would be worse off rigidity wise than what I have now parting from the front side.
Why I am going through this mental exercise is because I don't think that I have the skill level to make a backside parting blade holder for my lathe. It would require machining precise parallel dovetails, fitting gibs and somehow attaching it to the cross slide or the cross slide lead screw. I think that I would be worse off rigidity wise than what I have now parting from the front side.
- Joined
- Dec 20, 2012
- Messages
- 9,422
I agree with your analysis to a certain extent. If you put the DI on the blade close to where it is contacting the work I would think that there would be nil downward movement on the front side and measurable upward movement on the backside.
Actually, just the opposite occurs. On the front side, the blade moves down, then up, then down and so on. In the rear, it doesn't rise up as far as I can tell. I suspect most folks who believe the tool moves in the rear have not used such a tool.
It isn't that the backlash is the culprit; it is the structure of the lathe itself - the cross slide, the compound and the slack in the slides and gibs that causes movement. As Savarin pointed out, replacing these structures with a solid plinth all but eliminates the issue on his lathe and I can guarantee you his lathe has backlash. If you dial into the cut, that essentially eliminates backlash anyway.
The difference between the front side and backside is that on the front side the blade can't move down. The blade can only move into the work as the backlash is taken up. The slight upward angle of my parting tool holder aggravates the problem. On the backside the blade is free to move up as the backlash is taken up. Instead of getting jammed into the work it rides up over the work.
On the front side, the blade definitely moves down, and it moves down in spite of any backlash you might have. It is the gaps and slack in the compound/cross slide system that allows the blade to move. To clarify, backlash enters the picture when the tool moves into the work due to slack in the threads in the nut and screw but when parting, you are feeding in and there is no slack in that assembly so backlash is not the issue; movement in the structure is the issue.
The upward angle of your tool has nothing to do with the issue provided the tip is on center. Many of us have those crappy holders that angle the tool up at an angle and have no problems parting with it. In a rear mounted tool, the tool does not move up as many think; it just cuts.
Why I am going through this mental exercise is because I don't think that I have the skill level to make a backside parting blade holder for my lathe. It would require machining precise parallel dovetails, fitting gibs and somehow attaching it to the cross slide or the cross slide lead screw. I think that I would be worse off rigidity wise than what I have now parting from the front side.
Chuck, I have no idea what kind of lathe you have or what it looks like. I can tell you that if I could not fabricate a rear mounted parting tool holder then I would consider a solid plinth to replace the compound and I would make a parting tool holder that holds the blade horizontally instead of at an angle. I would also spend some time adjusting the gibs between the saddle and cross slide to eliminate as much play as possible while maintaining freedom of movement.
For me, a parting tool is an important tool to have. I use it to cut grooves, demarcate and denote the depths of cuts and I also part with it. This is one tool that must work and I would do all I can to make it so.
- Joined
- Oct 31, 2016
- Messages
- 2,644
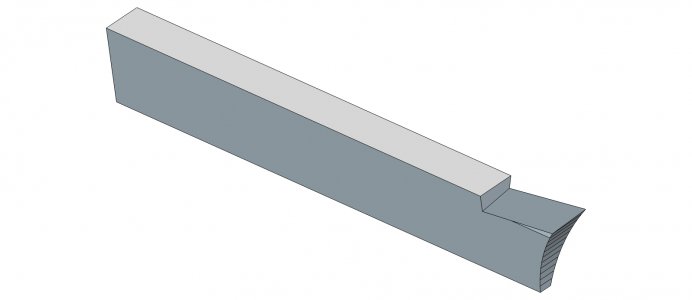
Had what I will call my first truly successful parting yesterday. I needed to part off the excess length of a bushing that I have been making. But didn't feel like taking 3 to 4 hours to make a parting tool holder like the one I referenced above. Instead I took one of the tool holders that I had already made and put a parting blade in it. The blade fit and when tightened down was solidly held in the tool holder. I sharpened the blade with the bench grinder so that it would have a curved front relief (terminology??) to prevent rubbing. The blade came with back and side rakes already ground. I did an exaggerated drawing because I didn't think that a picture would show everything. Because of the angles the blade isn't square across the top edge. I don't know if this helped with the parting.

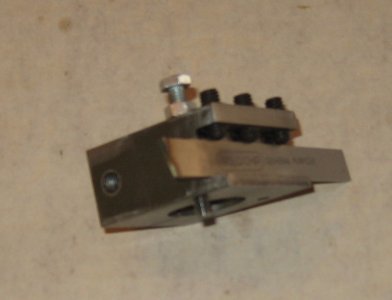
Here is the holder with the blade.

The only thing that was disconcerning was the noise. There was a very loud squealing sound through most of the part off. When it wasn't squealing is was very quiet. No sound to speak of. The amount of cutting fluid didn't seem to make any difference.
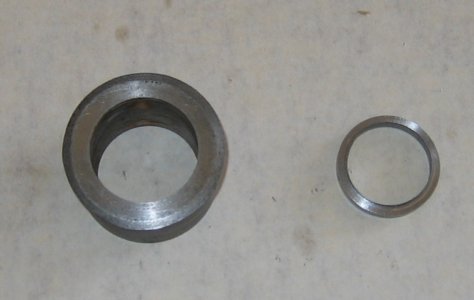
Here is the bushing and the excess that was parted off.


Here is the holder with the blade.

The only thing that was disconcerning was the noise. There was a very loud squealing sound through most of the part off. When it wasn't squealing is was very quiet. No sound to speak of. The amount of cutting fluid didn't seem to make any difference.
Here is the bushing and the excess that was parted off.

- Joined
- Oct 31, 2016
- Messages
- 2,644
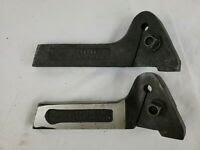
After reading this thread https://www.hobby-machinist.com/threads/gooseneck-or-spring-tool-holder.80037/#post-688601 I researched gooseneck/spring tool holders. Found this video which I think does a good job of explaining how a parting tool behaves when parting and why it wants to dig into the work. And how a gooseneck/spring tool holder solves the problem.
This video shows a gooseneck/spring parting tool holder in action. Fast forward to about the 7 minute mark in the video.
I was going to make one to try it out. Then I found two for sale on Ebay. Should have them by the end of next week.

This video shows a gooseneck/spring parting tool holder in action. Fast forward to about the 7 minute mark in the video.
I was going to make one to try it out. Then I found two for sale on Ebay. Should have them by the end of next week.


