- Joined
- Oct 17, 2022
- Messages
- 8
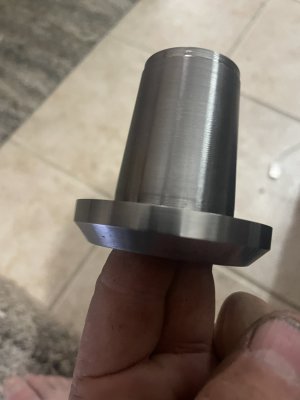
Today was mostly research and setup. Somewhere along the line, someone had given me a 5C taper sleeve from a Southbend lathe. He wasn't sure if it would fit my lathe, and sure enough, it didn't, so it has been sitting in a drawer. After my success yesterday turning a #3 Morse between centers, I started wondering if I might be able to cut a new taper on that old sleeve. I pulled it out, took some measurements, and then pulled the chuck off of my Logan and measured everything I could on it to see if what I was considering was even possible. It looked like it would only take a light shave to match my spindle taper, so I started thinking I could pull it off. I wasn't 100% sure, but I suspected the sleeve was hardened, and I didn't want to take a chance on ruining it so I chucked it up and tried cutting a very small amount off the small end. Carbide had no issues at all shaving it, so one more obstacle removed. This was looking like it just might be possible.
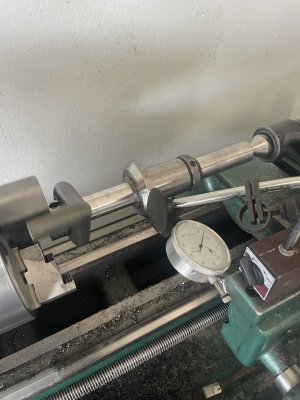
The next issue was figuring out exactly how to pull this off. I decided the only way to do it was to set it up on a mandrel, so I started looking for something that would work. Ultimately, I didn't really have anything that looked promising, so I pulled out the largest 5C collet I had, which happened to be 1 1/32". After that, dug around in my scrap steel and found a suitable length of round bar, and started turning it down. After making a couple of passes, I took careful measurements along the length, just to verify my tailstock was centered. It had a slight taper of about a half a thou over 12 inches, and I thought about trying to bring that in closer, but some quick math made me realize that over the lenght of the sleeve it was only going to come out at a tenth of a thou, and I don't believe that will be an issue, so I left it alone. I finished cutting the bar down to 1.031, gave it a quick dressing with some Emory cloth and slipped the collet onto it. Next, I inserted the collet into the sleeve, and tightened it down. Set the bar between the centers and brought out the dial indicator. I noted the orientation of the bar to the drive dog and chuck when I removed it, and made sure it all went back together the same way. Checked the homemade mandrel for runout, and there was none, so I set the dial indicator on the outside of the sleeve. As things stand right now, there is about a half a thou runout at the large end, and about 1 3/4 thou at the small end. I took a small brass drift and tapped the small end, and brought it to about a half, and double checked the large end to make sure it was still good. As things are set up right at this moment, I think I have it about as good as I am going to be able to. I could try turning the collet in the sleeve and see if I can get it any closer, but I am afraid that it might end up worse. The collet is a Hardinge, so I am going to assume it is true, the mandrel is true, and that only leaves the OD of the sleeve, which is going to get turned down anyways. Think I am ready to start measuring the tailstock offset, and make some cuts.
The next issue was figuring out exactly how to pull this off. I decided the only way to do it was to set it up on a mandrel, so I started looking for something that would work. Ultimately, I didn't really have anything that looked promising, so I pulled out the largest 5C collet I had, which happened to be 1 1/32". After that, dug around in my scrap steel and found a suitable length of round bar, and started turning it down. After making a couple of passes, I took careful measurements along the length, just to verify my tailstock was centered. It had a slight taper of about a half a thou over 12 inches, and I thought about trying to bring that in closer, but some quick math made me realize that over the lenght of the sleeve it was only going to come out at a tenth of a thou, and I don't believe that will be an issue, so I left it alone. I finished cutting the bar down to 1.031, gave it a quick dressing with some Emory cloth and slipped the collet onto it. Next, I inserted the collet into the sleeve, and tightened it down. Set the bar between the centers and brought out the dial indicator. I noted the orientation of the bar to the drive dog and chuck when I removed it, and made sure it all went back together the same way. Checked the homemade mandrel for runout, and there was none, so I set the dial indicator on the outside of the sleeve. As things stand right now, there is about a half a thou runout at the large end, and about 1 3/4 thou at the small end. I took a small brass drift and tapped the small end, and brought it to about a half, and double checked the large end to make sure it was still good. As things are set up right at this moment, I think I have it about as good as I am going to be able to. I could try turning the collet in the sleeve and see if I can get it any closer, but I am afraid that it might end up worse. The collet is a Hardinge, so I am going to assume it is true, the mandrel is true, and that only leaves the OD of the sleeve, which is going to get turned down anyways. Think I am ready to start measuring the tailstock offset, and make some cuts.