Smithy CB 1220 XL feel like im chasing my tail.

mac1911

Registered
Registered
Joined
Sep 29, 2022
Messages
739
So I picked up a 90s vintage smithy 3-1. Knew from the previous owners admissions and what I found so far it was going to take some time straightening it out.
So far almost everything has been loose, mis adjusted and out of alignment.
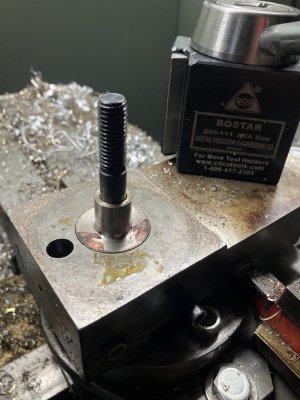
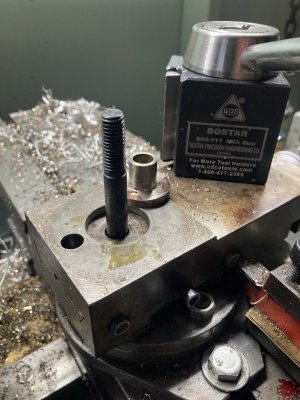
I cleaned up the saddle/crossslide/compound and adjusted the gibs and got a lot of back lash removed , cross slide is still wonky but I think I need a new nut and re shim the dial end.
Specs are .008-.015 and what Im seeing is more like .030”
I had it pretty close then it started to feel tight and got sloppy
So what im finding is it seems the head stock has shifted but it looks like its pinned solid and set screws hold the pin.
Anyone have some tips on where I should “re start” my check over/tune up.
Im tempted to strip down the gear head
The machine runs smooth and quiet compared to other small lathes I have been around.
Im a auto tech so the mechanical parts dont scare me. I just dont want to do things If its not needed ir might get me involved more than needed.

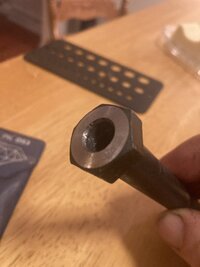
When I first started looking at it I found the nut and “lash” plate not even attached to each other. Lucky the screws where still there.B6EFFE06-3E26-4F21-A837-1921A0441EAD.jpeg
 
Backlash by itself isn't bad; all machines have some. Even if it's more than the spec says, as long as it's consistent and repeatable. If it's changing, then you have an issue. Most likely something still needs tightening
-M
If you are finding the slides have tight spots and loose spots then the factory didn't machine the sliding surfaces parallel enough. You would have to adjust for a compromise between too tight and too loose.
The only way to fix that is to re-scrape the surfaces but it's a big job and often hard to justify the effort
 
Last edited:
Backlash by itself isn't bad; all machines have some. Even if it's more than the spec says, as long as it's consistent and repeatable. If it's changing, then you have an issue. Most likely something still needs tightening
-M
Im going to try and shim the nut a little more and adjust the screws again. I think the nut is just that worn out.
Been making a list of parts . The belt tensioner assembly is a mess and the internal left hand screw is bent so it only can go in so far.
Right now im already at $300 in parts list.
I will admit to be a bit “lazy” and trying to get it up and running quicker than a full tear down , as once the cold comes I wont be out in the shed playing with this.
 
There are two kinds of people- the kind that starts to brutallize the machine when they find things don't fit. The second kind surveys the situation and
tries to understand the weaknesses of the machine and carefully repairs or upgrades it if possible. Often the machine encounters the first kind first.
Hopefully you are the second kind. Sounds like it
-M
 
Last edited:
I would clean it up before dismantling it. Then clean it again after it's apart. What are you showing in the picture? How about taking a few more pictures. I see Smithy has free parts manuals on their web-site.
Here is one I downloaded. Find your and tell us part numbers, so we are on the same page. https://cdn.shopify.com/s/files/1/1845/6449/files/GN1300_Parts_Diagram_20130711_1.pdf?v=1652110563
Part 13-14 although the cross nut has 2 pieces. The small plate where the screws pass through was just floating on the end of the screw and the retaining adjusting screws where just sitting in the “valley”
First thing I did was free up all the oil buttons. Then started cleaning everything I started at the tail shaft and moved to the left.
 

Attachments

  • DAB3BBB3-253D-4CD5-80D6-57C68FA8C0B3.png
    DAB3BBB3-253D-4CD5-80D6-57C68FA8C0B3.png
    386.6 KB · Views: 3
I get it, the 2 piece nut is an adjustable backlash eliminator. Clean it up with a paintbrush and some Purple power, mineral spirits or Kerosene with a paint brush and rags. The way it looks, I bet the brass nut (s) has sharp worn out threads . The screw is no doubt worn too. Take it apart and check it out. Hard to give advice when it is together and dirty. The former owner was a slob.
 
I get it, the 2 piece nut is an adjustable backlash eliminator. Clean it up with a paintbrush and some Purple power, mineral spirits or Kerosene with a paint brush and rags. The way it looks, I bet the brass nut (s) has sharp worn out threads . The screw is no doubt worn too. Take it apart and check it out. Hard to give advice when it is together and dirty. The former owner was a slob.
I dont think it was the former owner I think it was the former former owners. I had a friends dad , ( retired machinist) look at it. Well he insisted really. After some inspection he says the lathe does not have a lot of wear and really is not that dirty considering what he expected.
He really though the under sides would all be packed with chips and rust. His thoughts where someone put this on the bench and just used it as it came and worked real hard trying to anything productive. He said its dirty. The ways and gibs are all full of fine crud, everything that should be tight is loose and all that should be loose is binding.

So I been working at cleaning it up. He gave me some "way" oil and said just use this or 30w non detergent or even chainsaw bar oil. nothing else.
I have since improved on the machines feel , tightness and got a lot of slop out of it over all. I was missing gears and I had one break on the machine while running and those should be here Wednesday.

Smithy has sent me info on setting up the machine as it would have came from the factory , pdf of the correct owners manual.and has been helpful although slow in response.

Im probably going to need new cross slide nut and the Lead screw nut. As I snug up one area I fine another with some play.
I was able to use washers and shims to help sure up the handle end and noticed a good amount of slop in the bushing link from the lead screw transmission to the lead screw. They use a tapered pin on one side and just a key way onto the lead screw. I noticed in a video the newer units have pins on each end. I was thinking maybe a set screw.


right now Im working on the feed screw dial handle end. lots of slop, Im not good at taking pictures as I usually just dig right in and try to get things done. My video skills are lacking also.
 
Improved and fixed a lot of issues and completed my first project
-adapter for WCTP to take up the slop from 10mm to 14mm.
Just need to tap my chicago screw to bolt it all together
 

Attachments

  • E3F6D29D-ACE0-4618-9698-83123D607933.jpeg
    E3F6D29D-ACE0-4618-9698-83123D607933.jpeg
    18.1 KB · Views: 3
  • DCC0E645-9DF3-4A3A-A6A1-D2505B0EA57C.jpeg
    DCC0E645-9DF3-4A3A-A6A1-D2505B0EA57C.jpeg
    275.1 KB · Views: 3
  • BA5FF863-8F2F-4F2B-8899-78A404F31348.jpeg
    BA5FF863-8F2F-4F2B-8899-78A404F31348.jpeg
    281.3 KB · Views: 3
  • D41A9BBD-4AE8-4F24-AF19-65B64CF065F0.jpeg
    D41A9BBD-4AE8-4F24-AF19-65B64CF065F0.jpeg
    65.8 KB · Views: 3
Back
Top