- Joined
- Apr 21, 2015
- Messages
- 582
I finally got around to installing the quill DRO that's been rattling around in a drawer for several years.
I was alarmed to discover that the DRO didn't display the same values as the dial on my quill feed. The DRO was consistently displaying smaller travel distances than the dial.
I've since discovered (thanks @darkzero) that others have apparently run into this before me.
In a nutshell, just because the dial is labeled in 0.001" divisions and 0.100" per full turn, it doesn't mean your quill is axially moving 0.001" or 0.100".
Like many offshore collet manufacturers, the maker apparently felt that 25mm is close enough to an inch. The quill on my Grizzly G0762 square column mill actually moves 2.5mm (0.0984") for each full turn of the dial, not the 0.100" I thought it was moving. That's a 1.6% error with every adjustment!
This is a pretty big deal on benchtop mills because we can't move the table in Z. On a knee mill, I think one usually raises the table for accurate Z adjustments and tends to leave the quill locked with minimal stick-out for rigidity when milling — the quill dial is only for boring holes. On a benchtop mill, head movements in Z are harder to do precisely (lowering vs. raising, usually with no dial or DRO for the Z-location of the head itself), so we pretty much always use the quill to adjust cutter depth (re-locking for each pass).
At least a few of the blown dimensions I've made in prior projects make sense now.
There's no need to check a Bridgeport, of course, but anyone with a mill that has a suspicious number of metric cap screws and the like (pretty much any offshore benchtop mill) should check their fine-feed dials for accuracy before depending on them.
Here's how I checked mine:
First find a couple ground pins of known but different dimensions. I used gauge pins (because I use them for EVERYTHING), but end mill shanks, ejector pins, dowel pins, etc. work just as well. Just mic whatever you use beforehand and verify their diameters beforehand. I used a 0.500" and 0.100" gauge pin to make the math easy, but any two diameters more than a couple hundred thou apart are fine. A 123 block also work, but rolling a pin under the indicator tip is best.
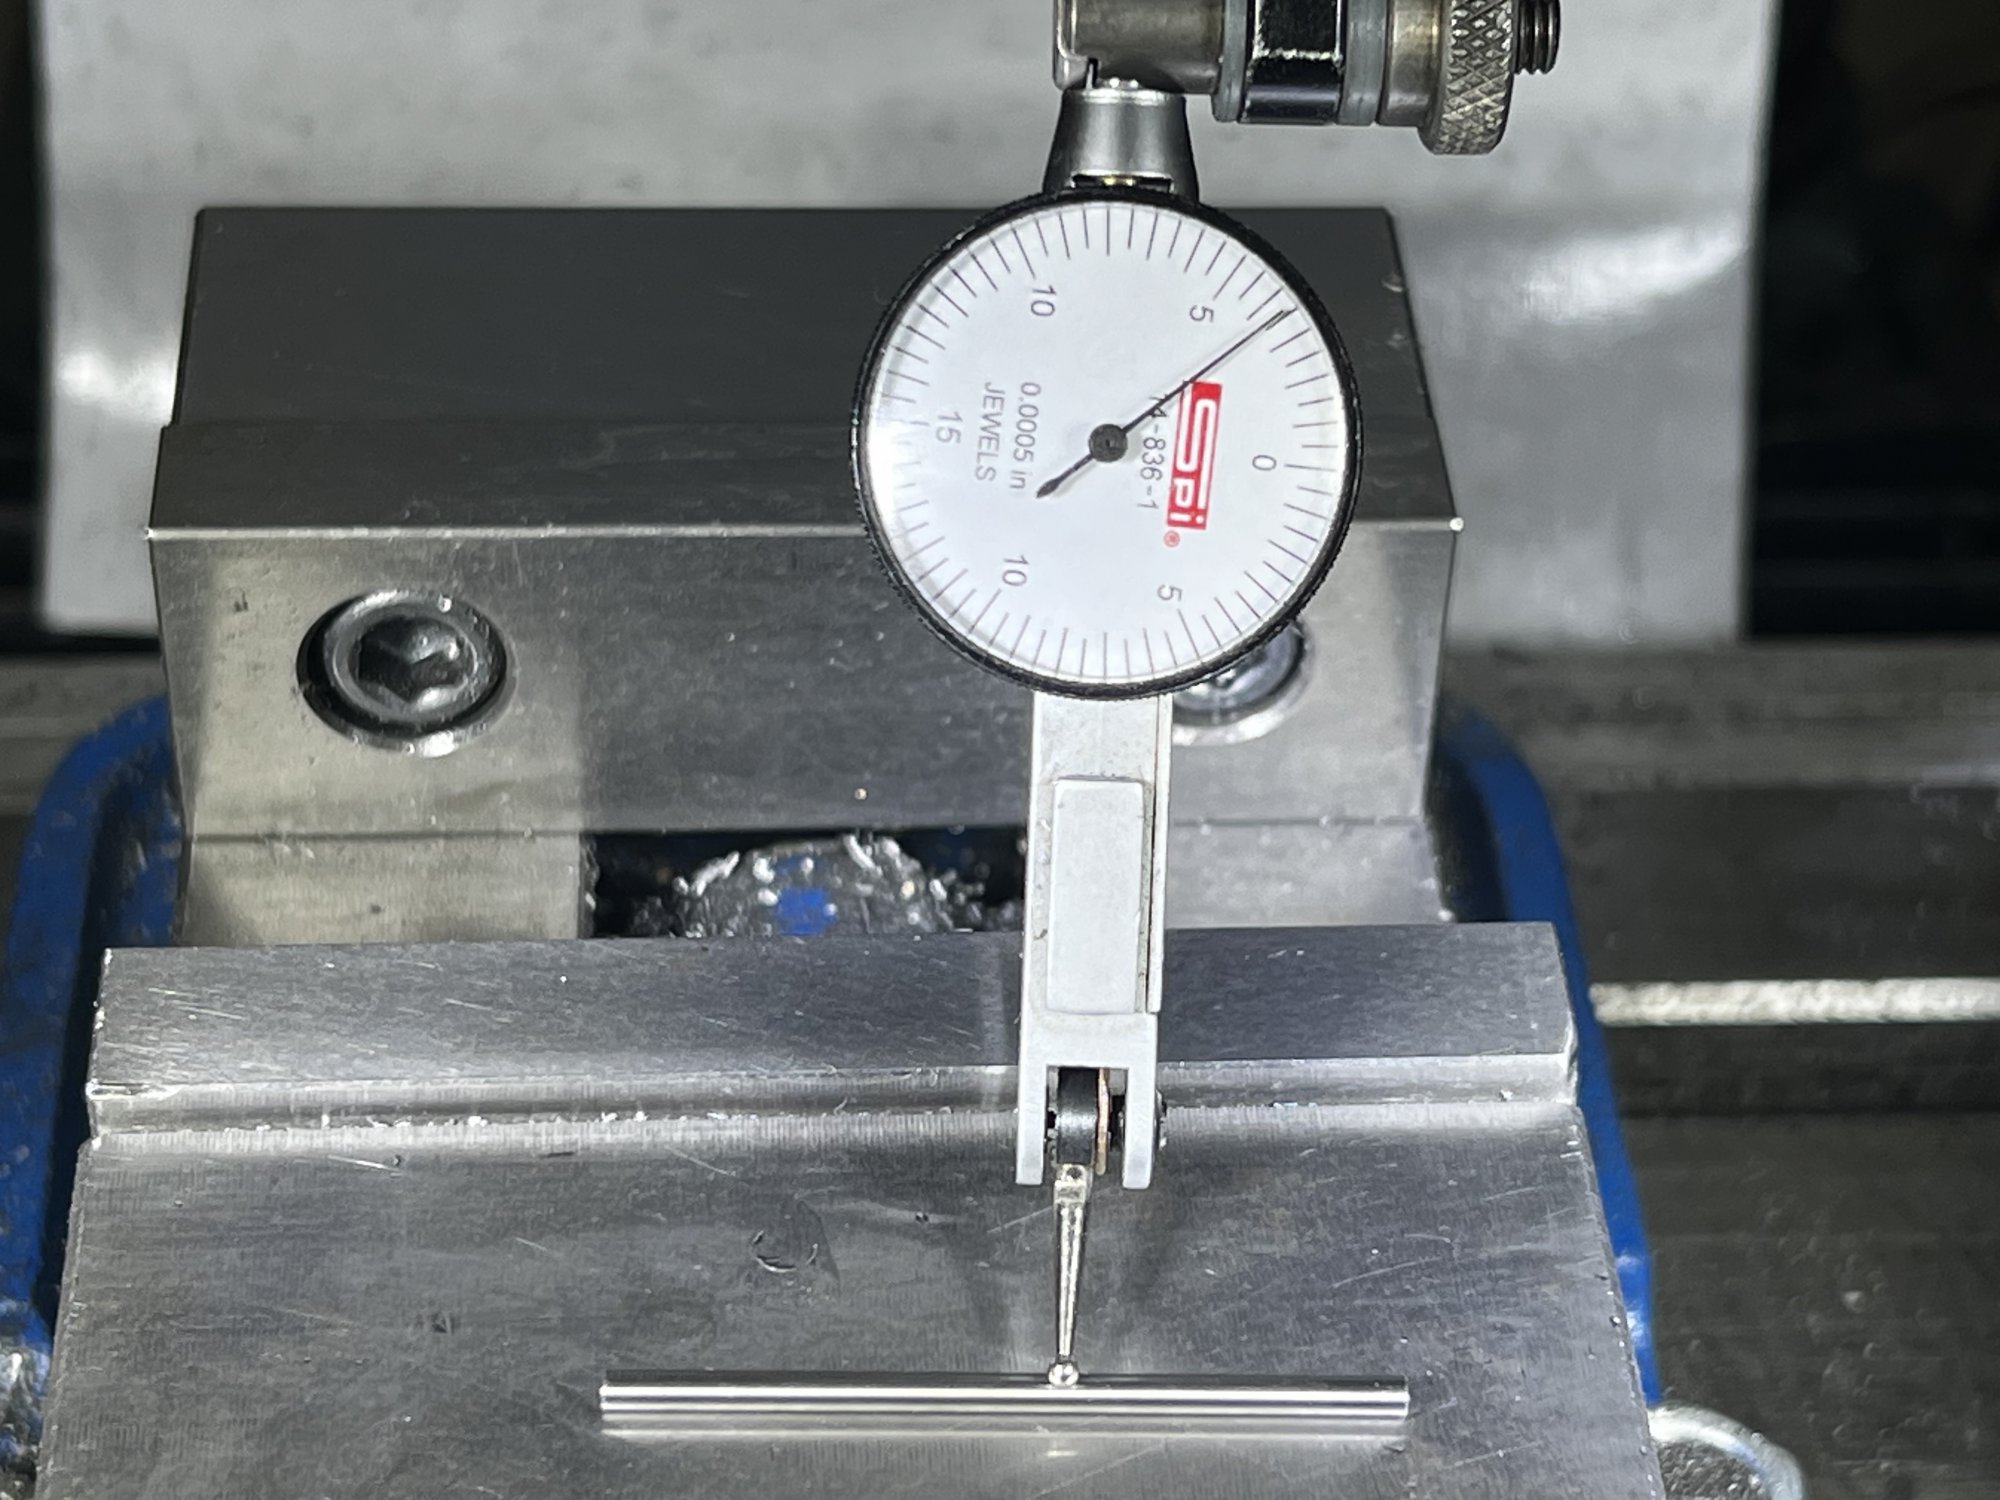
You also need a 0.001"/division or (better) 0.0005"/division dial indicator attached to the spindle and a flat reference. I used the top of my mill vise (which despite appearances in the macro photo was recently stoned and swept with my hand).
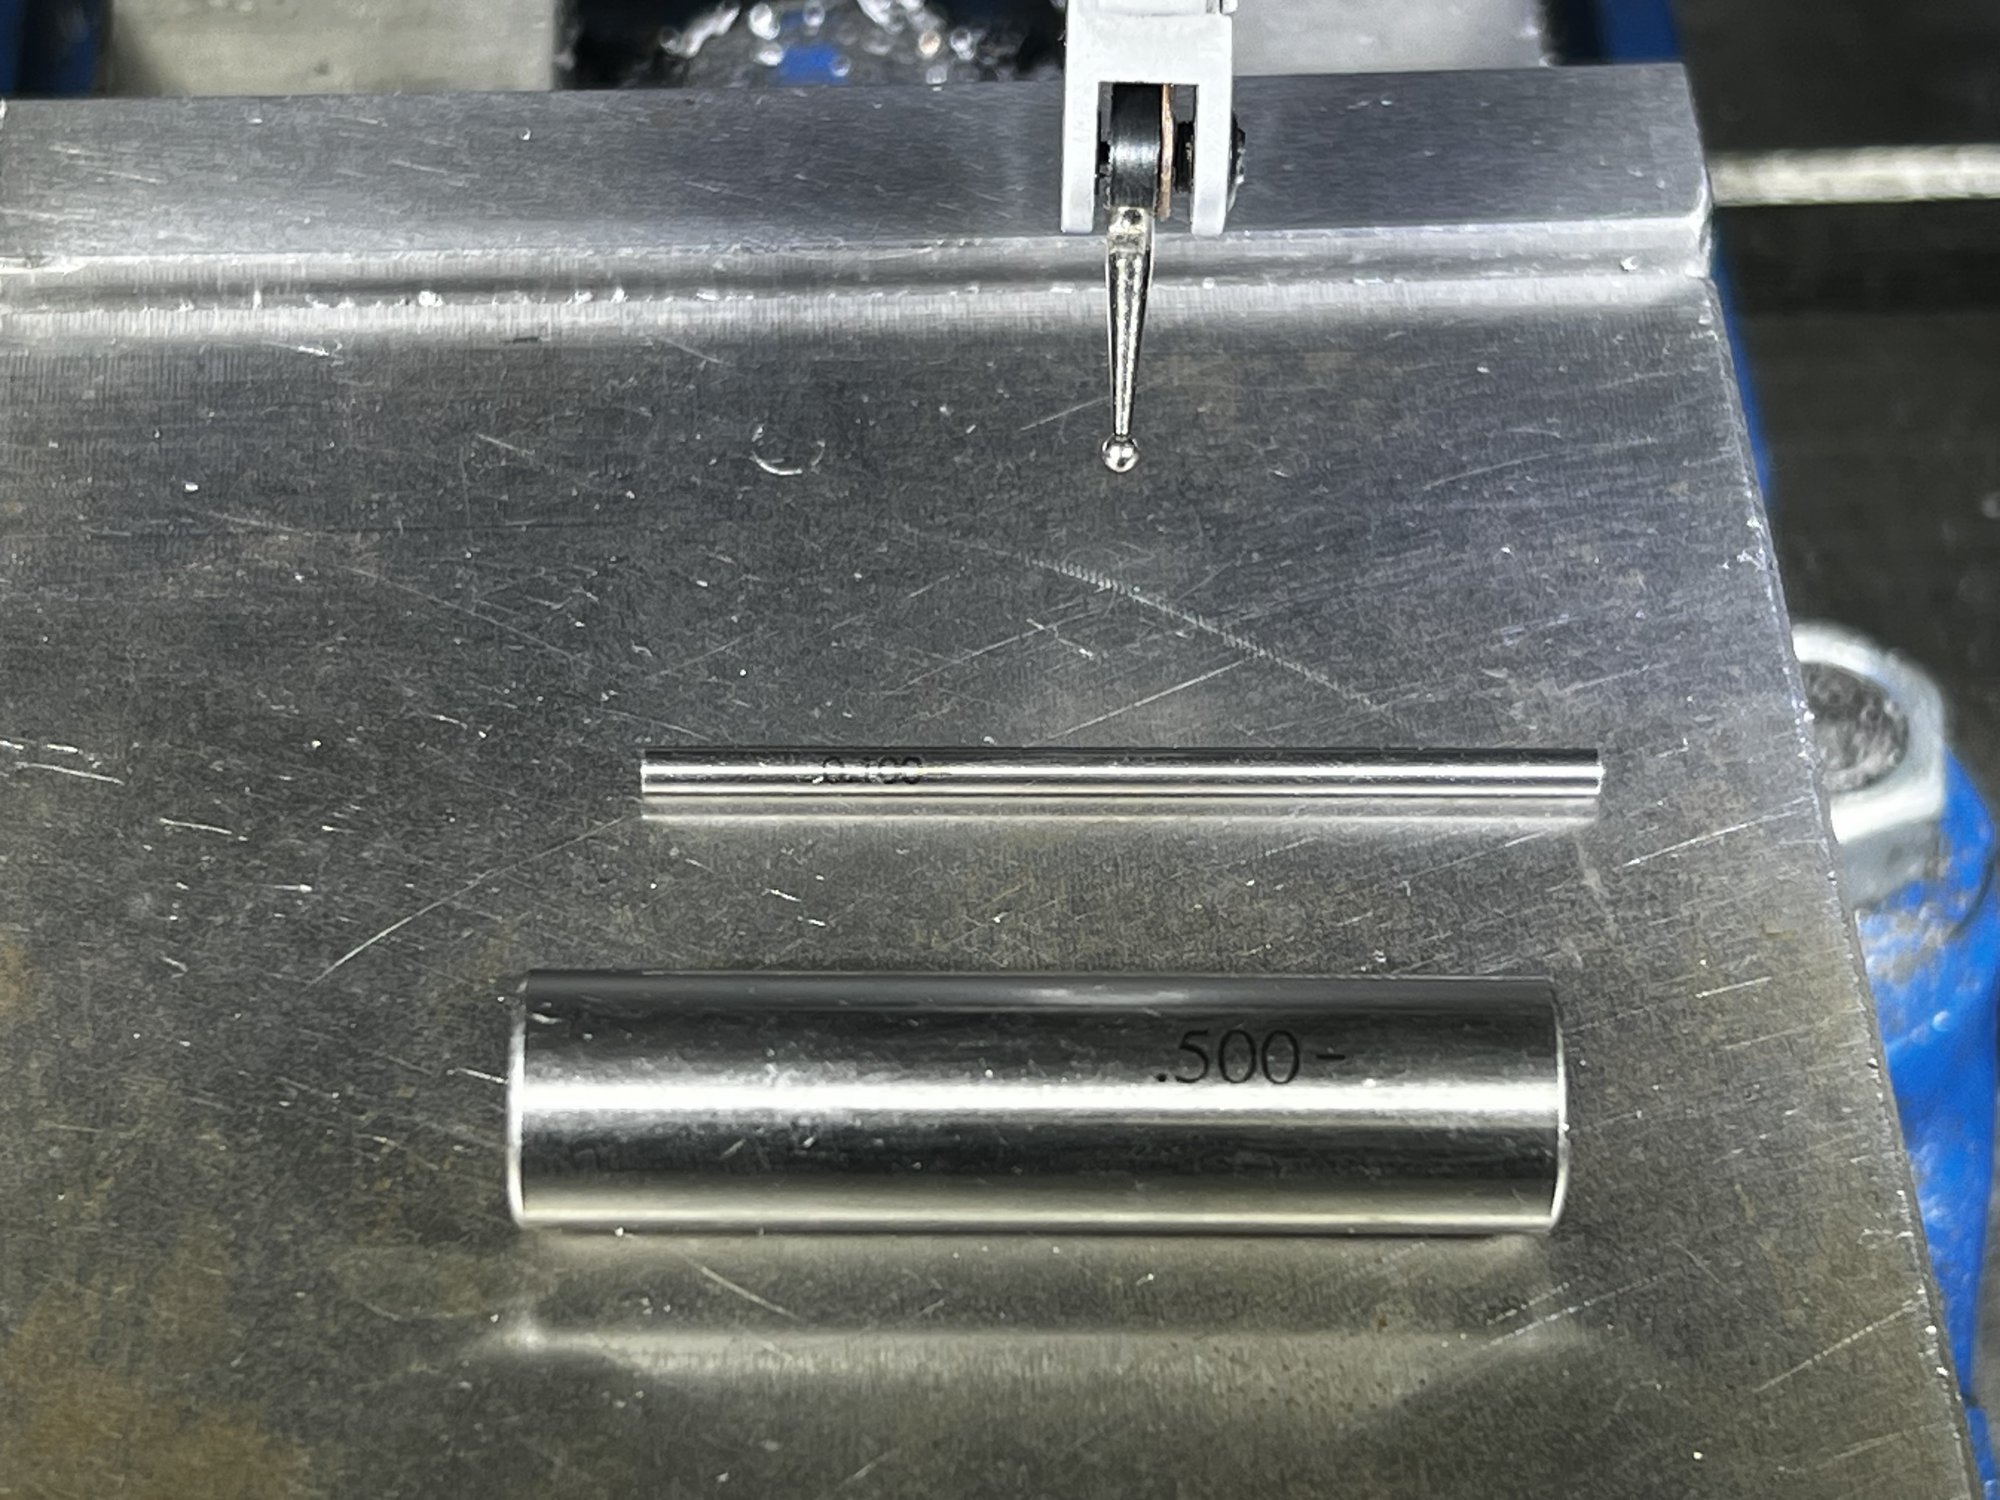
Now lower the quill and roll the larger pin under the indicator from behind until it shows maximum deflection. Adjust the quill until the indicator is reads exactly zero, then zero your dial (and DRO if you have one). I then locked the quill since this is how I will actually use it when milling. Locking the quill tightly on my machine reliably induces about 0.0025" of movement, so I had to re-zero everything after locking.
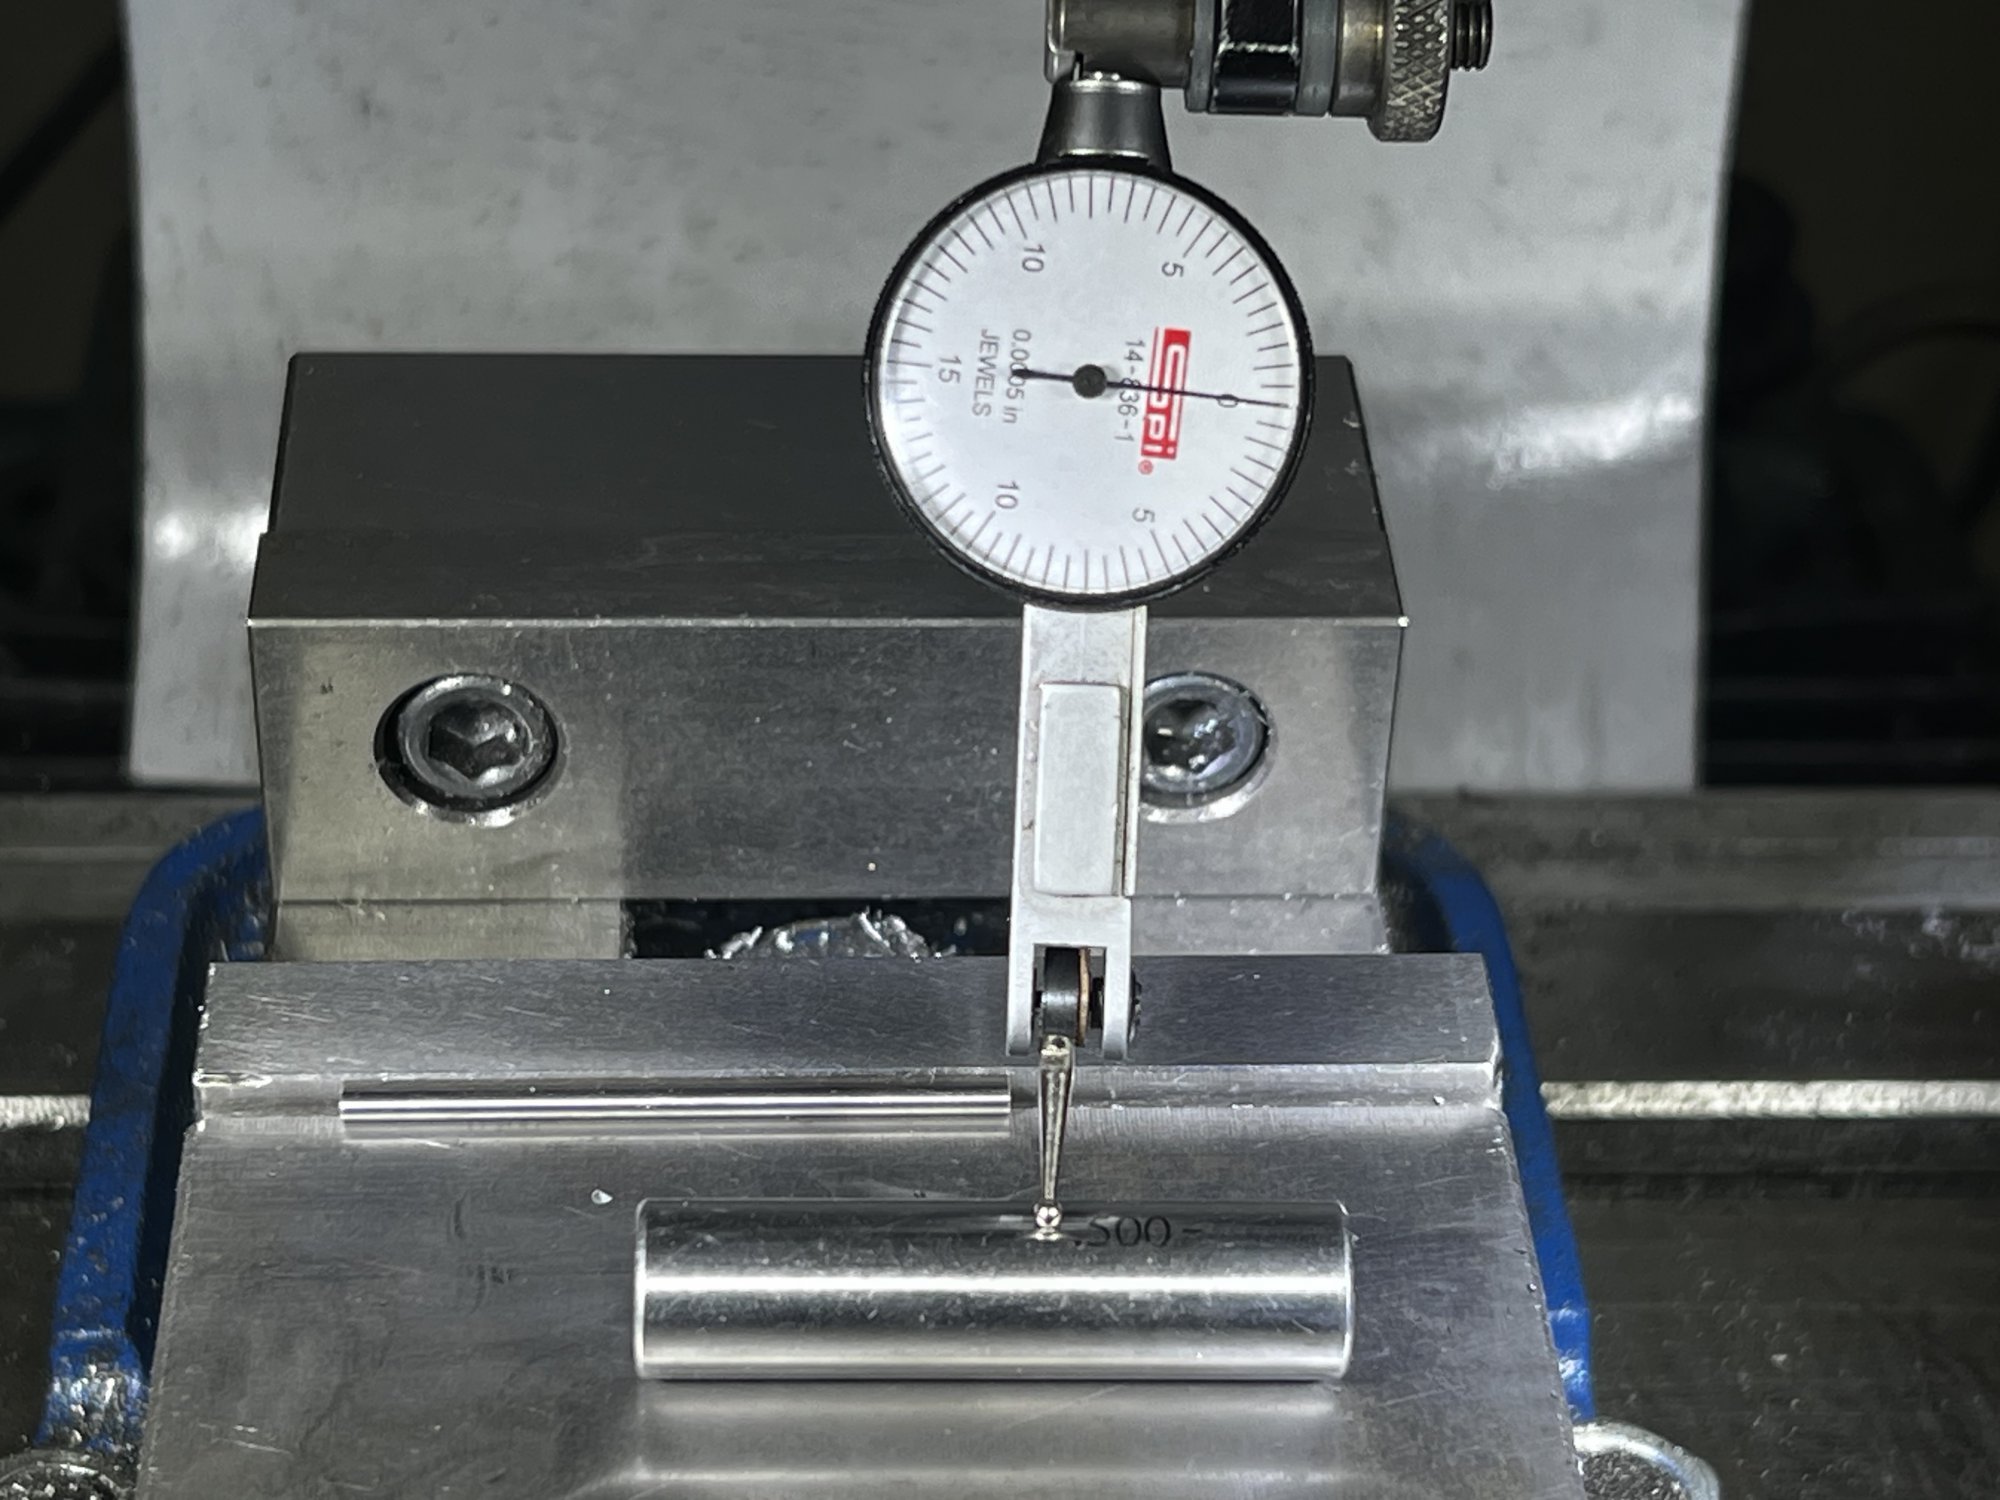
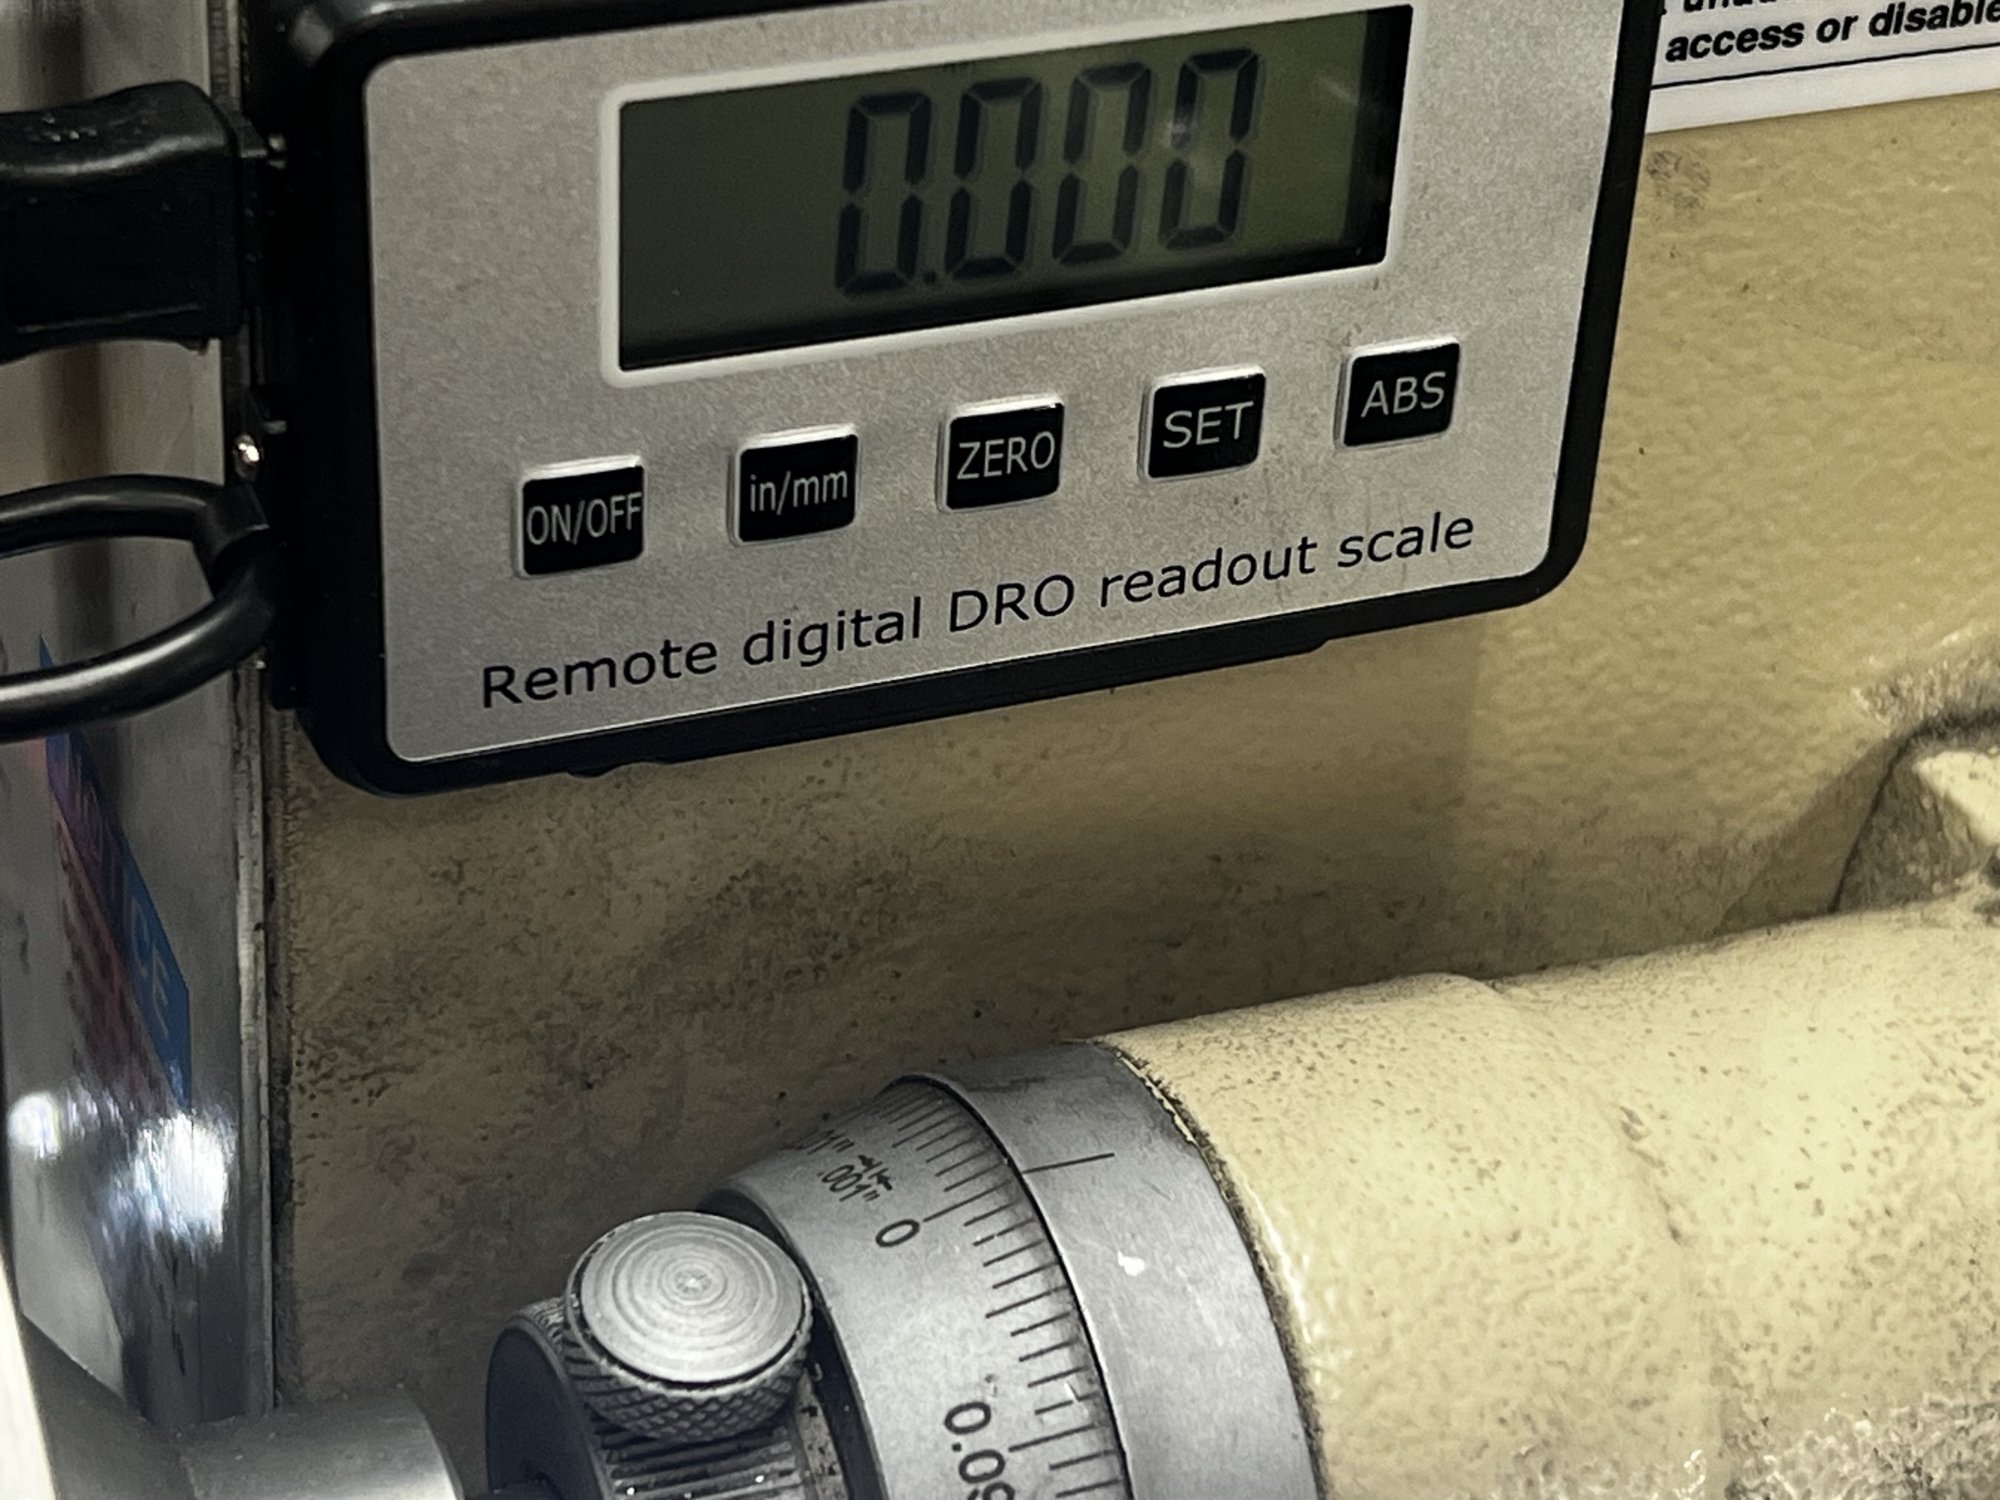
Next, remove the pin, unlock the quill, and lower the quill by the difference between the two diameters, using the dial as the reference. In my case, the difference in diameters was 0.400", so I rotated the fine-feed wheel four complete revolutions. Since the feed mechanism is a worm gear, do NOT go past the reading then back up to eliminate backlash like you would with table movements. Just ensure you move the dial in the same direction on the way to zero for each measurement. Re-lock the quill.
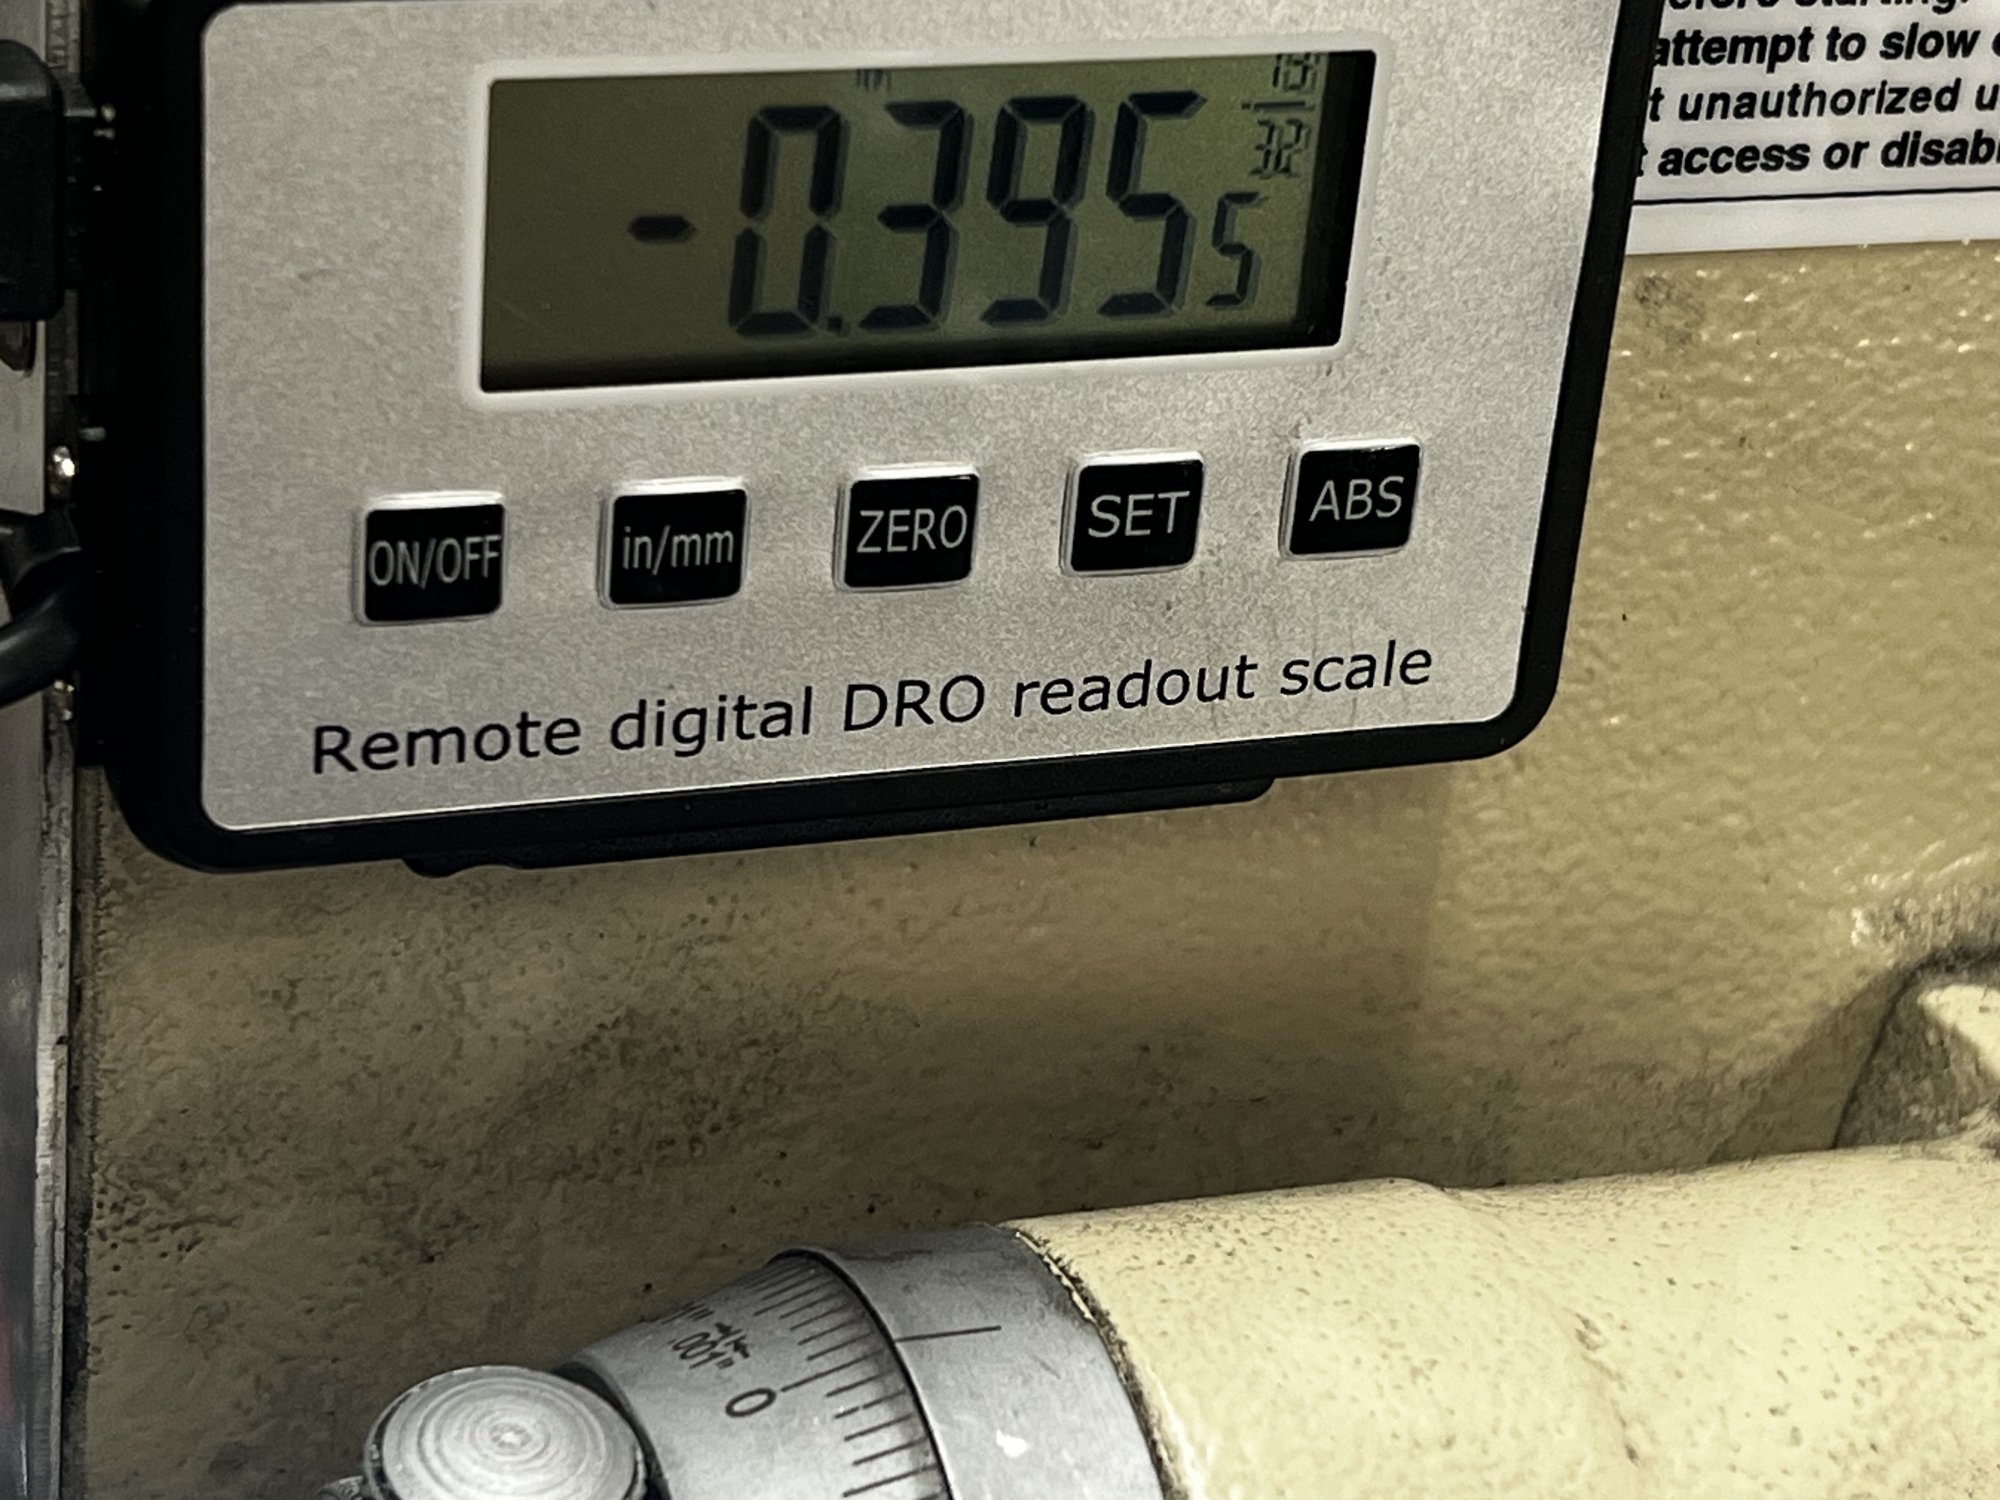
Note that the DRO reads less than 0.400". It's suspiciously close to 10mm (0.3937"). The DRO value displayed is equivalent to 10.0457, and the slight discrepancy (0.0016" over 0.400") is from many possible sources:
In my case, the quill was pretty close to .0035" away from a full .400" of travel. This is about a thou off from what the DRO displayed, but more than three and a half thou off from the dial. I'm pretty sure the discrepancy with the DRO reading is mostly due to locking the quill and lack of rigidity in the DRO, but all of the factors listed above contribute (and several more, I'm sure).
The indicator and pins is where the rubber meets the road. My quill actually moved ~0.3965" between the two measurements. Note that this was only with four turns of the dial, longer travel distances would, of course, show even more of a discrepancy.
This experiment convinced me of ~~two things~~ THREE, three things (ah, ah, ahh):
I'll be very surprised if there aren't a large number of users of these mills with the same issue.
I was alarmed to discover that the DRO didn't display the same values as the dial on my quill feed. The DRO was consistently displaying smaller travel distances than the dial.
I've since discovered (thanks @darkzero) that others have apparently run into this before me.
In a nutshell, just because the dial is labeled in 0.001" divisions and 0.100" per full turn, it doesn't mean your quill is axially moving 0.001" or 0.100".
Like many offshore collet manufacturers, the maker apparently felt that 25mm is close enough to an inch. The quill on my Grizzly G0762 square column mill actually moves 2.5mm (0.0984") for each full turn of the dial, not the 0.100" I thought it was moving. That's a 1.6% error with every adjustment!
This is a pretty big deal on benchtop mills because we can't move the table in Z. On a knee mill, I think one usually raises the table for accurate Z adjustments and tends to leave the quill locked with minimal stick-out for rigidity when milling — the quill dial is only for boring holes. On a benchtop mill, head movements in Z are harder to do precisely (lowering vs. raising, usually with no dial or DRO for the Z-location of the head itself), so we pretty much always use the quill to adjust cutter depth (re-locking for each pass).
At least a few of the blown dimensions I've made in prior projects make sense now.
There's no need to check a Bridgeport, of course, but anyone with a mill that has a suspicious number of metric cap screws and the like (pretty much any offshore benchtop mill) should check their fine-feed dials for accuracy before depending on them.
Here's how I checked mine:
First find a couple ground pins of known but different dimensions. I used gauge pins (because I use them for EVERYTHING), but end mill shanks, ejector pins, dowel pins, etc. work just as well. Just mic whatever you use beforehand and verify their diameters beforehand. I used a 0.500" and 0.100" gauge pin to make the math easy, but any two diameters more than a couple hundred thou apart are fine. A 123 block also work, but rolling a pin under the indicator tip is best.
You also need a 0.001"/division or (better) 0.0005"/division dial indicator attached to the spindle and a flat reference. I used the top of my mill vise (which despite appearances in the macro photo was recently stoned and swept with my hand).
Now lower the quill and roll the larger pin under the indicator from behind until it shows maximum deflection. Adjust the quill until the indicator is reads exactly zero, then zero your dial (and DRO if you have one). I then locked the quill since this is how I will actually use it when milling. Locking the quill tightly on my machine reliably induces about 0.0025" of movement, so I had to re-zero everything after locking.
Next, remove the pin, unlock the quill, and lower the quill by the difference between the two diameters, using the dial as the reference. In my case, the difference in diameters was 0.400", so I rotated the fine-feed wheel four complete revolutions. Since the feed mechanism is a worm gear, do NOT go past the reading then back up to eliminate backlash like you would with table movements. Just ensure you move the dial in the same direction on the way to zero for each measurement. Re-lock the quill.
Note that the DRO reads less than 0.400". It's suspiciously close to 10mm (0.3937"). The DRO value displayed is equivalent to 10.0457, and the slight discrepancy (0.0016" over 0.400") is from many possible sources:
- My inability to align the relatively coarse (and dirty) fiduciary mark and dial divisions
- Lack of rigidity in the DRO and mount
- Movement from locking the quill (the dial doesn't move, but the quill and DRO itself does)
- Cumulative errors in the worm gear mechanism.
- Various misalignments (DRO to spindle axis, tram from spindle to vise top, orthogonality in the feed mechanism)
In my case, the quill was pretty close to .0035" away from a full .400" of travel. This is about a thou off from what the DRO displayed, but more than three and a half thou off from the dial. I'm pretty sure the discrepancy with the DRO reading is mostly due to locking the quill and lack of rigidity in the DRO, but all of the factors listed above contribute (and several more, I'm sure).
The indicator and pins is where the rubber meets the road. My quill actually moved ~0.3965" between the two measurements. Note that this was only with four turns of the dial, longer travel distances would, of course, show even more of a discrepancy.
This experiment convinced me of ~~two things~~ THREE, three things (ah, ah, ahh):
- The DRO is a far more reliable indicator of quill movement than the dial. It's more than accurate enough for my needs.
- The fine feed mechanism really moves 2.5mm/revolution.
- That means every division is really 0.025mm not 0.001". Every 0.010" on the dial is really only 0.00984".
I'll be very surprised if there aren't a large number of users of these mills with the same issue.
Last edited:

