13" F/3 telescope build

The secondary lives in a box reminiscent of a box for a large eyepiece,

assembly27.JPG

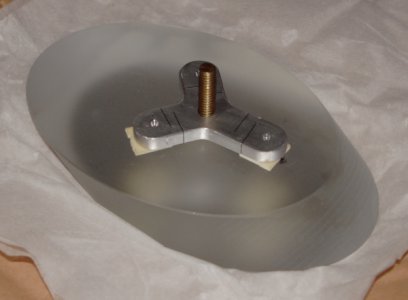
The secondary is inserted into a <semi> kinematic mounting on the nose of the secondary <frame> holder, and can be adjusted in tip and tilt from there.

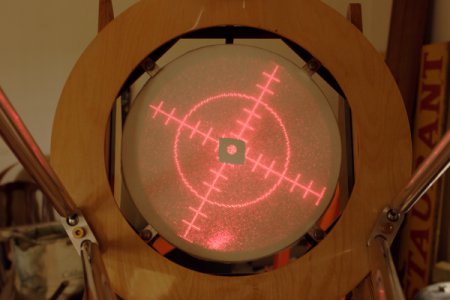
assembly29.JPG

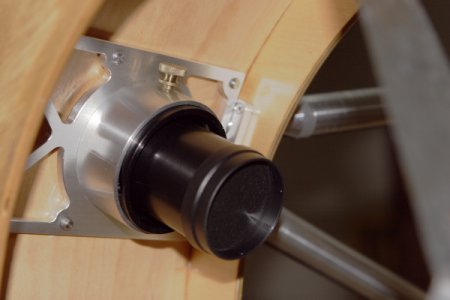
The image shows my laser collimation reticle device in the focuser after squaring the focuser base plate to the upper assembly.

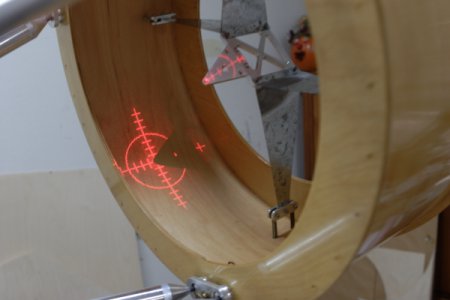
assembly28.JPG

And an image of the not quite collimated reticle on the primary.
 
There are ground spikes to hold the feet of the ground board in position (against the flow of stumbling feet over the course of a night.)

assembly30.JPG

The recessed portion of the head is to allow a high tensile rope to be attached making removal easier.
 
And now a few looks at various other parts of the scope (not covered way up above):

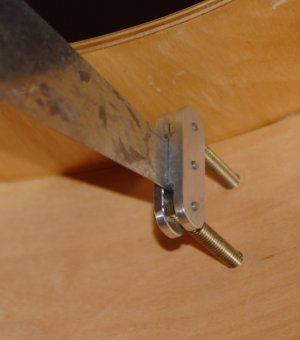
assembly31.JPG

Spider vane outer attachment. I wanted a way to adjust tension without imposing any twist on the vanes. I milled some Al and milled of the end of some threaded rod (1/4-20 brass) to just fit in the slot with essentially zero clearance. All three attachments are done with 4-40 stainless cap head screws.

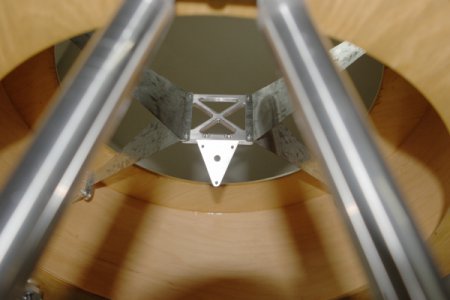
assembly32.JPG

The secondary frame. One can see how the inner portion of the vanes are attached and where the secondary is attached to its kinematic mount.

assembly34.JPG

The Paracorr 2 (coma corrector is MANDATORY at F/3) is inserted from the inside of the upper assembly.
 
Hi Mitch, what adhesive did you use to hold the secondary to its bracket?
Thanks
 
The pictures show double sided foam tape.

The real mounting will be done with silicone at 1mm thickness (after washing both sides with lacquer thinner, and dabbing all 6 points (3 each) with silicone and mounting both in a jig for squareness.)
 
Thanks Mitch, ai thought it was double sided tape and wondered about its strength.
Thanks for the idea of a jig to get it all aligned correctly.
Thats a bit I'm finding difficult.
 
You reminded me to check my records, as I, too, am waiting for a Zambuto mirror, which is due this December if he sticks to his delivery schedule. As for where I'm going to store the scope once it's complete, that's a different story!

Anyway, how are you planning to attach the secondary to its support? I real of all kinds of methods, and most work, and a few don't! I haven't decided on the spider design. At first I was heading down the wire rabbit hole but may end up doing very much the same as you for rigidity and simplicity.

Regarding the ball ends on your trusses, did you fabricate them or buy knobs from McMaster? Of the latter, are they aluminum?

When complete, mine will be a 16" f/4.3 6-truss design. The details of its aesthetics is still up in the air, but will probably end up more functional than artistic. I don't plan on transporting it much and want it stout and not losing collimation too easily.
 
Last edited:
Anyway, how are you planning to attach the secondary to its support? I real of all kinds of methods, and most work, and a few don't! I haven't decided on the spider design. At first I was heading down the wire rabbit hole but may end up doing very much the same as you for rigidity and simplicity.

The secondary is attached to the secondary frame by means of the 1/4-20 threaded rod in the center, there are 3 points from the frame that hit the center drilled holes in the secondary holder. These 3 (4-40 screws with pointed ends) are used to point the secondary when collimating the scope.

Regarding the ball ends on your trusses, did you fabricate them or buy knobs from McMaster? Of the latter, are they aluminum?

I got them with 1/4-20 threads and polished them with 1000 then 1500 grit paper on my lathe. They have a setscrew drilled in so the ball won't unthread itself from the 1/4-20 4140 threaded studs. The threaded studs are held in the poles with a 1/4-20 star nut and the pole ends are also threaded 1/4-20. So collimation consists of loosening the pole end and the opposite pole clamp, then turning both the pole and pole end, then tightening the pole end. Almost all collimation is translation of the upper assembly, and this is performed by adjusting the lengths of the poles that are parallel with each other.
 
Back
Top