2016 POTD Thread Archive

Ditto on what Greg said. Not enough air coming in is like running with the choke on a bit. You'd see fouled plugs, pops and burbles on throttle down, maybe a backfire on shutdown if it's crazy rich. Running a turbo or supercharger without re-jetting would make it run lean. ;)
 
And shame on you for bringing something modified for warranty, never ever do that, you must save your stock parts and revert back before you bring it in, but I do agree the guy checking it out is an idiot, only way your gonna lean out the engine is if you have obstructions in the fuel metering, or as said after the carb if there is an obstruction, but that'd have to be a big obstruction haha
 
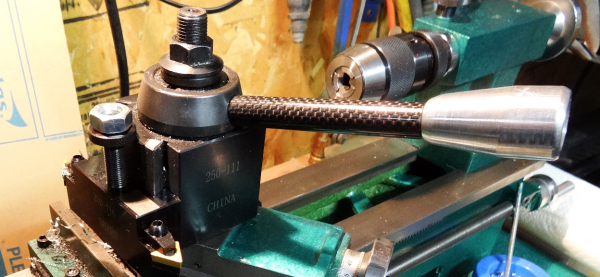
More fun with the space block set from Shars ...
Ebay Shars reply 6415.jpg
I kinda wonder just how I'm suppose to get a "picture of the damage"???? Maybe take a shot of a part held in a mike? Must be a "form letter"/canned response from these idiots. Guess I'll just have to jump through their hoops, because IIRC, eBay will NOT let you simply leave negative feedback without a lot of rigamarole. Ah, well ... off to take some meaningless photos.
 
Been a busy couple days! Yesterday my shiny new 6" rotary table with index plates and tailstock arrived, so naturaly I went to the machine tool supply house only to find they don't sell a fractional - #2 MT adapter to ease indicating to the mill center line. So that being said, time to learn to cut a #2 MT on the lathe. Much to my delight , that turned out better than expected. Then to top it off bought 2 treadmills with controls and 1 1/2 HP DC. GE. electric motors $60.00 for the pair of them. Looks like a variable speed lathe project coming up!
 
More fun with the space block set from Shars ...
If I have a problem with their stuff I just call them on the phone. They have always been easy to deal with.
 
modified the exhaust manifold for a B&S 24HP motor to it works with my zero-turn.

The original part was this (forgot to take a before shot):
http://www.princessauto.com/en/deta...atton-vertical-gas-engine-muffler/A-p8541690e

the curve in both pipes put the muffler right in the middle of the rear crossmember, which has the grass-catcher mounted to it, so it would have been much more of a pain to move than modifying the exhaust.

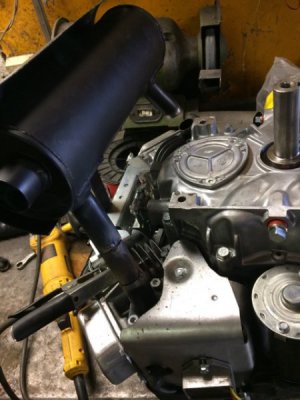
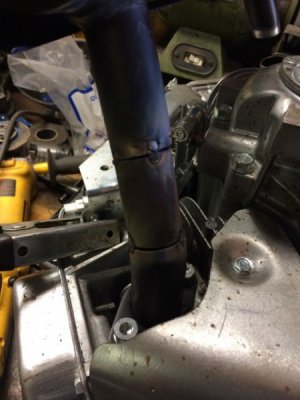
tack welding the new bit of exhaust pipe on one side
IMG_0534.jpg

IMG_0535.jpg

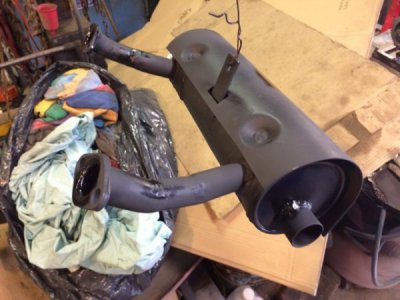
Final result after welding, a bit of grinding and then a splash of high-temp rustoleum.
IMG_0536.jpg

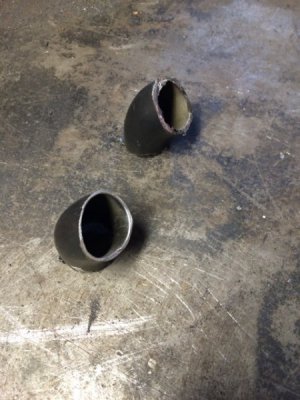
Lonely bits of metal, these are the cutoff curved bits that I replaced with straight tubing.
IMG_0537.jpg

I'm pleased with how the exhaust turned out. the bolt holes all line up really nicely with the motor and the bracket I made [bolts to the middle of the exhaust] also lines up nicely, so the part isn't under stress. I'm started to get the hang of fabricating things, so that parts line up reasonably well. Just last year I would regularly drill bolt holes more than 1/4" out of place [yay, oblong bolt holes!], now I get them maybe with a 1/16". Same with welding, with stuff this thin I would normally just burn holes in it and then have huge globs of weld. Now I'm down to small globs here and there.

Now I just have to exchange this motor, as it's got a steady leak from near the oil filter when the engine runs, that doesn't go away when I tighten the filter.

One step forward, 1/2 step back...

:-(
 
I am going to need to cut metric threads on my south bend lathe making the ER 40 collet, sooooo.....after a year of procrastinating..:rolleyes:... I finally got off my but and made up the transposing gears. It only took 20 minutes! I had previously made extra bolts and bushings for the change gears just for instances like this. I turnd the OD of a busing to .562" to fit the gears and drilled and tapped two holes for 10-32 SHCS.
View attachment 126967 These are the parts.
View attachment 126968 These are the parts assembled and ready to use. I put loctite on the bolts to make this a permanent assembly as I bought to spare gears a year ago just for this. (I been waiting until I needed them). This is a 44 tooth and a 56 tooth gears. you could just remove the bolts and use them normally again, but I wanted a permanent one. There is a chart showing which change gears to use to cut all the most common metric threads. The error in this setup is 2 parts per thousand or two threads over 40 inches , which is negligible and won't be noticeable.

The advantage to this is I don't need to make those special big gears for 127/100 teeth. this setup uses the standard change gears.

Well ..... I did something stupid today. I tried out my new transposing gears for metric threading on my South bend lathe.....BUT.....I tried them out on the almost finished collet chuck I made. The metric threads were the last step. I SCREWED IT UP! ( I should have experimented on a sample part)... I learned the hard way, the gears work great, but when metric threading, you MUST ALWAYS ENGAGE THE HALF NUTS ON THE SAME MARK ON THE THREAD DIAL. If you start on number one, you must start every pass on that number. Using any other line or number will split the threads. I finally figured that out and got a good thread but it was too small by this time and the nut is a little too loose for my taste.. So... I made another collet chuck and will finish it up tomorrow.
By the way..... it says NOWHERE in the write up for this metric threading about that detail. I think it was kind of important to be left out of the write up.
 
Had to make a fixture to hold two parts I'm making for my 15" Sheldon lathe. The mandrel/fixture allowed me to hold the parts in my super spacer so I could cut a square hole cross wise in two sleeves. There are two square holes at 180 degrees from each other. The corners do not have to be sharp, a 1/16" radius is acceptable. The sleeves are too thin to try to broach and I don't have a shaper, another tool on my lists.

My internet connection on my end is not allowing me to up load pictures right now. Ill try later.

Edit: 4-17-16 Re-posted in the Sheldon-Logan Group.
 
Last edited by a moderator:
Well ..... I did something stupid today. I tried out my new transposing gears for metric threading on my South bend lathe.....BUT.....I tried them out on the almost finished collet chuck I made. The metric threads were the last step. I SCREWED IT UP! ( I should have experimented on a sample part)... I learned the hard way, the gears work great, but when metric threading, you MUST ALWAYS ENGAGE THE HALF NUTS ON THE SAME MARK ON THE THREAD DIAL. If you start on number one, you must start every pass on that number. Using any other line or number will split the threads. I finally figured that out and got a good thread but it was too small by this time and the nut is a little too loose for my taste.. So... I made another collet chuck and will finish it up tomorrow.
By the way..... it says NOWHERE in the write up for this metric threading about that detail. I think it was kind of important to be left out of the write up.

First, I am assuming you have an SAE thread screw.

Everything I've read about doing threading [admittedly, I have only been using a lathe for a few months, and only have made a half-dozen good threads after a half dozen bad ones], the thread dial works as commonly detailed for SAE threads, but with metric threads you have to do extra work to figure out when you can specifically use the thread dial, and in general, it's easier to just run the lathe in reverse.

(sorry, it's from the "other" machinist web site)
http://bbs.homeshopmachinist.net/threads/45876-Why-doesn-t-a-thread-dial-work-with-metric

I also (in the past) found a web site that detailed under which specific circumstances the thread dial worked, but I can't find it now and I don't recall the details, just that it didn't work in general. So I just put the lathe in reverse and then go again, leaving the half-nut engaged until the thread is done.

And the opposite it true if you have a metric thread screw...the thread dial works for metric threads, but not for SAE.
 
Last edited:
Back
Top