2016 POTD Thread Archive

Can you describe the pump used? Is this something the typical garage hobby guys like me should stay away from? Looks like a really interesting addition to a machinists collection of shop made stuff! I assume the rubber gasket is placed around the permitted to match the shape being milled and provides the seal for the the vacuum?

Thanks for posting.

An ideal choice for the pump would be a Gast (brand) vane pump. They run dry and typically have carbon vanes. They are very expensive but run long with minimum upkeep. Alternate hobby guy choices could be HVAC type pumps which are often oil-filled vane pumps. A "worn out" one of these won't pump out a refrigeration system well enough but would work well on a chuck. Another approach would be to modify a scroll type pump used in a refrigeration system. Halligan142 has a video showing how he modified one of these to make a quiet air compressor for his shop.

The oil-filled vane pumps don't like running open ended (intake) for long periods so an intake valve could be used to close the flow until needed. A reservoir will help rapid pull down but is not really necessary.
 
Still can't see pics posted with tapatalk!
If a person uses the attachment (paperclip icon) instead of the picture icon in Tapatalk, the pictures work. I believe the issue is a disconnect between Tapatalk's server software and HM's software. If one uses the Tapatalk image option, you are uploading the picture to Tapatalk and letting them host it instead of posting it directly to HM and letting HM "own" the picture.
 
Yesterday’s POTD. Really like my Harbor Freight 7” x 12” band saw. However, the chip pan is as flat as the work day is long so coolant doesn’t want to drain very well. My solution was to add an additional drain in the back corner and run a second hose to the pump reservoir.

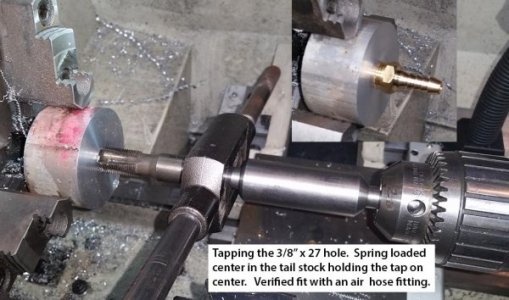
The new drain housing was made from a chunk of 2 ½” aluminum. Fitting to the additional drain hose was an air hose nipple. Working end has a 3/8” x 27 tpi pipe thread.

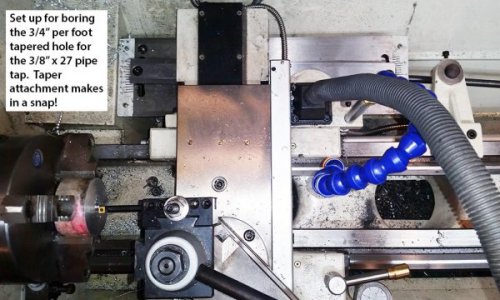
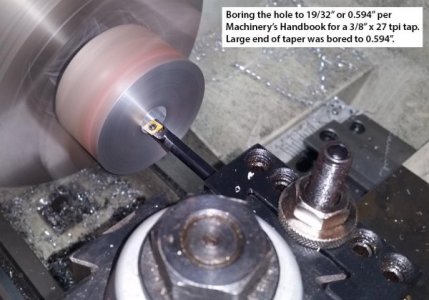
Machinery’s Handbook calls out a 19/32” tap hole and suggests running a ¾” over 1 foot ream through the hole. I have a 3/8” x 27 pipe tap, but don’t have the 19/32” drill or the ¾” per 1 foot ream. Hey, how about boring the tap hole and cut the taper with my G0709 lathe that has a taper attachment! I know I spent around $400 for the taper attachment for some reason!

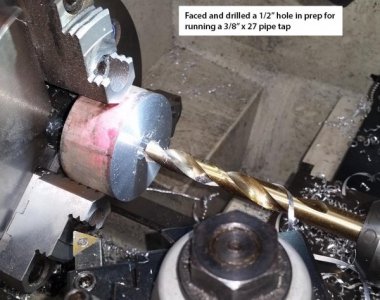
The 2 ½” round was faced and a ½” pilot hole drilled. Taper attachment set to ¾” per foot taper and the large end of the tapered hole was bored to 0.594” (19/32”). Tapped the hole on the lathe using a spring-loaded center in the center drilled end of the tap to hold it on line.

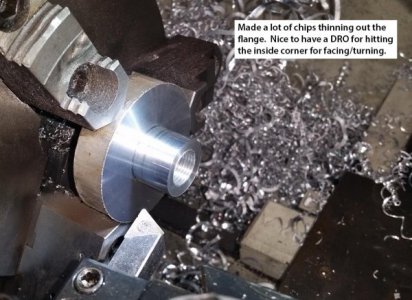
Brought the work out of the chuck some to relieve material around the tapped hole. I’ve seen a number of threads on turning shoulders; do you turn the OD and then face for a crisp inside corner? My G0709 has a DRO on it also, makes it really easy to get a nice shoulder.

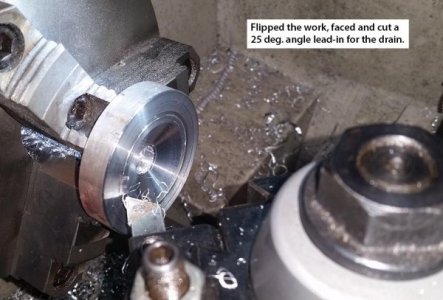
Flipped the drain housing and faced the opposite side. Plan was to attach the drain to the band saw with four ¼” x 20 cap screws on a 1 ¾” circle. Tool bit was “dipped” to the work and the resulting ring diameter measured with calipers. The X axis on the DRO got that number plugged in, then adjusted cross feed to 1.75” diameter and made a second plunge. Not a necessary step but it gave me a layout line of sorts for the mounting bolt holes. Also was a good visual aid for cutting a 25 deg. lead in on the drain face, kept advancing the cut until I got close to the bolt circle.

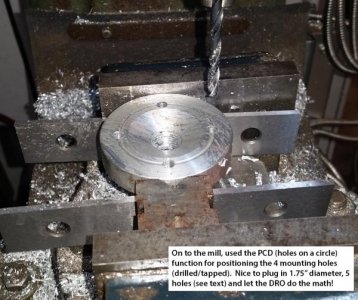
On to the mill, used the mill’s DRO to do the four holes using the PCD function (holes on a circle). My DRO is typically zero’d out in ABSolute mode on the left corner of the fixed vise jaw. Set the drain in place with the LH edge in line with that jaw, so 1.25” on the X and Y put me at the center of the hole. The PCD function asks for the hole center, hole diameter, number of holes, starting and ending angles. I was at center so that was easy (0, 0). Hole diameter was 1.75”. Number of holes; 5. Why five? I input a start angle of 0 degrees and an end angle of 360 degrees. The DRO interprets the steps as 0, 90, 180, 270 and 360 or 5 steps around the 0 to 360 circle. I could have put in 4 holes and run them through angles of 0 to 270 (steps would be 0, 90, 180, 270), but frankly it’s easier for me to do a full 0 to 360 and add one to the number of holes. Center drilled, tap drilled and tapped the ¼” x 20 holes.

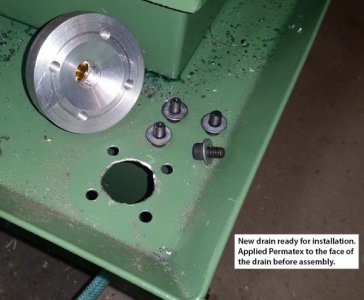
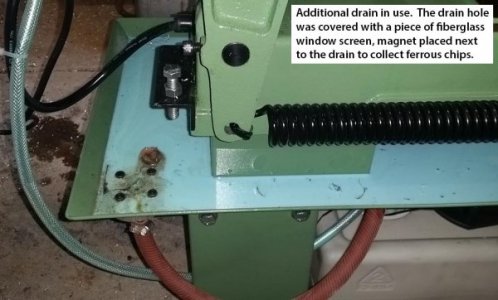
Now on to the band saw. The new additional drain is at the rear corner of the saw. Laid out those holes and drilled through the pan. Mounted the new drain with the cap screws and a couple of layers of fiberglass mesh to filter the drain hole. A film of Permatex was applied to the face of the drain before attaching to the band saw. Ran a short length of air hose from the drain nipple to the pump reservoir. Additional hose is tie strapped to the existing drain hose to hold it in position. I put a rare earth magnet next to the drain also to collect ferrous chips. The saw is now leveled with the rear corner low.

The new drain works great, no risk of running the pump out of coolant, no puddles of coolant setting in the pan for days after cutting. I’m going to replace the drain hose with a more flexible hose in the future, the air hose I used is really stiff and tends to want to set higher than I’d like though it shouldn’t affect how well it drains.


Bruce
20160910_154113a.jpg 20160910_155941a.jpg 20160910_160738a.jpg 20160910_161535a.jpg 20160910_163116a.jpg 20160910_165057a.jpg 20160910_171158a.jpg 20160910_194313a.jpg 20160910_202228a.jpg
 
I would use a venturi pump, but I happened to have an electric vacuum pump for hvac, you want the pump to produce around 25-28 inches of vacuum, and not use alot of air, under 1cfm no need to get caught up on the biggest baddest pump you can find. Talk to tech guys. This is the perfect thing for a hobby garage, it saved me from spending 2 grand or more on the Mitee bite version. The pump I use was a little over 100 bucks.
You want the o ring gasket to have the largest sealed area in relation to the part possible, obviously you can't cut all the way through the part and break the seal, bad day.... you can get pretty creative with vacuum holding. Using orings, the best gasket material is a type of foam rubber, not the standard hard o rings you find in hydraulic or cover plates.
The gasket is not connected at the ends, it works, it's awesome, and I would recommend anyone to make one, having cnc is rather useful for machining the grid.
The oring I use is 3mm, .118, I cut my groove .125 wide and around .095 deep, works perfect.
 
My Vacuum pump is a R-12 freon compressor from an Whirlpool refrigerator as others have mentioned, I soldered fittings to the intake side and when not in use I cap it. On the discharge side I brazed a stand pipe to the discharge line to allow any oil to drop out and keep the sump full of sabo 500 oil with a shut off valve. When not needed I cap the suction line and run for 60 sec then shut the valve off. This keep all moisture out of the pump during storage, I think it is the same one for 42 years and it has seen a lot of use drawing down car AC systems before filling in addition to my vacuum plate for the mill and surface grinder. I can easily get 26" of vacuum in a short time with mine.
 
I have a hitachi industrial vac tucked away in the shop...i sucks down to outer space ;-)
 
I have a T30 IR vacuum pump if someone wants to build a serious vac plate. :)

Or it could be converted to a compressor. The valve plates are different and there is no finned intercooler.
 
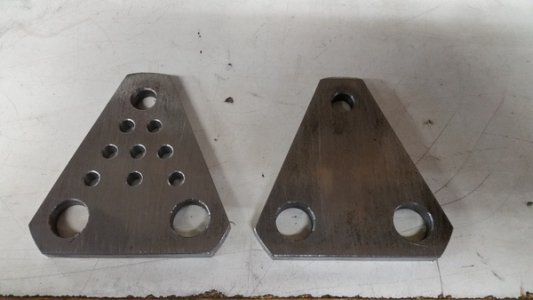
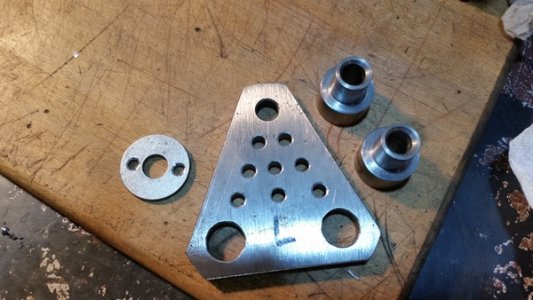
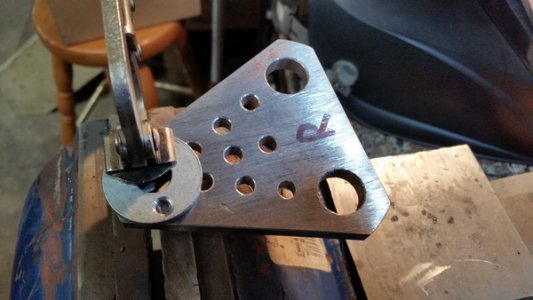
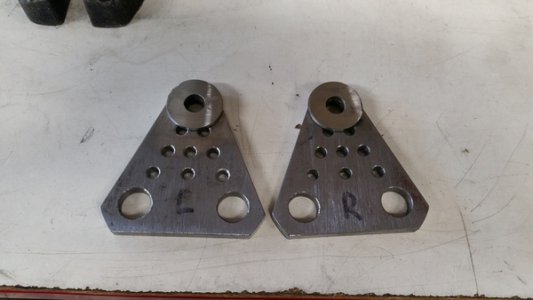
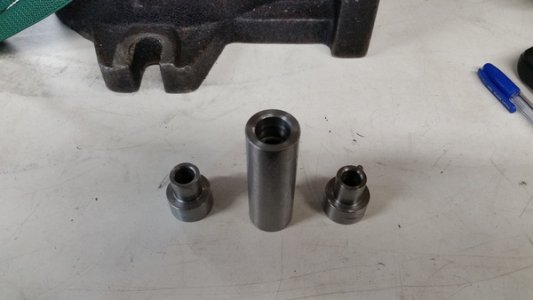
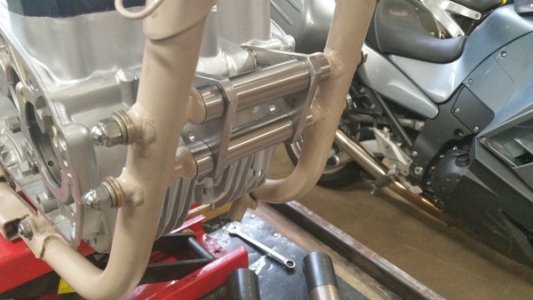
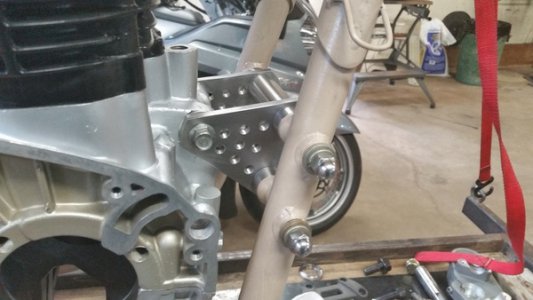
I got the engine mount for my Yamaha XS650 project finished. I decided to add some decorative holes to the plates and I spot welded a washer to each plate to fit against the engine. I dressed the spot welds off on the belt sander. I machined 3 spacers, one for each side and one to go between the plates.

20160905_091906_zps21mtyn26.jpg

20160905_100521_zpslxbt1ksw.jpg

20160905_100526_zpsbt7q7fv5.jpg

20160905_103828_zpsderkk9wr.jpg

20160905_150152_zpsiwdsvkfy.jpg

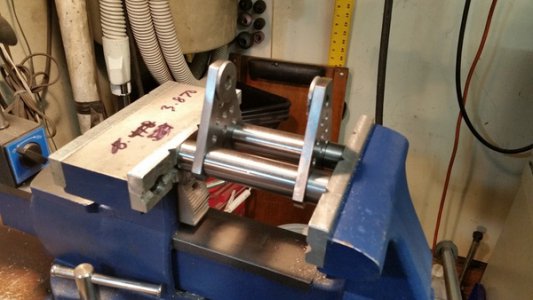
Then I pressed all the parts together in my Yost vise with aluminum jaws.

20160905_160415_zpsliaysukm.jpg

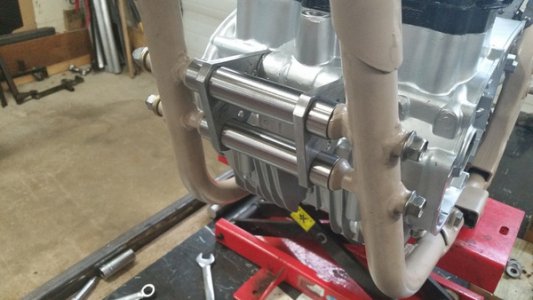
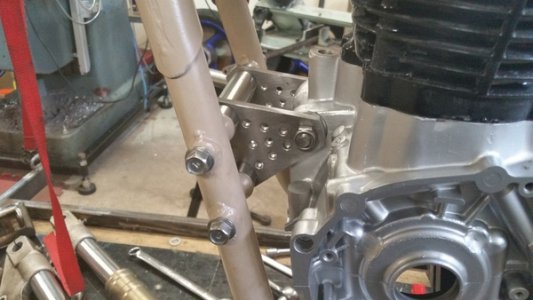
The finished mount fits like a glove and looks a lot better than the original I think.

20160905_161142_zpsaeiezf0y.jpg

20160905_161149_zps8qugls4f.jpg

20160905_161201_zpsgprcf81o.jpg

20160905_161207_zpsgndrfcxz.jpg

John
 
Last edited:
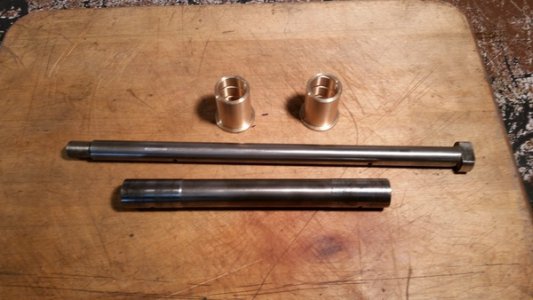
Now for the rear suspension on the XS650. I got new bronze swing arm bushings from Dime City Cycles and cleaned up the old shaft and sleeve. They are in good shape so I'm going to re-use them.

20160831_120547_zpsvrls56mj.jpg

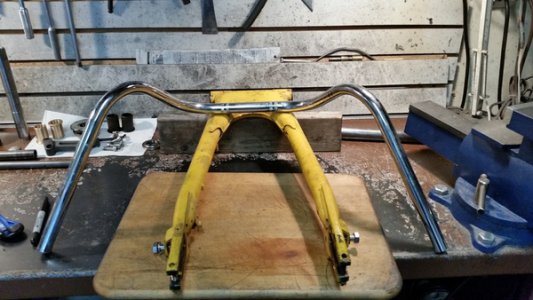
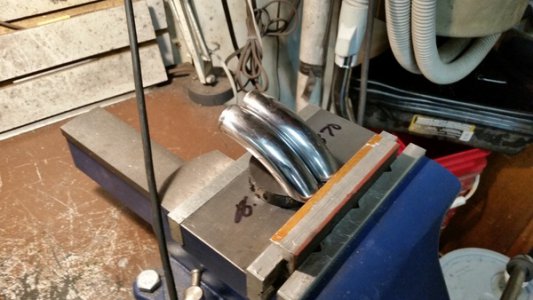
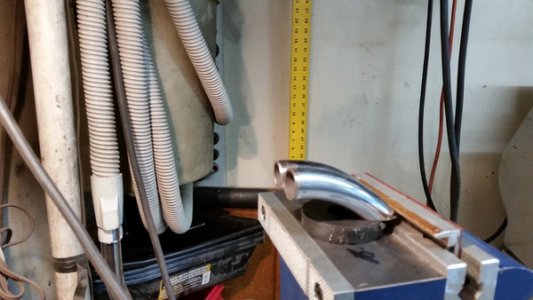
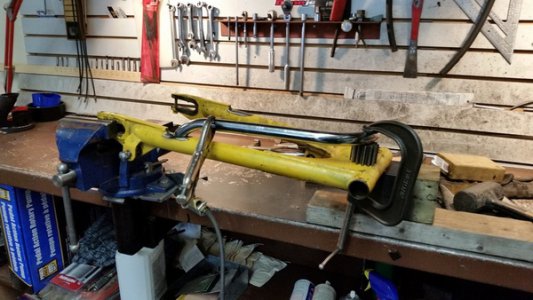
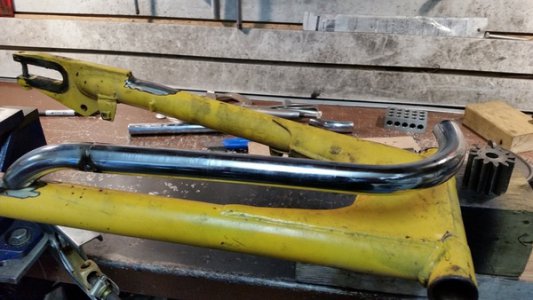
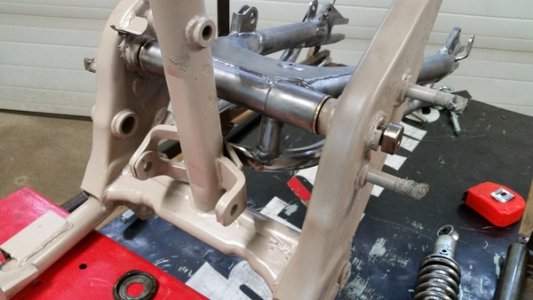
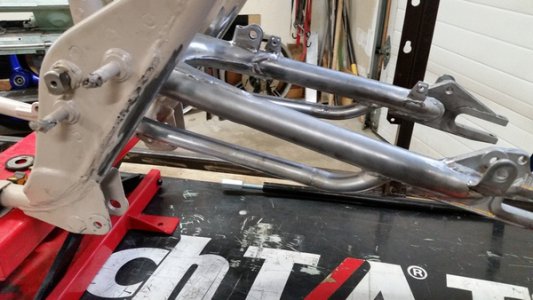
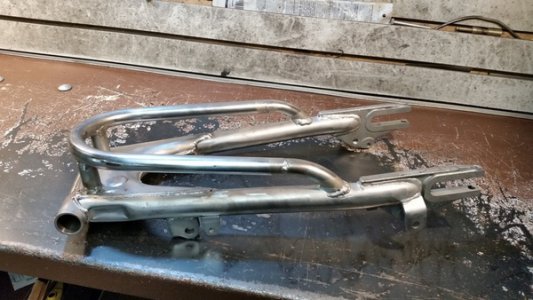
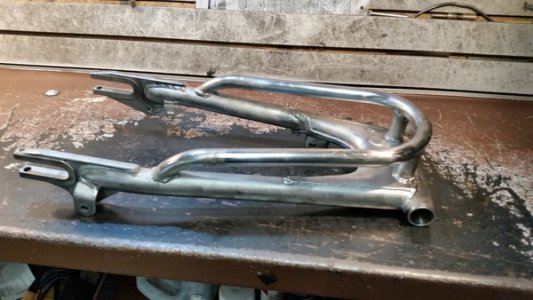
I decided to make a swing arm brace from some old handle bars. The 7/8 Chrome moly tube is perfect for this job. I cut the bars up and used some of the bends to form the brace and TIG welded the parts together.

20160901_101058_zpsk0z1nyln.jpg

20160901_105921_zpscqcwhalx.jpg

20160901_105932_zpsbkeayk4v.jpg

20160901_112528_zps3yj2kx4u.jpg

20160901_112836_zpszebtkfsu.jpg

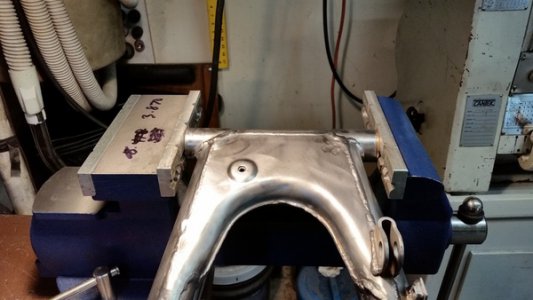
I MIG welded the brace to the swing arm and bead blasted the assembly before pressing in the new bushings.

20160902_104131_zpsltbj9lgf.jpg

20160902_104149_zpsosfnnlit.jpg

20160902_104705_zpse1r4osmc.jpg

20160902_131633_zps3icgrmr9.jpg

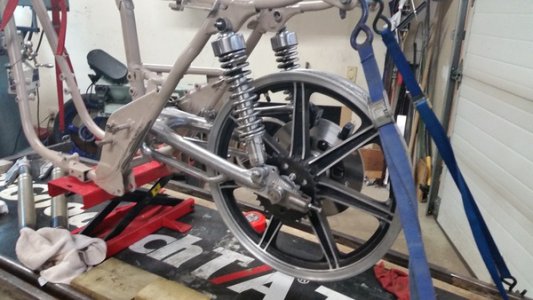
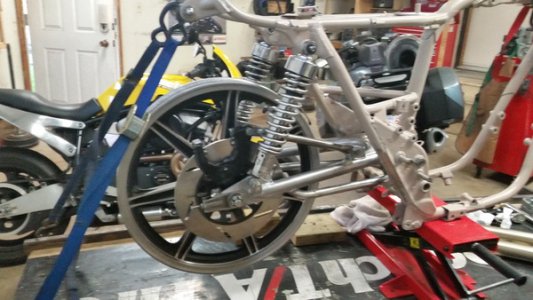
I mocked up the engine with the trans output shaft in it to make sure my sprocket alignment was still good after welding on the swing arm. It lines up perfectly.


20160902_131638_zpsapccssmu.jpg

20160902_144424_zpsaexq0evo.jpg

20160902_144453_zpsbtqnvr6g.jpg

I have some 1" longer rear shocks ordered to work with the longer fork.
 
Back
Top