-
Welcome back Guest! Did you know you can mentor other members here at H-M? If not, please check out our Relaunch of Hobby Machinist Mentoring Program!
- Forums
- THE PROJECTS AREA
- PROJECT OF THE DAY --- WHAT DID YOU DO IN YOUR SHOP TODAY?
- Project of the Day Mega-Thread Archives
You are using an out of date browser. It may not display this or other websites correctly.
You should upgrade or use an alternative browser.
You should upgrade or use an alternative browser.
2016 POTD Thread Archive
- Thread starter sanddan
- Start date
- Joined
- May 17, 2015
- Messages
- 165
My original post was in regards to a pulse mig reference to a weld like the stack of dimes. It got lost a bit along the wayIT'S NOT PULSED MIG!!
It is purely technique, and machine setup, it is continuous welds with expert torch manipulation. Yes they make pulsed mig welders, but no, that is not technique, that is process.

See post 6080..
F
Firestopper
Forum Guest
Register Today
Welding in pulse mode makes it harder/trickier to achieve that finished look, but its much hotter IMO. I only use manipulation techniques when the joint allows or when welding thick to much thinner material.
Other wise I keep a steady consistent speed of travel. Been manipulating Migs for 30+ years and tune to sound and feel. I once had perfect vision (20/10) and could weld with mirrors in contorted positions, but those days are well behind me. FWIW, I would NEVER use this technique for something requiring a visual inspection as too many differing opinions and who need that hassle. A conventional filet with excellent toe tie-in and no undercut goes a long way. The pulse mode also eliminates spatter and makes for quick clean up.
Other wise I keep a steady consistent speed of travel. Been manipulating Migs for 30+ years and tune to sound and feel. I once had perfect vision (20/10) and could weld with mirrors in contorted positions, but those days are well behind me. FWIW, I would NEVER use this technique for something requiring a visual inspection as too many differing opinions and who need that hassle. A conventional filet with excellent toe tie-in and no undercut goes a long way. The pulse mode also eliminates spatter and makes for quick clean up.
- Joined
- Nov 18, 2012
- Messages
- 1,352
Me and my 9yr old just came in from a lesson on the lathe. We we went over the basic parts and what their function is.
Then we parted the head off of a .750" diameter bolt and knurled the 4" shaft.
He was super excited....... now I have to hide the spare shop key.
Im gonna scrounge around for some brass stock to make a hammer head for his newly knurled hammer handle.
Sent from somewhere in East Texas Jake Parker
Jake that is awesome. First that you are helping him, and also above all that he is interested.
I am working on a science fair project with my 14 year old grand daughter and she is using the lathe, mill, hand tools etc.
On Sunday she was milling a piece of acrylic and she said "it is too bad that other kids don't have the opportunity to do what we are doing". I asked her if they really wanted to do what we were doing. she said "I think so, but they don't have this equipment and people to help".
Makes me wonder if there are enough folks on here helping out our youngsters to start an "under 18 club" or whatever.
Great job Jake and thanks for posting.
David
Last edited:
- Joined
- Jan 25, 2015
- Messages
- 2,558
Started polishing:

All that's done is the coolant plug side retaining plates and initial strip of the head "fins".
All the Al you see in the pic will be polished, right after I strip the clearcoat thats gone all yellow on them.
Once I get the valve cover clearcoat stripped, the vertical inserts will get a coat of black. Kind of the reverse of the coolant plates.
Looks a bit venture and a bit VMAx and at the same time; neither.
Perfect. Just the way I wanted it. Just perfect.

Gonna almost be a shame to cover most of it up with the side covers and fairing lowers, but that's the way it's gotta be for the look I want.
I'll probably go with black engine guards and rear bag crash bars. Even thinking about black fork lowers now.
So, the color pallet is going to be Yamaha New Ruby Red, Jet Black and polished Al/chrome.
Very happy with how it's coming out. Very happy indeed!


All that's done is the coolant plug side retaining plates and initial strip of the head "fins".
All the Al you see in the pic will be polished, right after I strip the clearcoat thats gone all yellow on them.
Once I get the valve cover clearcoat stripped, the vertical inserts will get a coat of black. Kind of the reverse of the coolant plates.
Looks a bit venture and a bit VMAx and at the same time; neither.
Perfect. Just the way I wanted it. Just perfect.
Gonna almost be a shame to cover most of it up with the side covers and fairing lowers, but that's the way it's gotta be for the look I want.
I'll probably go with black engine guards and rear bag crash bars. Even thinking about black fork lowers now.
So, the color pallet is going to be Yamaha New Ruby Red, Jet Black and polished Al/chrome.
Very happy with how it's coming out. Very happy indeed!


F
f350ca
Forum Guest
Register Today
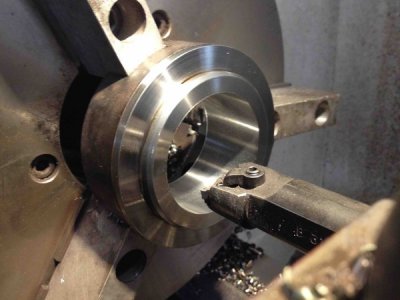
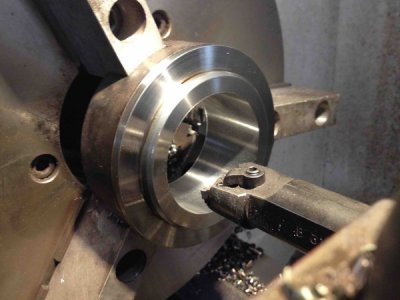
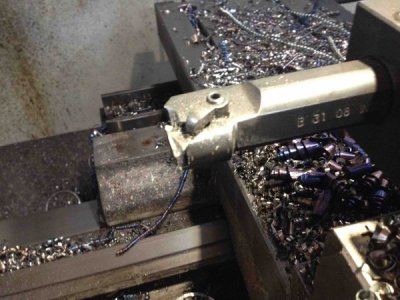
Ran across an incredible insert for boring. The Kenametal boring bar I have takes a TNG inset, I've always used the double sided ones with 6 cutting edges. 0.030 depth cut was a load for it, much more and you'd get spring in the bar and have chatter. Ran across these in some inserts my uncle gave me, 0.1 DOC at 500 rpm and ,007 feed was effortless with masses of C shaped cuttings going every where. Had to put on a hat to save my head.
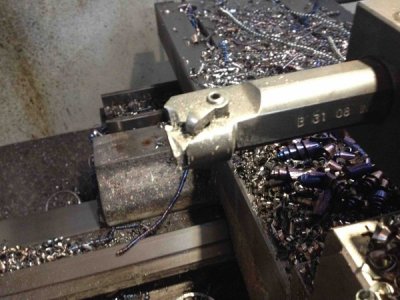
Can anyone identify the shape to track more down.
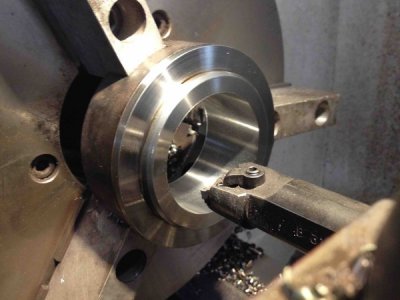
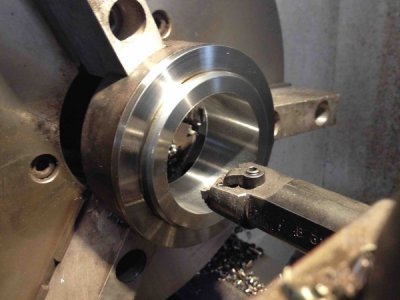
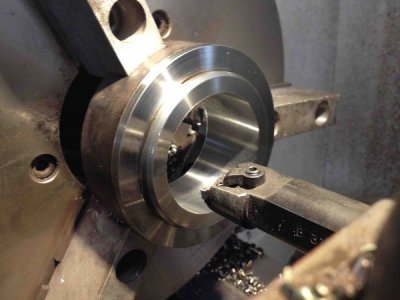
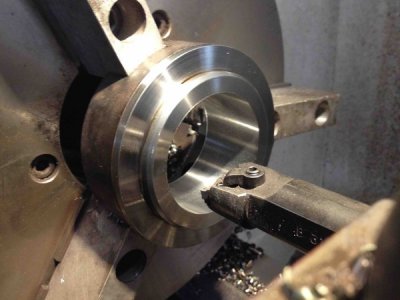
Finished rough bore ready to be welded into a gear case. The part is mystery metal from a shaft, 4 1/2 od with a 2.85 bore.
Greg
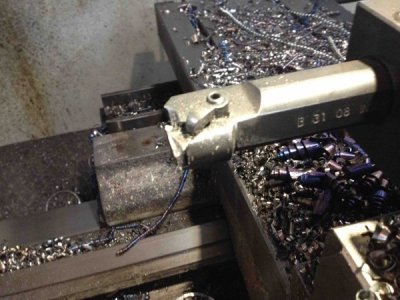
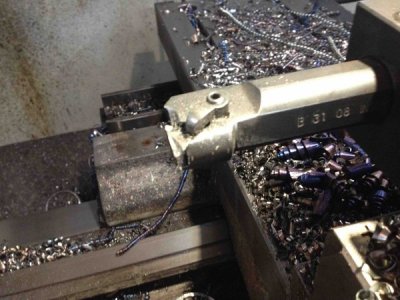
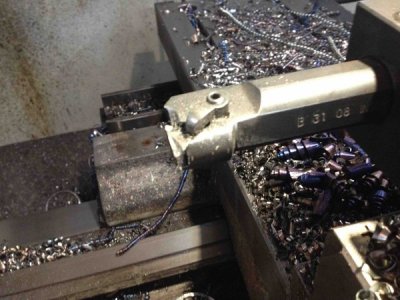
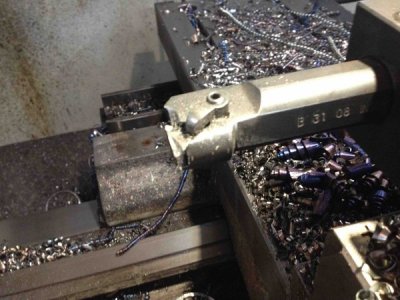

Can anyone identify the shape to track more down.
Finished rough bore ready to be welded into a gear case. The part is mystery metal from a shaft, 4 1/2 od with a 2.85 bore.

Greg


- Joined
- Dec 11, 2014
- Messages
- 891


