2017 POTD Thread Archive

Here's what some of the logs that come into the yard leave as. Making these cabinets from white ash I sawed about 5 years ago. The tree was blown down in another storm.

Keep the shots coming of this project. I am interested. You are a busy guy. Impressive.
 
Keep the shots coming of this project. I am interested. You are a busy guy. Impressive.
Thanks for the interest but once again its not metal. lol
Here are the logs the cabinets came from.
XEh72bSaIK9-FJWKLTWbr42W58jF3cDuY2lEQvESaZHHJA1HHCm7MEU2jRqqzSLdTkGwGsgbn0Ho3dF4TbPthFahsLws4f93IKQcB-ZHCjSzgtQOuPtG4tyCjAAQ0Spa-FrPDFtvRf41V_mkbWZr3v0Cwys95p66beW3m1c5xg7dD4FLIl-U4Wbd3GGIq8zZhlBQDbWeP8uMMLm8kt6oA0wZmgb5O6adsUiqOxYtSmegaTDMF4cFPuYMWL6jaFI2RbKNew-NYZn0MsXsYI1_2VWK0wBBGqli45RG59YAdCJhCYE_olrkJ3eCrSveABdbaq1_fhLhryqnhkC8P3cwRRngDlBrtEZrgADY0XhSerMsUfOdE1BoGPA2cOljE4lqM1kLzctQX2OH9IftPbZYBjnLvyuv1yOJtKMHd0N2nlPcRSZhK0iSMEIavP72CkTSPWU1H18T9CwsW1fkee_ONv8V7NDrTKjoH9wBBXBaWSaUmp2Yy_g9fB62hBIDvnUZlMfCUVMaXUQFXe3Jbq4jlGHnVJebw4qt5nRmfysncDLyonVXRjVre_BnqqhXL53F101x4VNJZYusEVrII0fhR7XXVE26KpXgNTeTiPkATv5xFMFzl7iD=w1702-h1276-no


And starting to quarter saw them. A lot of work, the log gets split down the middle then, the haves get split in two, then the quarters flipped back and forth to get the quarter and rift sawn boards.

_DHYMnZtJtGmYZqL1SWBQurKWg9BCI_cWpVaNrhW9MWWifl38RcmvTP0QASYGF_kdpQwEZnqtNiodSjpAXpRR_5USHFFcQxfraIaEygvFuoFDelDTvmteVGAgy5wQYTHE00PhVpbbM78JJ6iQvre7-mRP6m1EXRKP251A2nJVWm5WWDur22sAIghHBSU8LZeEySvg8UYbfn96m7vBJTOf4U0taXSWswso1590q4wXMbSY8iZ87P8zSRs4ZCzfeu52VRRRdnkIJSdNSdx2kEoXdW7vlWSGlXzjnEvWDVPDAQnzF7h-sUjnEcGJonF-x_FW9I0-xvzN26Im1M5Eq83K3PunnIha03pYQtRxYs3F_fonaFh1DYWxRUbtmn17AH3vyCKuf9HH57Q1TL28QGJ_6yVGpLnNB6NSUv6o4kWX-2qqCqVdz8V7pooG4KKjxJhZTJQi1ljdFzwfPugmqbgCbDu5SD4kH3zbZp1AHZCslJ1wXwsw7ogCp8XviifHiUDSxfEcCu17i-VF45ahHG1TdblPbCQ_N2pOkfUyaD0rZgOUooTX7GrvEVglh7tsM5B7uO9dLWSkmaSKbZF9pnuG6mAAALDeRE3XdMmb9BXNl_k7CA1KZle=w957-h1276-no


The saw mill came out of my machine shop though.


Thanks for watching,
Greg
 
I built it pretty simple Jeff. Its push through, think I prefer that, can somewhat feel how its cutting through knots and get a better idea when the blade is dull.
Will cut 30 inches between the guides, the wheels are 24 inch sheaves off an oil well pump jack, hydraulic blade tension and a salvaged 14 hp Yanmar 2 cylinder diesel. Burns 1 litre per hour when sawing.

Greg
 
Greg, lots of us work both metal and wood. They actually complement each other, imo.
 
I have avoided using wing nuts in my jigs due to the hassle of unscrewing them. It seems "Murphy" always manages to get these stuck when the time comes to unscrew the wing nut. I use a pair of pliers, but this tool is not easy to use for this purpose.

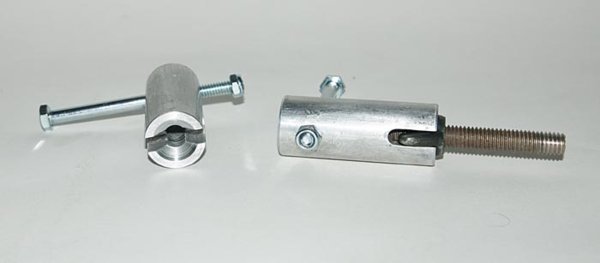
I was reading a 2007 Machinist magazine and saw this home made wrench. The article had the one end machined to 3/8in dia for use in a cordless drill. I did not feel I needed a cordless drill, just the leverage of a bolt through the wrench.

I made this on my metal lathe and milling machine, but it could be made with a drill press, hacksaw and file.

A piece of 1in dia aluminium. I designed this for a max bolt diameter of 3/8in. I drilled a 3/8in hole for the bolt 1 3/4in deep. Can be as deep or shallow as you prefer. Two slots were milled 1/4in wide by 3/4in long. The length is also up to your preference, but the 1/4in width is needed for the 3/8in wing nut.

I machined the end at 45 deg on the metal lathe. You could easily use a 45 deg countersink bit.

I am using a 1/4in bolt for the leverage with a locknut on one end.

I made two for local woodworking friends. One is shown with an example wing nut to show how this fits.

I actually needed to use this a few days ago. It was as easy and fast to use as I desired. A quick loosen with the wrench then spun the nut off with my finger.
Wing_nut_wrench_7673.jpg
 
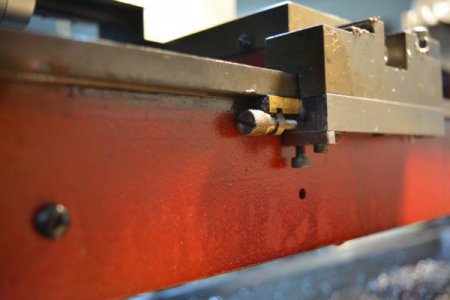
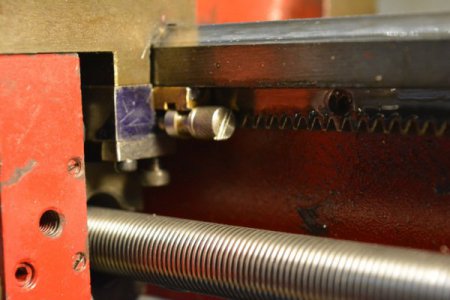
I made some mods to the mini lathe and mill over the last few weeks. I converted to tapered brass gibs on the mini lathe. Based on the design by Rick Kruger ( see the attached PDF). It's no longer a hassle to adjust the front gib. Very much smoother carriage travel and no loose slop in the carriage. Really helps in parting operations too. Before the mod I had to disassemble the carriage and apron to get to the gib adjustment screws. Now no need to disassemble anything. I used 360 brass for the gibs and 11L17 for the L brackets. The gibs and L brackets are milled at a 1° angle.

Dsc_0020small.jpg Dsc_0021small.jpg

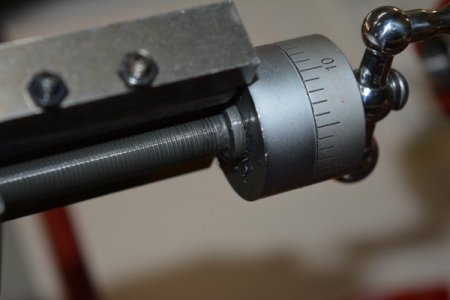
I installed a torrington thrust bearing in the compound and bored the retainer to fit 28 1/16" ball bearings between the screw and and retainer. While the screw shaft and retainer form the inner and outer races I have not seen any wear on either. The bearing balls actually have enough surface area to not cause a problem. I know this is not in keeping with ball bearing design requirements, I thought it was worth a try. The index wheel no longer sticks to the retainer causing incorrect readings and operation is much smoother. If it doesn't work out I can change back to the original bad design.

Dsc_0025small.jpg

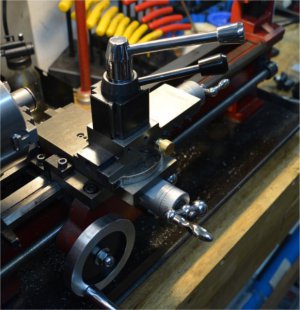
I added 2 gib adjustment screws to the compound and made a pressed on brass knob to lock down the compound also.

I made a nut and handle to hold down the QCTP instead of the original nut and wrench set up. The nut is 1018, the shaft is 4130 and the knob is 12L14. I polished them and gave them a coat of wax.

Dsc_0022small.jpg

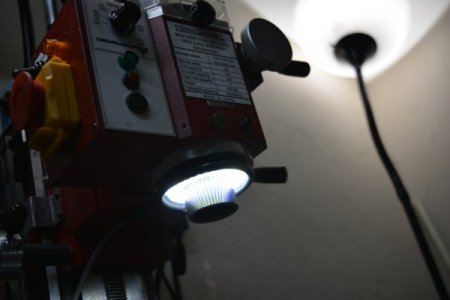
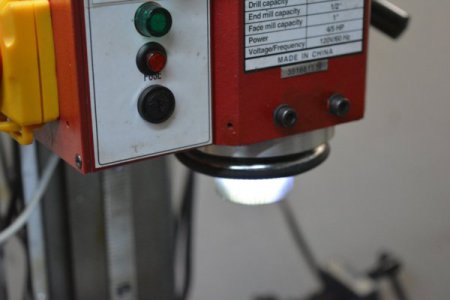
I made a ring light for the mini mill using a 60mm angel eye led and diffuser I purchased from super bright leds dot com. It draws 12v at 300 ma and I used a 12v 750ma wall wart wart I had in the pile "o parts" bin. It works great. I mounted a switch on the control box to turn it on and off. I also added a reverse switch to the mini mill. It is the same switch used in the mini lathe to reverse direction. I had purchased it from LMS 2 years ago and finally got around to installing it. I've already used it when tapping holes.

Dsc_0026small.jpg Dsc_0027small.jpg

Roy
 

Attachments

  • Tapered Saddle Gibs Instructions for the 7x10 By Rick Kruger.pdf
    973.8 KB · Views: 7
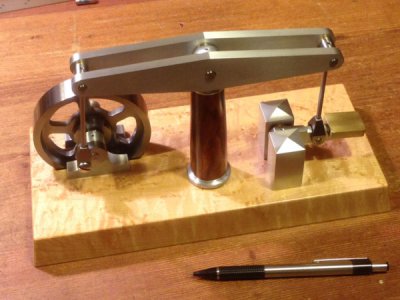
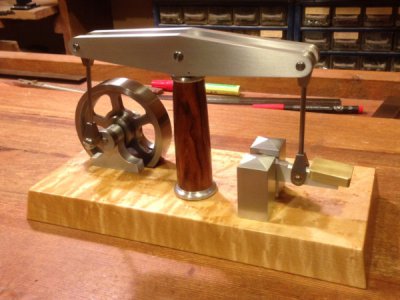
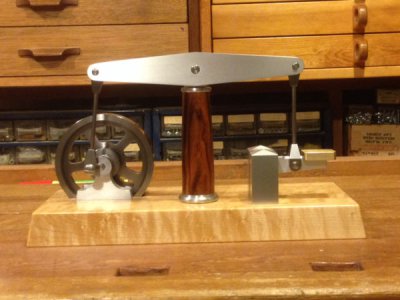
Well, time for another treadle engine. I finished this one off this afternoon. I've always liked the looks of those great beam engines from the industrial revolution, so they inspired the design of this one.

It's not a bad runner -- not a screaming race horse by any means -- but smoother than my last one.
Aluminum, steel, leaded brass, and an ironwood column on bigleaf maple base.

And as always, thanks for looking.

-frank

image.jpeg image.jpeg image.jpeg
 
Back
Top