2017 POTD Thread Archive

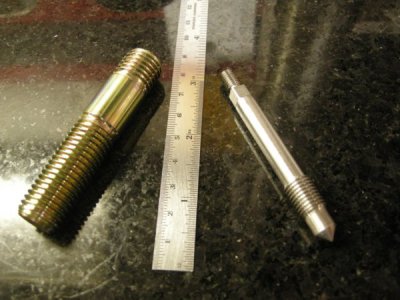
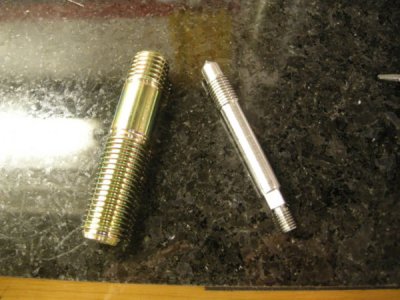
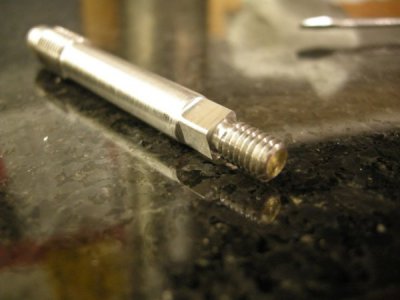
Long story short, at work we ended up having Studs manufactured for our customer in the incorrect length (too long). They can't be re-purposed so they're essentially scrap. I got the idea to turn them into 2/3 scale valve spindles and hand them out to all the employees of the company as desk ornaments (about 20 people). I chose the valve spindle because valve manufacturing and overhaul represents a big part of our business.

The Studs are 4140 heat treated to about 35 HRC. Last night I made the first one to figure out the tooling and schedule of operations. Now that I have that figured out I can tackle the rest like a production line.

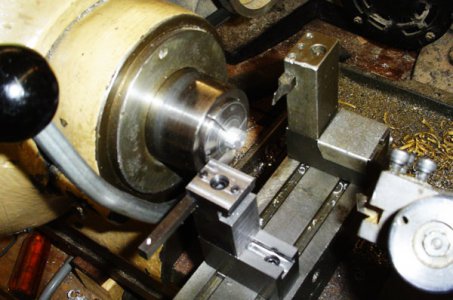
Of note, I milled the 4 flats using a fly cutter mounted in a 5C collet on the lathe, with the collet closer I built recently (see previous postings a page or two back). I have a milling attachment but opted to mount the spindle in a quick change tool holder (one with a v-groove for a boring bar) and used the QCTP. Gotta say I was pretty excited to see that in action! I'll post pictures of the production run and milling setup in the next few days.
DSCN9933.jpeg


DSCN9930.jpeg

DSCN9931.jpeg
 
Been working on a Hemingway's kit spherical ball turner after work all week. Finally finished it up. It was a good project and test of my abilities or lack thereof. Made a few mods like a dovetail to sit directly in my tool post and also milled dovetails on the body using one piece of crs instead of milling separate dovetails and screwing them on the body. I also made a gib for the dovetail. Not sure why my balls are egg shaped. Lol.
Also getting the grind right for the cutting tool has been challenging.View attachment 240047 View attachment 240044 View attachment 240045 View attachment 240046
In order to get a sphere, your pivot point has to be at the same height as the spindle axis (the pivot axis has to intersect the spindle axis) and your cutting edge has to be on a vertical plane through the spindle axis.
 
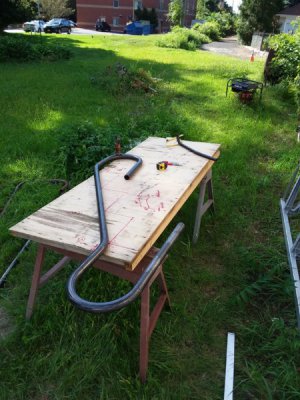
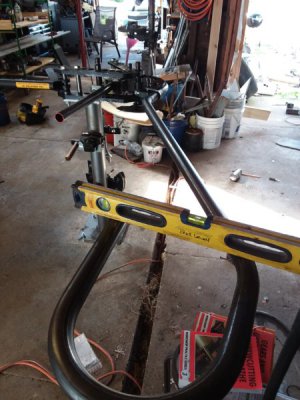
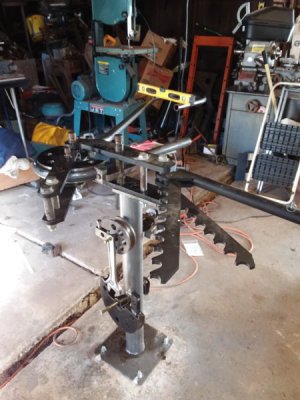
The girlfriend wants some handrails going up the steps to her pool. So I went to the local metal supply and picked up some metal tubing. The only stuff they had in 1 5/8" was some schedule 60... .144 wall thickness.... woo boy. So I grabbed 4 pieces and headed back to the shop for some serious manual bending lol. 1st piece took a bit of time to set up, the second went together very quickly...

20170823_164154.jpg 20170823_164154.jpg 20170823_164154.jpg 20170823_163619.jpg 20170823_163640.jpg

I still need to do the posts, bottom rail and weld in all the spindles... sand, prime and paint.... but... I'm pleased with the way the top rails went together...

Thanks for looking
Rich
 
IMG_0262-L.jpg


IMG_0263-L.jpg


slitting saw arbor

IMG_0261-L.jpg


IMG_0260-M.jpg


drill table stops

thanks for looking

pete
 
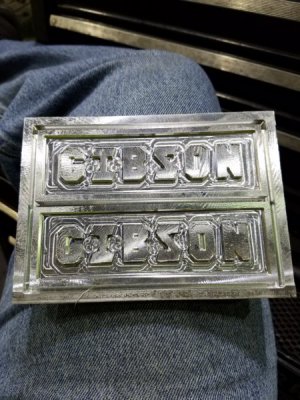
20170824_164735_001.jpg 20170824_165720.jpg I didn't make these today, but got one mounted today. This is a project I've been wanting to do for a while but had no good way to do it till they got the Haas hooked up at work. I think they turned out pretty good. The unpainted ones need cut out, deburred, and painted, and all three need the face radiused. But I have to wait till they get new glass for the Haas door since someone threw a part and busted it.
 
I had a bit of time today, finished my secondary tool holder for the Ames Turret lathe. The picture isn't really great, but it does show the new tool holder and the part. I set it up to part the finished part off, chamfer both the back of the finished part (which fell out of the picture) and chamfer the corner of the feed bar. (in case it needs chamfered. Only time will tell what it will work out to be, I made it to accept 3/16 and 1/4 in HSS tools. And, of course, it can be rotated 180 degrees to put the tools in different places

Cross slide tools 2.jpg

It also has settable stops for both tools. .
 
1 - Aprillia go kart engine
24 - 6 mm x 1mm helicoils
18 - 8 mm x 1.25 mm helicoils
4 - 10 mm x 1.5 mm helicoils
1 - trip through the hot tank

then off to the engine assemblier, for Saturday's Race, the engine/transmission is new completely set up for studs, no more bolts (per their request)
 
I finally got the parts to convert the cross slide and compound of my PM1228 from 80 thousandths to 100 thousandths per turn. I switched them out this afternoon. After a bit of head scratching it got took apart and miraculously all went back together with no screws or springs left over. I was particularly impressed with myself that I didn't drop any of the little parts or screws and have to crawl around on the floor with a flashlight to find them.

Well, I did actually drop one of the little knob shaft keys, but it didn't disappear. I should go purchase a lottery ticket.

Included in the set were conversion parts for the tail stock. I'm not sure I will change it out. I actually never noticed (therefore, never used) the veneer dial on it. I've always just used the scale etched on the big sliding tube/morse taper doo-whacky.

Sorry, no pictures. My hands were way too greasy.
 
Last edited:
Franko, you should have purchased one a few days ago. But could never hurt now. You now have a backup set of part in case something happens.
Ken
 
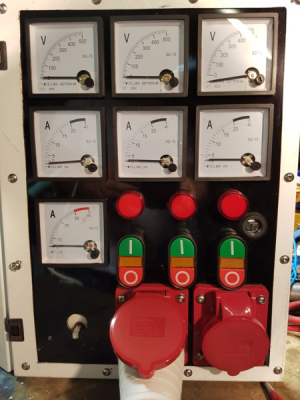
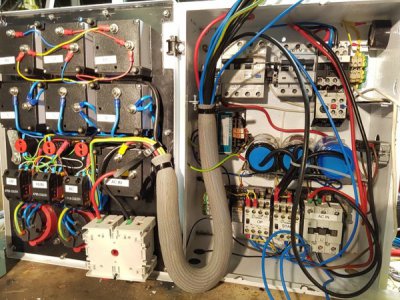
Got a little further with wiring up the phase convertor control box:

convertor panel scaled.png

converter panel wiring scaled.jpg

I *think* I'll be able to get the door closed...

(yes, it needs a sheet of Lexan/similar over the exposed terminals on the meters!)

Dave H. (the other one)
 
Back
Top