Accurately measuring and boring holes (28mm)

Good morning!

I've recently tried to up my precision when it comes to lathework but am struggling a bit.

I have a cylinder that is 50mm diameter, I bore it through completely 25mm diameter.
After this I try to lathe Turn a "pocket" that is 8.5mm deep and 27.95mm diameter.

I've tried this twice so far.
First time I used a internal micrometer (5-30mm) and measured it to 27.99 or so but the bearing slid in very easily which makes it seem like the hole is way larger than 28.00mm, hence I can't trust that micrometer?

Second time I used a bore gauge and set a external micrometer(that I trust) to 27.95 and got a final measurement of +3 so 27.98 I think? This was a tighter fit but I could still slide the bearing in by hand, which again makes me question if the hole is really <28mm?

It's a bit time consuming so I would appreciate any tips before I spend 3 hours to try again.:grin:

Somewhat related, anyone got a firm grip on fits when it comes to bearings? It's supposed to be 28.00 outer diameter, do I want to aim for a slipfit or press fit? And if pressfit, how do I know which tolerance to look towards?


Turn, you turn on a lathe.

What you are attempting is not the easiest of tasks and pockets especially when turned on the lathe can be tricky as given the boring bar should be raised above center your dials will not read correctly. Then there's spring passes to be taken into account.

Measuring bores is an art in itself and it can take some time to become proficient at it. An 8.5MM deep bore is a real bugger to measure as many measuring methods will simply not work or at the least can be deceptive when you try to measure them.


Without knowing the brand or condition of your tools, let alone your methods and skill level, its hard to say where things are going wrong. It may simply be a case of relying too much on your measuring instruments and machine dials and not enough on your skills and trial and error.

As to the fit for a given bearing, is this going into a highspeed precision assembly or a wheel barrow axle?

Worlds of difference between the two and how you would need to fit the bearing..
 
In addition to the difficulties measuring bores, there can be some complications boring. If your bar sticks out too far it could be flexing. Then, when it reaches a critical point it will 'dig in' and cut unexpectedly over-size. A potential solution is to take several 'spring passes' as you approach your final diameter. Run the bar through a second time without adjusting the infeed (outfeed?!). It'll probably take a small chip. THEN measure. That measurement should more accurately show where your boring bar would be cutting if it were perfectly rigid. Then make your 'final' adjustment and bore. Depending on how much you left to remove in your "final" pass, you may have to make another spring pass to reach your desired diameter, but measure / check fit before doing so.

HTH,

GsT
And also this, saved me from typing it out, but this is critical.

For final dimensioning I have made passes that only left fine dust on the tip of the cutting tool.
 
An alternative procedure:
You need a consistently repeatable (not necessarily precisely accurate) outside micrometer to measure the OD of the bearing.
If you have such a micrometer, measure the OD of the bearing. Apply minimal pressure with the micrometer because bearing races are typically very thin and will distort, providing a false (too small) reading.
Then turn a plug gage about .0002" smaller, and with a very smooth finish, than the desired bore diameter and one or more slightly smaller (so you will have some idea when you are approaching finished bore size).
Bore your workpiece and use the plug gage(s) to determine finished size. When the .0002" smaller plug just fits you will have enough size left to polish the bore to a very smooth surface finish.
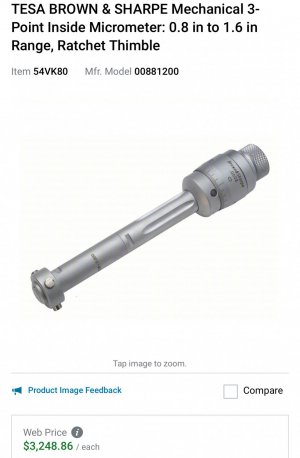
While time consuming, this is the best alternative to having a set of 3-point inside micrometers (or a single wide range one):

IMG_7010.jpeg
 
My go to for measuring bores, depending on size are small hole gages, telescoping gages (both measured with a micrometer, then an inside micrometer, also measured with an outside micrometer, I almost never use a dial or digital caliper for bores, as they are not always accurate enough, I would, however trust a vernier caliper if the resolution provided an accurate enough result.
 
Also important is the use of sharp, free cutting boring tools, I mostly use HSS Bokum form ground boring tools, they are only ground on the top and have a long life. They cut quite freely.
 
Did you see price
I did have and did not work that well so after spend all money I went to old way.

Dave
Even on EB they are far from cheap and have quite a narrow range of measuring capability.
 
Even on EB they are far from cheap and have quite a narrow range of measuring capability.
And they are easy enough to over torque to obtain any dimension you want by springing the part out of round. Besides the fact that you cannot reliably check inside diameters at different clock positions to check roundness. Stick with the telescope gages, inside and outside micrometers. My .02
 
That's the style we had at work. I think the largest was up to 8". They were ungodly expensive way back then and haven't come down in price since then.
While time consuming, this is the best alternative to having a set of 3-point inside micrometers (or a single wide range one):

View attachment 486174
 
Back
Top