Central Machinery (Harbor Freight) 8 x 26 Knee Mill Upgrades

I was just mentioning for parts. I saw the price diff...

I treat all HF like a kit... I take apart the items clean out the swarf that they left in, then I file, stone, and do whatever to upgrade.
I have had some great HF tools for the price, and some awful. I know there are people especially contractors that won't touch them.. I get it.. they don't have time to run back and forth.

But if you know what you are in for, and work through it, you can save some money.
DON'T buy the 1/4" torque wrench.. useless... I needed inch lbs. I saw awful reviews, but figured I could work through it if it didn't work out... but no way ... it just doesn't work.

cheers.
 
I treat all HF like a kit...
That's about right, for the larger tools, anyway. They are inexpensive, and the quality / features reflect that cost. Failing to realize that will lead to dissapointment. Many of their tools, however, are decent enough. Some are even quite nice. Go in with appropriate expectations and be prepared to make adjustments and / or upgrades, and one will be satisfied. There are a few things, like the power wiring, on this mill that are truly lousy. I am going to fix them. I can do a lot of fixing for the extra $4000 a comparable Grizzly would cost.

I take apart the items clean out the swarf that they left in, then I file, stone, and do whatever to upgrade.
'Not much to do to a grinding wheel or an air compressor fitting, but yeah. I bought a 3" pneumatic angle grinder that would not admit 3" grinding wheels more than 1/8" thick. I got out the pneumatic die grinder - also from Harboir Freight - with a carbide burr and in a couple of minutes the shield would admit 3/16" wheels. I have to chuckle: using one harbor freight grinder to fix another.

I also bought a new compressor pump and 3HP motor for my old 125 gal tank. The old one was just plain worn out. (And no wonder, really. It was over 40 years old.) The included plumbing just would not seal, no matter what I did. I actually wound up fracturing the cast iron exhaust pipe trying to get it to seal. I have never before had a pipe rupture while tightening it with a wrench. In any case, I junked the whole exhaust system and fabricated a new one out of copper.
I have had some great HF tools for the price, and some awful.
I have had reasonable luck. I would not go so far as to say everything I bought there has been wonderful, but I have always been able to get the things I have purchased to work reasonably well. OTOH, I have frequently decided not to purchase the HF tool and gone with a more reputable tool company.
I know there are people especially contractors that won't touch them.. I get it.. they don't have time to run back and forth.
Yeah, fair enough - for some things. Most of their consumables are decent enough. Their small hand tools are not nearly as nice as other brands, but often the difference is not significant, while the price is. I mean, how nice can a sledge hammer be?

I will take your advice about the torque wrench.
 
The price just jumped $500 on that HF knee mill. You think the Grizzly versions will too?
 
It is similar to the Grizzly, but definitely not exact. First of all, the Grizzly costs considerably more than twice as much, and is more than 100 lbs heavier. OTOH, the Grizzly offers some significant advantages for the cost. The CM has a 6 x 26 bed, while the Grizzly is 8 x 30. The Grizzly has infinitely variable speeds with a tachometer, while the CM has 9 discrete speeds and no tach. The Grizzly includes a stand with a chip tray. I had to make my stand, and there is no chip tray on the base. The power switch on the Grizzly is much nicer, and I like the quill oiler much better on the Grizzly. The Grizzly's hand wheels have folding handles, although I am not all that wowed by this feature. I think the Grizzly's knee travel is much greater. If I had the money, it would be worth the additional cost just for that. The Grizzly motor is only 1.5 HP, however, while the CM is 2 HP, and the CM's 2885 RPM top speed is 28% faster than the Grizzly's max of 2250. The low end torque of the CM is undoubtably much, much greater than the Grizzly, since it is geared down. At the lower speeds, the Grizzly might stall rather easily. There is no way the CM mill would stall at 240 RPM without destroying something. The CM's high end torque is without doubt also greater.


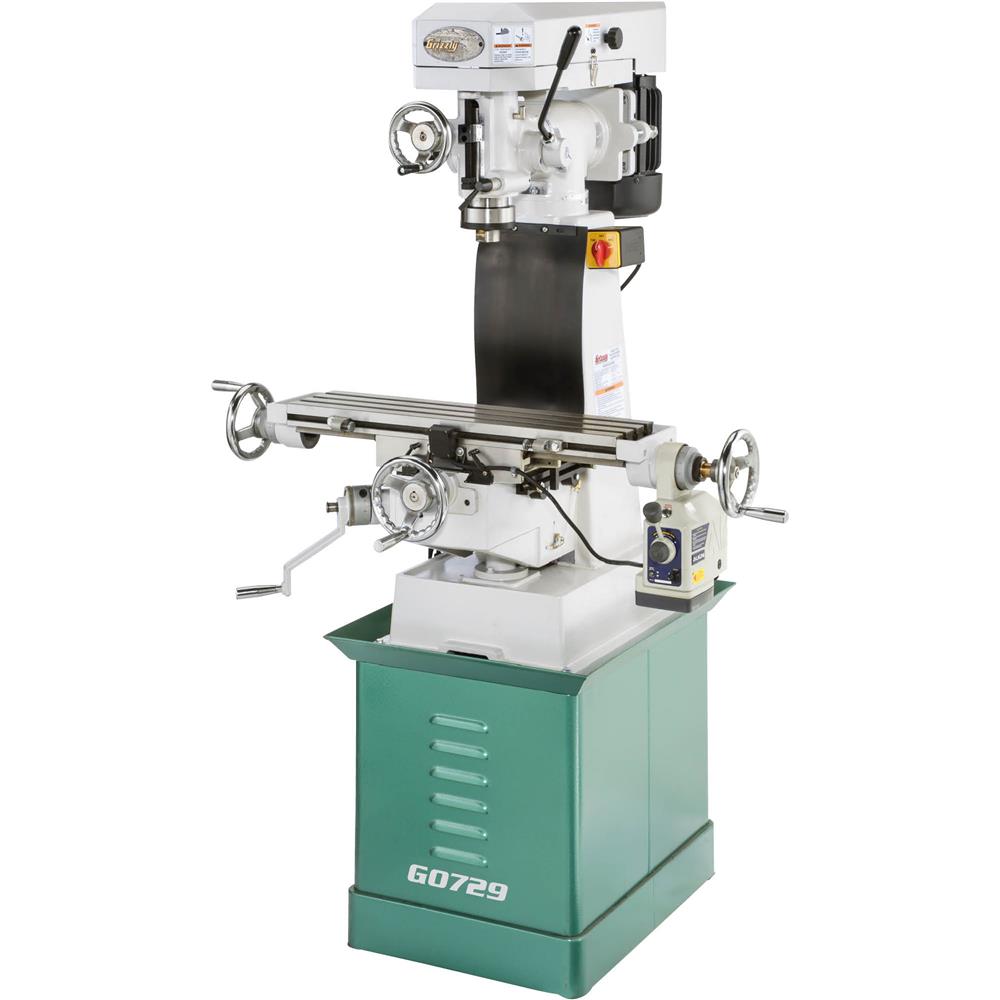
It looks near identical to the discontinued Grizzly G0729, 6x26 knee mill. I'm sure they still have some parts available for these. I still get G4016 lathe parts occasionally, and it was discontinued before the G0729.

I had the KB Tools version of that mill a long time ago. G0729 parts were compatible. They're surprisingly capable for the size.


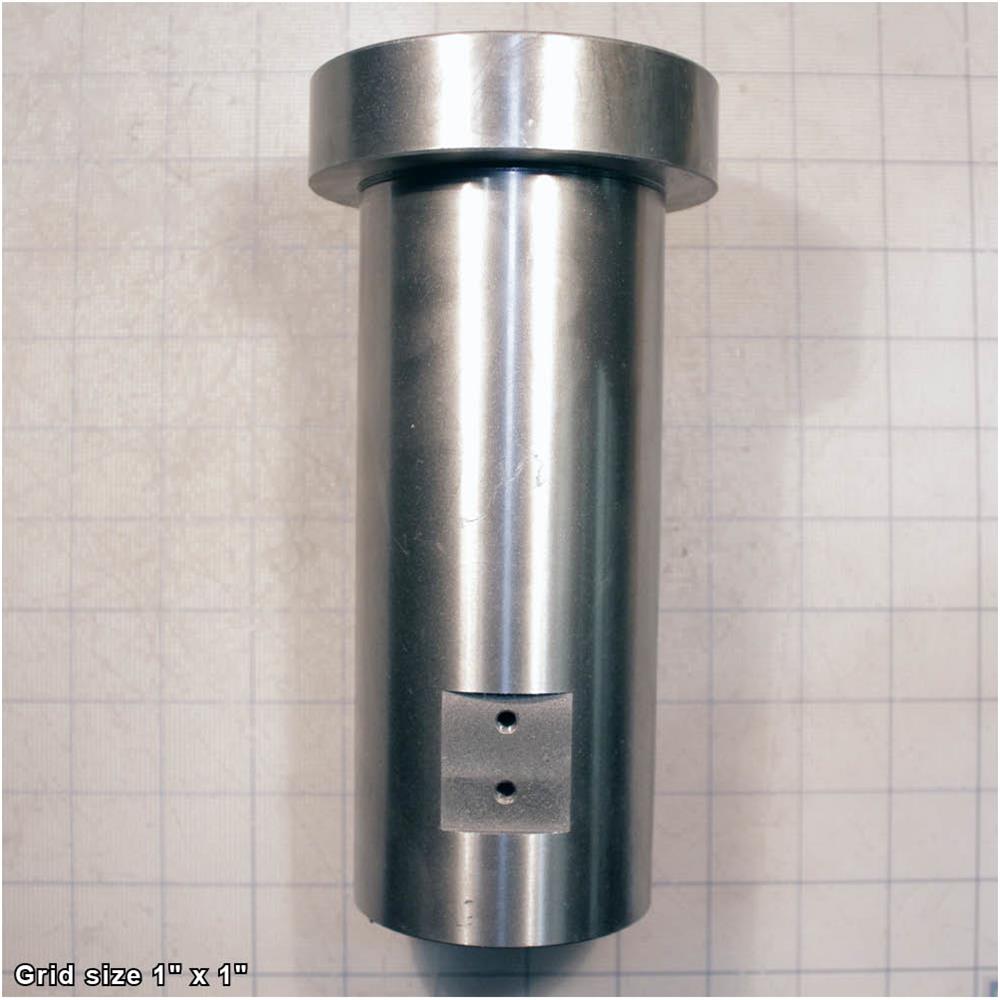
For example, a brand new spindle quill, in-stock and ready to ship....


Ouch! That green stand is over 500$ for a new one.
 
Last edited:
The price just jumped $500 on that HF knee mill. You think the Grizzly versions will too?
Yow! Boy am I ever glad I pulled the trigger when I did. They had a Memorial Day special, so I got an additional 10% off. Phew, I'm glad I dodged that bullet.
 
It looks near identical to the discontinued Grizzly G0729, 6x26 knee mill. I'm sure they still have some parts available for these. I still get G4016 lathe parts occasionally, and it was discontinued before the G0729.
With the exception of the "bolt-on" parts, indeed it does. Once again, the Grizzly for some reason used a smaller, 110V motor. I don't know how well it worked, but I really like this 220V motor. It is smooth, quiet, and runs cool. It would have been nice if this mill came with the X-axis motor drive and the pump oiler, and the wiring on this mill is just stupid.
I had the KB Tools version of that mill a long time ago. G0729 parts were compatible.
That is good to know. Thank you both, Ken and Woodchucker.
They're surprisingly capable for the size.
I am mostly pleased. The Y-axis handwheel always makes this awful chattering noise. The X-axis is perfectly smooth by hand or at modest speeds with the motor, but at high speeds it sometimes makes an ungodly screech while moving. I have been unable to find the source, and it is worrisome. That chatter can't be good.
For example, a brand new spindle quill, in-stock and ready to ship....

That's good to know.
Ouch! That green stand is over 500$ for a new one.
I think I will pass. It cost me some labor, but the metal for the stand I made was under $50.
 
Phase III: Z-axis Scale
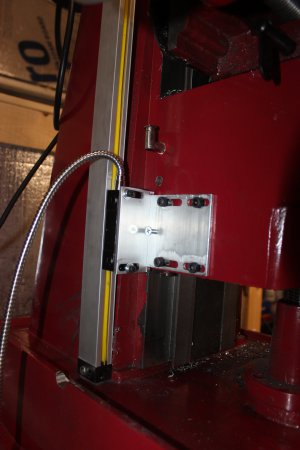
Technically, the Z-axis scale was not difficult. In practice it was a royal pain. First of all, as one might expect, the knee is very stiff, especially when raising the table. With a little use, it is beginning to free up some, but winding the table all the way up and down is a chore. Once. Twice starts to make the muscles a little sore. Ten times is just downright painful. The knee column is tapered - a lot. It is around 2" wider at the bottom than the top. This might have presented far less of a problem if I had a 24" caliper, but I don't, so an accurate measure of the column width is not practical. What's more, the scale length is much greater than the knee travel, so the shim size was much greater than the indicator deflection when moving the table to its full extent. My estimation of the difference was nort very good, it turned out. Ergo: lots and lots of adding a shim and then moving the table up and down again. Not only that, but situating the indicator where I could read it turned out to be an exercise in frustration. The thick layer of Bondo on the mill means the indicator base does not stick well to the column. The indicator kept not only moving but even falling off. Thank goodness my reflexes are still better than my eyesight. Having everything on the side of the mill column in the way didn't help. I finally got smart (well, OK, not so stupid) and removed everything off the side of the column. I was then able to mount the indicator on the bed directly, which fixed that issue.

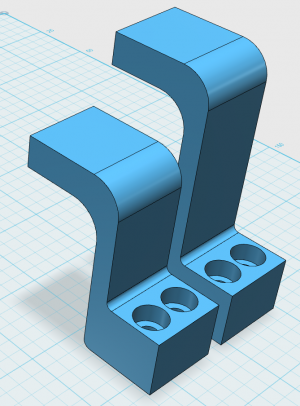
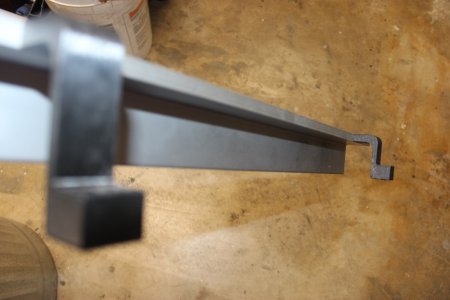
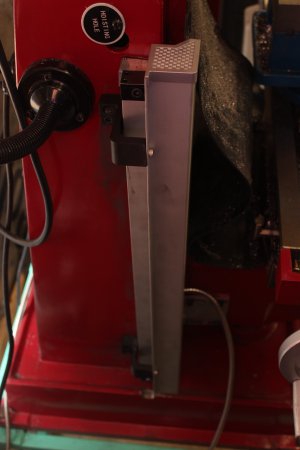
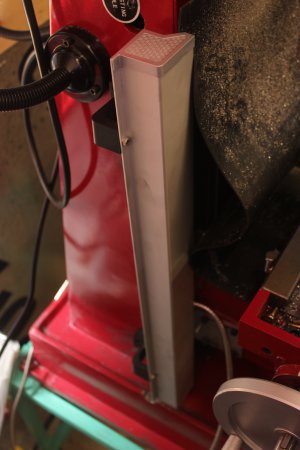
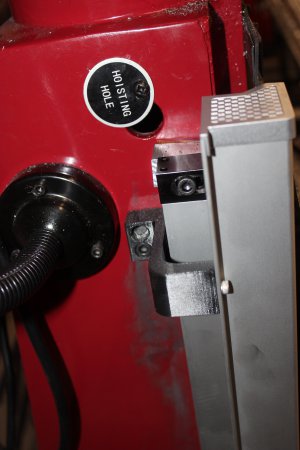
Because the scale port faces the mill cutter, I figure the scale guard is definitely essential in this case. If it were facing away or downward, as is the case with the X and Y axes, I think it would be acceptable to forego shielding the scale, which I had to do in the case of the X-axis, and I think the same may be the case for the Y-axis. The Z-axis scale must mount vertically, however, and it's not really practical to face the scale port away from the cutter. There is no means of mounting the cover directly to any feature of the mill, so I had to fabricate a pair of brackets. I had them 3-D printed, the upper one 7/8" taller than the lower one. This turned out to be a bit more slanted relative to the scale than I had planned, but there is still plenty of clearance across its entire length.
 
Last edited:
Phase IV: Drawbar

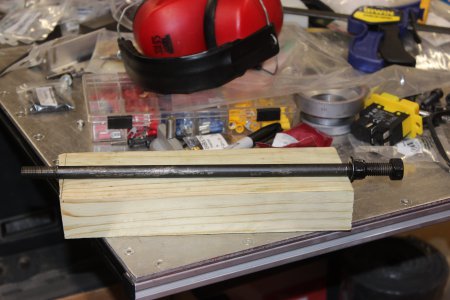
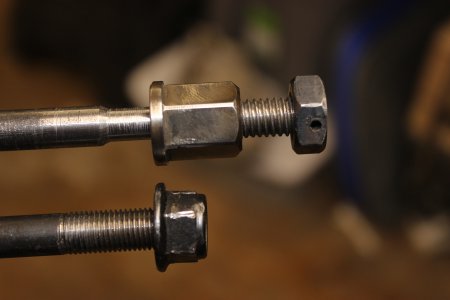
The drawbar which came with this lathe was really pathetic. The threads on both ends were poorly formed. Screwing the drawbar into some of the the R8 tools was all but impossible. In one case, I actually had to resort to using a pipe wrench! The flange nut which cinches the bar felt gritty, and was far too stiff when either cinching or removing the tool. On some of the tools, the drawbar would not fit far enough into the tool to allow the flange nut to be cinched down, meaning the wool was loose in the spindle column, and thus unusable. I did buy a quality HSS 7/16-20 tap and reamed all the tools. This helped substantially, but the feel of both the bar itself and the cinch nut were still "crunchy". I also bought a 7/16-20 die and ran it over the bottom threads. This allowed the bar to seat fully and smoothly into all the tools.

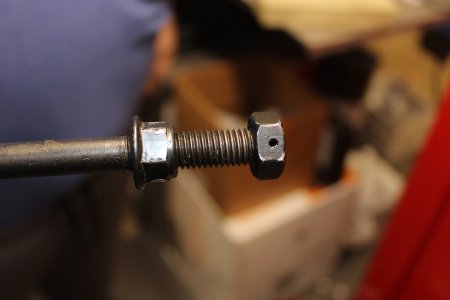
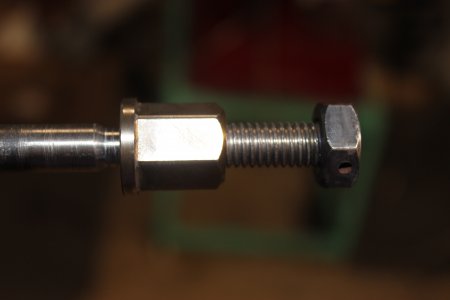
The roll pin holding the top nut onto the bar actually fell out. This meant to thread and unthread the bar I had to spin the cinch nut all the way up to lock the top nut and then break it loose when I was done. The bar itself is 7/16" diameter, of course, but the top thread is some sort of weird, nonstandard, oversized thread, although still 14 TPI. The cinch nut was quite soft, and its flats even stripped during one of the really aggressive operations (with the pipe wrench.) Fortunately, it was right after that the tap and die arrived, so I was able to ease the threads, making the torque on the nut far more reasonable, and even stripped, I could still tighten and loosen the nut.


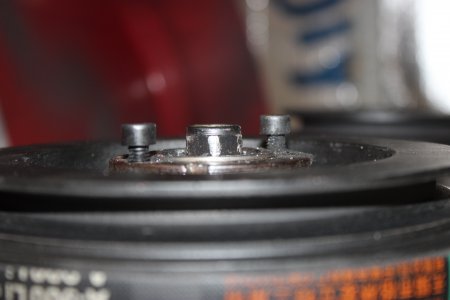
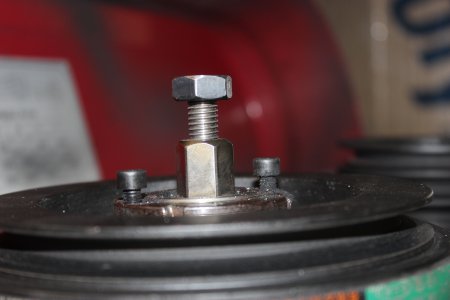
There appears to be a harmonic balancer on the spindle drive pulley. In any case, there are two cap screws that stick up above the pulley. The cinch nut was shorter than these two screws, making access to the nut limited and sometimes a bit difficult. Furthermore, the top nut is larger (3/4") than the cinch nut (18mm), preventing the use of a box-end wrench on the cinch nut. I purchased an 18mm flare nut wrench, which helped with both issues, but not perfectly, especially when the cinch nut was threaded all the way up to lock the top nut.

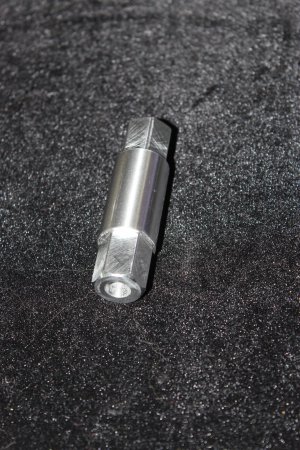
I machined a new flange nut out of drill rod and tapped it to a standard 7/16-14 thread. The old nut is 15mm tall. The new one is 24mm tall. I bored a 1/4" deep relief hole in the bottom of the new flange nut. I turned the old threads down to a proper 7/16-20 and added some relief behind the threads. The maximum depth for the old nut was 32mm from the bottom of the top nut. The new one can thread down 44mm, yet still with more threads engaged than the old nut, and several mm greater travel.

I actually have two drawbars on hand, both with the same issues, except for the loose roll pin, so I upgraded both of them. I hardened and tempered the new nuts, shielding the threads so they are less brittle. I welded the top nuts in place. The cinch nut how moves as smoothly as silk.
 
Last edited:
Back
Top