Craftsman power hacksaw rebuild.

RaisedByWolves

Mangler of grammar, off my meds.
H-M Supporter Gold Member
Joined
May 7, 2023
Messages
1,332
Trying to cut things to length in a small shop can be tricky. I have a small bandsaw, but cutting round stock can be problematic and the blade speed on these is generally too high to cut steel with anyway.

I had a small Dunlop branded unit years back that was in pristine condition, but I sold it off long ago for lack of room. Found one on FBMP that was cheap enough and close enough to acquire, so I went and bought it.


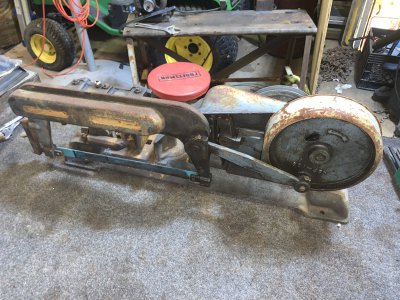
Here it is when I got it home. Ugly, Ugly, yo mamma says you ugly! U.G.L.Y. Ugly!

img_3634-1-jpg.465859

img_3635-1-jpg.465860


Got it home and wound up using it for a project as my big boy hacksaw didn't want to cooperate. This is setup with a DC motor but the controller is shot, so I tried to hook it up to a couple batteries and it worked.....kinda, but it was going to be a hassle so I used the new hire.

IMG_3652[1].JPG


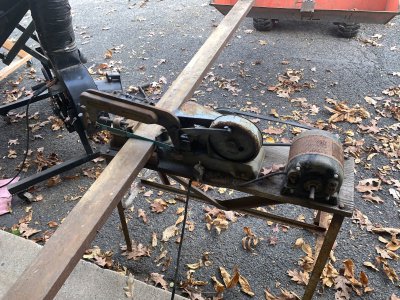
The saw worked well in a pinch, but after I put some time on it I found a few things that needed attention. It worked OK as it, but the vise and bushings needed attention and it was ugly as sin so I decided to give it an overhaul.
IMG_3657.jpeg


Got it off of the stand and on to the bench where I could start disassembling it.

Ugly on this side.
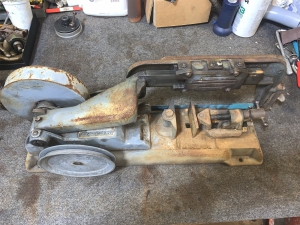

IMG_3750.jpeg

And on this side too.


IMG_3751.jpeg
 
Last edited:
One of the issues I had early on was that the vise was acting strangely when trying to clamp the stock for cutting. It would work in certain positions buy not along its entire length..

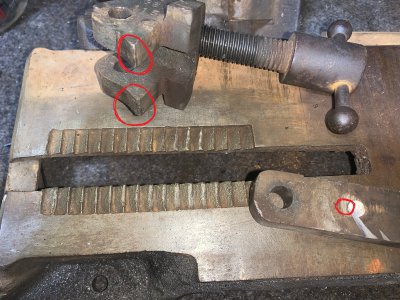
Once I got it all apart I understood why. Someone at sometime in the last 60yrs made a new bar for the portion of the vise that engages the saw toothed vise closing mechanism and made it too long and put the fixing rod at the wrong height. This changed the geometry of how the vise functions and made it chip up all of the teeth in certain parts.


Here you can see the vice rack on the bottom casting with the mangled saw teeth, the pawl points that engage those teeth (circled in red) and the fixing bar that was made incorrectly, with the proper pin position circled.


sawparts.jpg


Ill probably make a new saw-toothed section for the base to replace the mauled teeth as some of them are just too bad and I don't want to put a bunch of work into this (Even if most of it is cosmetic) and leave that looking ugly and working marginally.

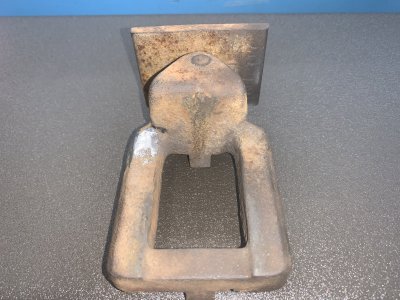
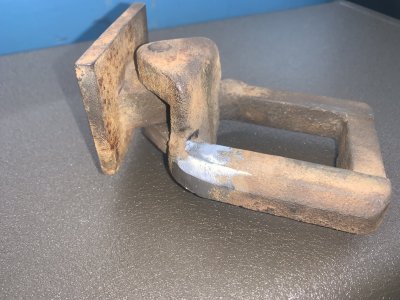
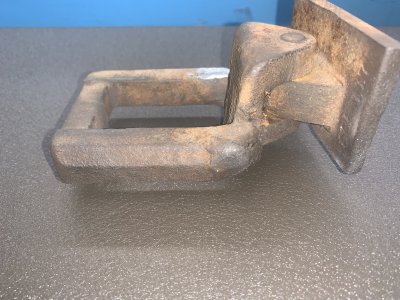
The Pawl points I can dress back to proper pointy points on the belt sander and then just adjust the height of the sliding jaw shoe to compensate by milling. Oh yeah, that has been busted and welded. I'm torn between remaking that part from scratch or just leaving it as the weld does look pretty good.

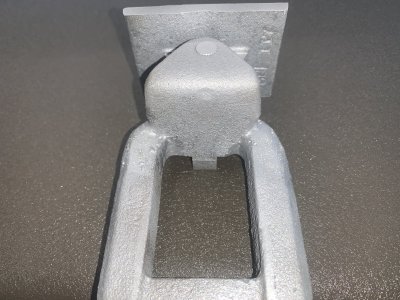
You can just make out where the welds are on the bottom. A little bit of porosity on the left, but not bad at all for welded cast iron. Top was never dressed and is rough as a cob which is how I noticed it had been welded in the first place.


IMG_3764[1].JPG


Oh, and I need a new Craftsman emblem, this one is toast.


IMG_3766[1].JPG
 
Fun project! What's the plan, full rebuild and new paint?
 
What a very cool project. Love this stuff.
 
Thanks guys, this should be nice when completed.

And yes, a thorough rebuild is planned. Bushings, pins and all.


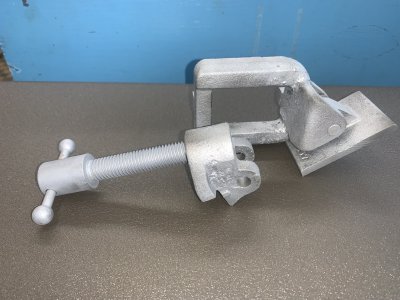
Looked over the sliding jaw and decided the repairs were well done enough to keep it so I started here with dressing back the welds.

Here I have the left side done and the right side as found.


IMG_3814.jpeg


IMG_3815.jpeg


Note the big blob of weld on the right side.


IMG_3816.jpeg


After dressing the welds back I found the cleaned up portions to be a little too smooth, so I stippled it randomly with the point of a tap, drug a stick welder rod over it a bit and sandblasted.

Looks better, and paint will do the rest.


IMG_3817.jpeg


All three pieces cleaned and ready for paint. I’m going to leave the screw and handle plain as well as the pin for the pivot of the sliding jaw.

I don’t like jobs where it looks like the person who did it just drug a brush over the whole thing, rather I like the contrast of leaving parts plain while others get paint.


Here’s the three pieces I got done today together. I may need to mock the welds back a little, but the original weld and surrounding area are camouflaged enough.


IMG_3818.jpeg
 
Last edited:
Had this project on the back burner for a while.

Got about half of the parts cleaned up, sandblasted and primed, but this fell by the wayside as I have several projects going at once as usual.


I kinda got stuck on figuring out what to do about the bad teeth on the speed vise area of this saw and I wound up just biting the bullet and buying a whole new base off of e bay.

Got it in today and its in much much better shape.


Old.

IMG_4059[1].JPG


New.


IMG_4060[1].JPG


Not perfect, but far and away better than the old one. I actually paid more for the new base than I did for the initial saw purchase, but this will speed up the restoration process and I still only have $100 into it so far.

People ask big money for these in good shape, and buying the parts months apart takes this sting out of the dollar outlay somewhat.


One of the worst parts of this machine when I got it was the large driven pully. I should have taken a video of how bad it was but I was unsure I would be able to save it and thought it just might explode on the lathe trying to get it to run even somewhat true.

Turned out that it was fairly easy if not time consuming to get it back in true.


After getting the major wobbles out of the pully, I needed to remove the dented portions of the V section. There were 4-5 places where it was damaged fairly badly, so I marked each of these and put it up on an 8" kurt vise to hammer them back into shape.


Marked:


IMG_3872[1].JPG


And gently rapped back into shape with a brass punch and a large hammer.


IMG_3874[1].JPG


That bad spot was one of the lesser defects, but I only at this point realized this was salvageable and started documenting the process.


The end result was remarkable.


.
 
Last edited:
I am curious, why wouldn't you just throw the ratchet teeth on the mill and re-machine them? If it didn't work out, they were toast anyway. I am pretty sure they would machine up really nice. Keep up the good work.
 
I am curious, why wouldn't you just throw the ratchet teeth on the mill and re-machine them? If it didn't work out, they were toast anyway. I am pretty sure they would machine up really nice. Keep up the good work.
The teeth are integral to the casting.

If I tried to mill them in place I would wind up cutting out the support on the side and even then they would likely come out too short.

I had planned on making the teeth out of a chunk of steel and inserting them, but I’ve got enough irons in the fire so I threw money at it.

Something I hate doing.
I completely understand. Thanks.
 
Back
Top