Need advice on rebuilding bellows on die filer.

While waiting for the bellows material I drilled a hole in the casting for a drain plug. SUPRIZE!!!! The main gear box is aluminum. Easy to drill, will add teflon tape to 1/8th" pipe to keep leakage down. Pipe,collar and bull plug to finish.......This machine had no roller on the overarm so today while at the play house I build one with a bearing and some brass pressed on the outside to save the file teeth. Yep, I forgot the pics.....Tomorrow.......I promise.
Hi,
I have not started on my filer yet, getting all I need to do the job. I am a newbie, so I was wondering exactly what will plug a hole for oil change so it does not leak. Just an oil plug with teflon tape?
What is a collar?
what is the nipple used fof and what is its part description so it can be ordered.
I am not sure whether to use brass or 932 bronze, 1/2" round or 3/4 in round. How long will you make the roller.
I have a round disc On top of bellows area, square steel at top, and i do not know yet what is covered by felt. Hoping bottom piece to fit bellows on is still there.
Do you have pics of filer with no bellows to show how both ends of bellows were fitted on?
Thanks,
Jon
 
Last edited by a moderator:
While waiting for the bellows material I drilled a hole in the casting for a drain plug. SUPRIZE!!!! The main gear box is aluminum. Easy to drill, will add teflon tape to 1/8th" pipe to keep leakage down. Pipe,collar and bull plug to finish.......This machine had no roller on the overarm so today while at the play house I build one with a bearing and some brass pressed on the outside to save the file teeth. Yep, I forgot the pics.....Tomorrow.......I promise.
I have solid pieces of both 932 bronze and brass 330 or 360. I noticed you said you were building one with a bearing and some brass pressed on.
How exactly would you build an arm as you describe.
Your idea sounds great, and I would appreciate any inf you could post. Especially a parts list and the tools that worked for you.
I like dealing with McMaster-Carr, get quality materials and. Really wide variety of items.
Thanks,
Jon
 
Last edited by a moderator:
A collar connects two pipes together with female threads in each end.
The nipple is 2.5 " long to allow drainage without making a mess.
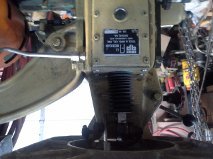
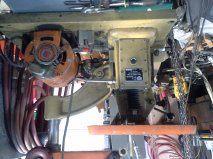
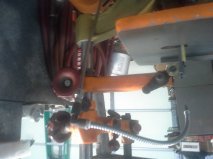
I removed the table. Drain gearbox. Take side cover off. Remove the 6 screws that hold the top plate to the gear box. There are two plates,the bellows bottom is sandwiched between them. Remove the two allen screws that hold the 1/2 inch square to the scotch yoke.
Remove the top plate and shaft. The square shaft has two "washers" at it's top. The top one will move upward to free the top of the bellows. Replace the bellows and reassamble in reverse order. Pretty straight forward I thought. I used 6" of bellows material. I think it would be able to use only 5" but I bought a foot so I just cut it in half.
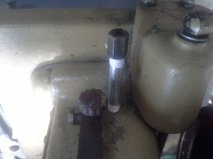
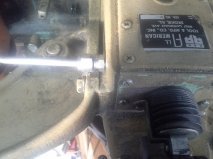
I put the drain in the lower left corner of the front of the gear case. The nipple is screwed into the box and a collar is on the outer end with a plug to allow drainage into a container to avoid a messy cleanup.
These pics are all I have for now. I can take more if needed.
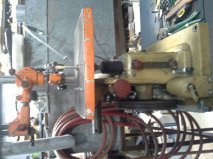
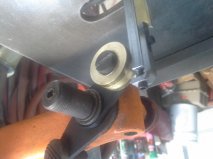
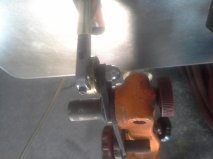
Well,well,well, the pics are upside down or sideways.........hopefully you can see what you need to see anyway.....

filer1.jpg filer2.jpg filer3.jpg
 
A collar connects two pipes together with female threads in each end.
The nipple is 2.5 " long to allow drainage without making a mess.
I removed the table. Drain gearbox. Take side cover off. Remove the 6 screws that hold the top plate to the gear box. There are two plates,the bellows bottom is sandwiched between them. Remove the two allen screws that hold the 1/2 inch square to the scotch yoke.
Remove the top plate and shaft. The square shaft has two "washers" at it's top. The top one will move upward to free the top of the bellows. Replace the bellows and reassamble in reverse order. Pretty straight forward I thought. I used 6" of bellows material. I think it would be able to use only 5" but I bought a foot so I just cut it in half.
I put the drain in the lower left corner of the front of the gear case. The nipple is screwed into the box and a collar is on the outer end with a plug to allow drainage into a container to avoid a messy cleanup.
These pics are all I have for now. I can take more if needed.
Well,well,well, the pics are upside down or sideways.........hopefully you can see what you need to see anyway.....
Thank You very much,
seems pretty straight forward. Would like to keep up with your progress, takes me longer to do,cause of lack of experience, like what and how you make support roller , brass or bearing 932 bronze at 1/2" or 3/4" diameter by maybe 1" long?
Jon
 
More details of my All American.
Back up roller- brass with a small roller bearing pressed in to the bored brass. Mounted on a shoulder bolt to the over arm.
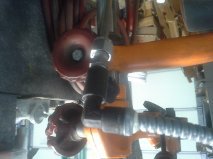
Blower assy. An oil spout and some 1/4" SS tubing. Works great. Oil spouts may have odd threads.......modify to suit your needs
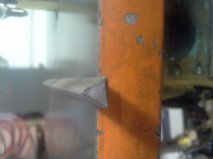
The polished triangle file end was done with the stone holder pictured with the roller. Easy to make. 1/4" square rod. 1/4" x 1/4" stones cut to 3 inch length with a diamond dremmel tool. Chevron notch on each end to retain the stone. The bottom retainer is 1/8 X 1/4 1018 with the bevel ground on it and silver soldered to the square steel. The upper clamp is 1018 also, bent over a piece of tool steel to make the 90 degree top.And add a slit for sliding on a 4-40 button head screw (they are on order,pictured is a shortened 4-40 cap screw). The top is a 4-40 x 1/2" socket cap screw to allow it to be tightened with your fingers. Smooth as mothers milk on a HARD piece of steel,ie a file. Hand parts can now be fitted with precision and care. YEEEEEha. I love it when a plan comes together. (George Peppard)
(More pics are available if there is any interest in the hone attachment)

drain.jpg lower blower detail.jpg upper blower.jpg upper blower detail.jpg polished  file end.jpg roller detail.jpg roller detail 2.jpg
 
Cactus Farmer,
If you are posting your pics in that orientation just for my benefit, Thank you! ;)

Cheers Phil
 
Cactus Farmer, nice to see your fix!
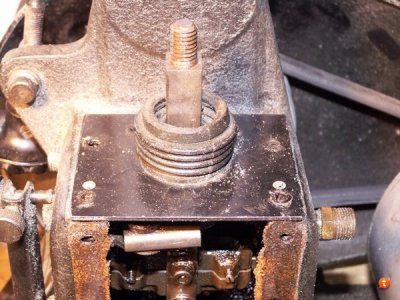
My do-all came to me with a bad bellows. Looks like it had been left sitting with the file down and the rubber eventually decided to stay that way4ygabata.jpg
I'm not quite up to spending 60 bucks on the puffer yet, but I might get there.
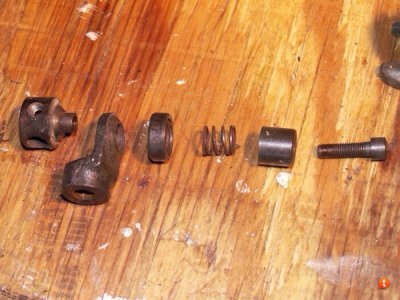
I'm a little curios about the way your file holder is designed. Does yours just screw on above the washer/flange that holds the top of the bellows?
Here's a shot of mine in pieces.
Cheersetu6ade4.jpg


(Insert catchy saying here)
 
I didn't take pics of the file holder assy. but I will today. It is different than yours as it has a "ball" with a hole thru it on the end of the square shaft. The parts on the right side of your pic appear the same. My file holder is a "V" block with a t-handle screw to clamp the files and other accessories to the yo-yo shaft. You can make a holder like mine and swap in out. The ball is to allow you to square up the files with the table. It seems you are limited to files with a small round shank.
 
Lewis,
could you please explain how you made the teardrop and its purpose, not clear on that part.
Thanks,
jon

I have trouble hearing on some days, i think I missed some of your answers yesterday.
Jon
 
Actually my holder takes both round and triangular files. The hole is teardrop shaped, even though might not be clear in the picture. I figure it could be reproduced by just drilling a hole and attacking it with a couple of triangular files.

At some point it might be nice to make a holder for a saw blade.

Too many ideas, never enough time to work on all of them.


(Insert catchy saying here)
 
Back
Top