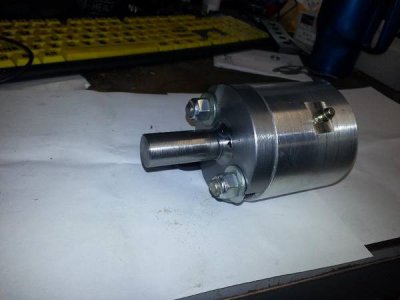
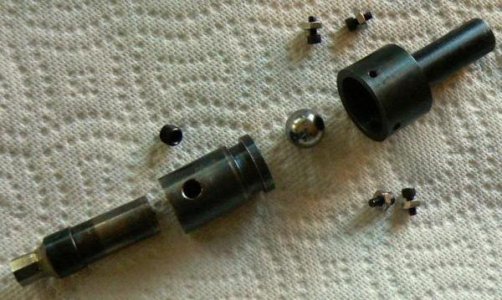
Shop made Rotary broach holder and broaches.

After it cooled off, I put it in the band saw to slice off the extra bit of thickness.
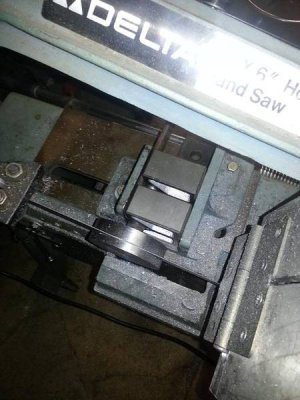
20140114_124004_zpsw4kgtssw.jpg

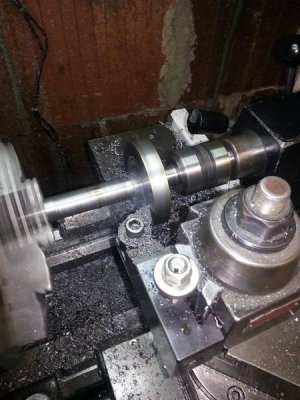
Then I chucked it up in the lathe to face off the mating side. And turn the large OD to the size of the Rotary broach body. I also re-center drilled it for the next operation.
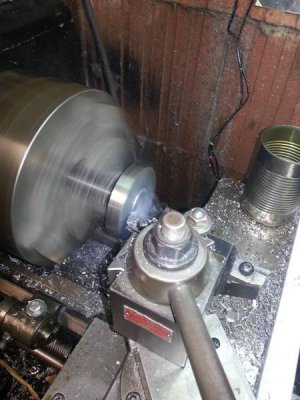
20140114_135613_zpswtehoemk.jpg

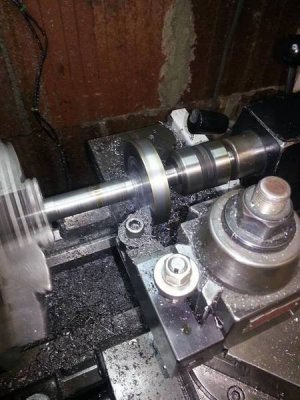
Turning the back side down. There was surprisingly, very little warpage from the welding operation. There might have been .002 at max warpage on the back side. I actually took off about .035 on the back. I also cleaned up the weld and cut that on a 45* angle to the shaft and plate.
20140114_151439_zpsypaa1jkg.jpg

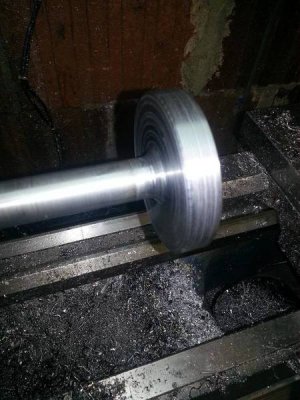
Here's the part. The only thing left is to cut the length of the shaft to about 2" in length. and mill the slots for the tail adjustment.
20140114_195049_zpsrhj6s1uh.jpg

Marcel
 
Last edited:
I haven't made much progress on the broach holder this week. My time is pretty limited with me working my buns off lately. I'm trying to come up with a good solid mounting for the tailpiece in the vice. To mill the slots I have to mount it shaft down, grasping by the shaft with the plate up. I don't have any v slots in my mill vice or really any good v blocks.

I've been wanting to make up a new set of soft steel jaws for the mill vice for some time now with a horizontal and vertical V milled into the jaws. I'll be working on those this week. Especially since I now have the surface grinder to be able to grind them in nice and straight.

Thats it for the progress report.

Marcel
 
I'm finding this thread fascinating as I've always been intrigued by rotary internal broaching.

However, I know nothing of rotary external broaching. I assume it puts splines on shafts?

I understand how an internal broach bit climbs around inside a hole to cut the shape, but I can't picture it externally except perhaps in the form of a knurl.

Little help?

M
 
External broaching works the same way as internal. The broaches have a 2.5* internal taper on them for clearance. The concept is exactly the same. The external broaches, however would be extremely difficult to make in a home shop. I'm not even sure how they make the external broaches. EDM maybe?
 
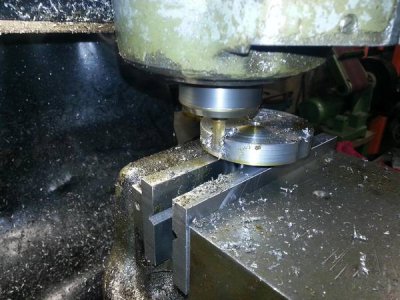
I finally had some time to work on this some more. I finished up the v-groove vice jaws for the milling vice last night and went right to work on the tailpiece. You can see the new jaws in the photo below. There's a horizontal and a vertical groove in them to hold round objects securely.

20140121_223153_zpsz5ystgzu.jpg

The plate that I used for the slotted part was a piece of hot rolled that I had laying around. It left a lot of heavy burrs after I finished milling the slots. So, it went back in the lathe for a final cleanup.

20140114_151439_zpsypaa1jkg.jpg

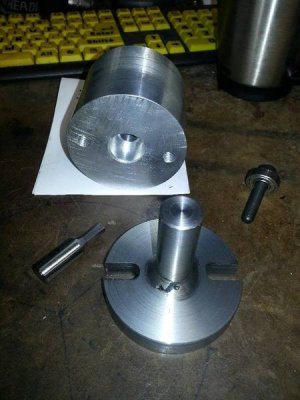
A photo of the completed back plate and the body. There's a 1/2 shank by 1/4"hex broach that i bought in the photo also. I bought it to grab dimensions from it for the other broaches I'll eventually be making for it. The little bearing and socket cap screw goes into the back side of the body and will eventually screw into the shaft. The cap screw draws the shaft back which holds everything together.

20140122_082833_zpslszqjlcc.jpg

Marcel
 
I finished the broach holder shaft last night. I forgot to take pictures of the whole process. Hopefully you can figure it out by looking the completed part. I finished the setscrew hole and the zerk fitting this morning.

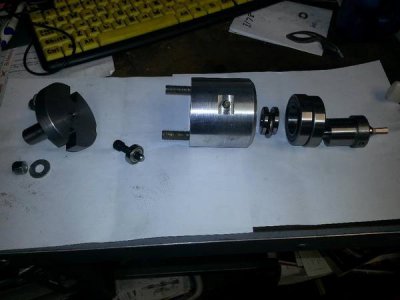
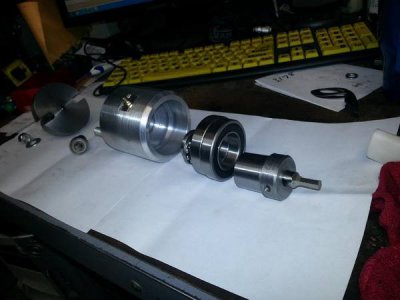
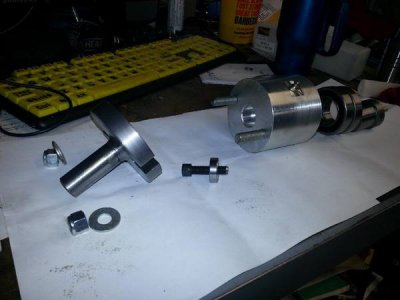
Here's a blow up of the parts as they would go together:
20140125_112058_zpswsqzhork.jpg

20140125_112044_zpslk1iy1w8.jpg

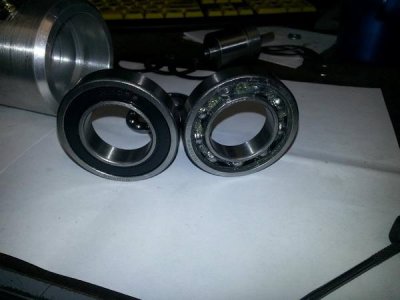
20140125_112052_zpsnnt3t5ke.jpg

I removed the bearing seals on all but the outer bearing seals so that grease can flow from the zerk to all the bearings.
20140125_114728_zpsg6ueaid2.jpg

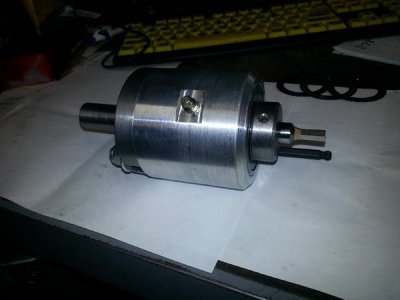
The completed assembly.

20140125_115542_zps36euksd0.jpg

20140125_115547_zps5nktopmx.jpg

All that's left is to grease it up and give it a try in the lathe.:))
 
I used this yesterday to make a 1/4" hex in a piece of scrap steel. It works great. No issues. I went for mild steel right off the bat.

Some things I might do differently if I were to make one again:
*I would use smaller ball bearings to make it a little more compact. I could have used 1" ID bearings which would have made the OD smaller too.
*I'd try to shorten up the body a little bit, by making everything a little more compact. ie: tighter thrust bearing, less meat behind the thrust bearing, instead of a socket head cap screw, I would use a button head. A small thin thrust bearing behind the retaining screw instead of a roller skate bearing.

With those changes, I could have shortened the whole assembly by about .75"...maybe a little more.

It's pretty easy to adjust it to center on the hole. I've seen some guys use indicators with a blank rod to get it centered. There's no need for any of that. I eyeballed it centered and away I went. Theres enough tailstock flex, that any small misalignment, within reason, self corrects.

Marcel
 
XALKY,
Thank you for posting this project. I have started to make one for my shop from your idea. I could not afford one otherwise
 
I love the simplicity of your design. I wish I would have seen it before I made mine.
 
Back
Top