The Stars Have Been In Alignment For Me This Week. Just Got My First Lathe, A D/r 11x36, 25-100

Working again on the SB today. Got it working, though. Made my first test cuts. Since I don't yet have a precision level, I just turned a test piece about 9" long and tweaked until I got it within .0005 on both ends. It will work for now. I hope to be making some shafts and trimming some bushings for the DR by the end of the week.

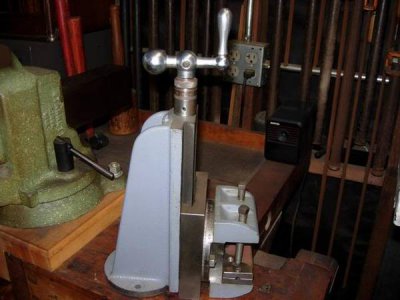
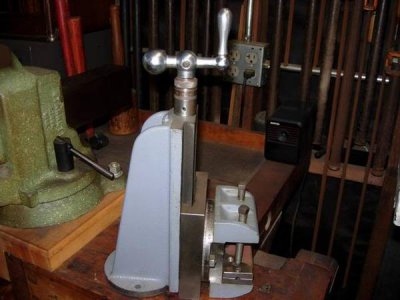
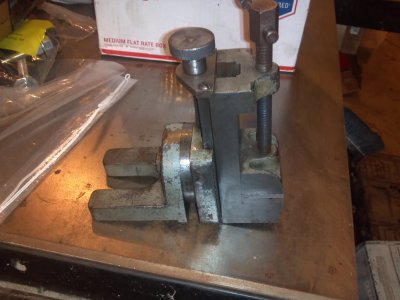
Received my new Palmgren 250 this evening. I'm pleased with it. I'll be able to use it on both the SB and the DR for cutting keys and limited machining. It will be a nice accessory until I get a mill...eventually.
2013-12-10 19.02.54.jpg

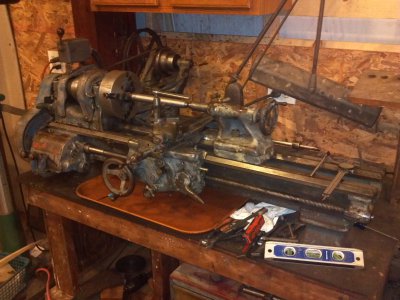
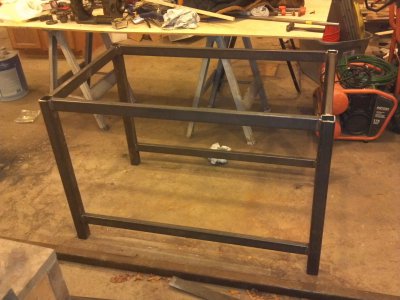
I started a new workbench on which to mount the Sb. The old wooden bench it's on has got to go. The new one has 2x2x3/16 legs with 1x2x1/8 cross members. It will have drawers, shelves, and a cabinet when it's done, to house all the tooling, and leveling feet. Should add some good weight and stability to the little machine as well.
2013-12-10 18.13.15.jpg2013-12-10 18.13.30.jpg

I hope to be getting back to work on the DR this week. Still waiting for some parts.

TH

2013-12-10 19.02.54.jpg 2013-12-10 18.13.15.jpg 2013-12-10 18.13.30.jpg
 
Received my new Palmgren 250 this evening. I'm pleased with it. I'll be able to use it on both the SB and the DR for cutting keys and limited machining. It will be a nice accessory until I get a mill...eventually.

I can't quite see how the Palmgren can be mounted to the Rockwell 11". Is there more to the mount than is shown or will you be making something? To the tip of the handle, the Rockwell is nearly 14" tall. Will yours center on an 11"? BTW, nice clean up job on the SB9.
David


DSCN1245.jpg

DSCN1245.jpg
 
Awesome thread and work sofar man! I found this because I picked up a DR 11" a month back as a first machine myself. I got crazy lucky on mine, it was a family owned machine shop way back when it was new. Had very limited use, then sold the biz and it sat in storage for 20+ years. One nick on the compound and that’s literally all the damage I could find, other then being oiled and put away for 20+ years so its covered in thick nasty crap, but no rust!

the only stuff that came with it that was rusty was the collets, the MT shanks on the pile of drills, and some other msc loose stuff. What are you using to remove the rust and grime from your rebuild? I see a crock pot there with a part in it. :) I can permanently borrow my wifes if need be.

Or does anyone have a good recommendation to remove the surface rust from small parts?


Keep up the good work and I will have to book mark your thread!
 
My cast parts will be going to the automotive machine shop and be hot tanked. They look like new when done. Tim
 
Dave,
Some people mount the Palmgren on the compound like a tool post. Not the most solid method, but will work for cutting woodruff keyways. Eventually I will make a base that will mount in place of the compound, like the DR unit does. I might even be able to clamp it to the cross slide using the T-bolts that normally hold the compound in place. I haven't tried it yet. I haven't compared the two, but I believe the DR unit is larger than the Palmgren 250. I paid $200 for the Palmgren. Couldn't afford the DR unit. Once I get a mill, I'll give the Palmgren to my dad for use on the SB.

Just a thought, MLA offers a cross slide casting (A-11) that measures 11-1/2x4x1-1/4". It has T-slots all along the top. Seems like that could be machined to fit in place of the DR cross slide. If a couple T-slots were eliminated, one might even be able to machine it to fit the DR compound on top of it as well. Maybe a bit "over the top", so to speak, but might be a fun project. It would be great for operations like line-boring, or to mount a milling attachment like the Palmgren or a rear tool post.

Krazykid,
The crock pot has rust remover in it. I found warming the solution increases its effectiveness in removing rust. Leaves unhardened steel with a gray coating that resists rust. Leaves hardened steel with a blued finish, almost like a firearm, but not quite as durable. If you don't like the coating, it comes off easily with a wire wheel, steel wool, or scrub pad. If you de-rust using electrolysis, though, you'd better get oil on it as soon as you get it out of the tank, because it will flash rust almost immediately. The rust solution I use is Evap-O-Rust, which is carried by Harbor Freight. It's not cheap at around $22/gal, but it's very effective, especially in the crock pot.

Hot tanking the cast parts is the best way to go, as Tim said, if you intend to paint, however they must be completely disassembled and you can't hot tank small parts (the hot tanks I've seen are like big dishwashers). I cleaned all my parts with Mineral Spirits, until I got tired of the smell. Found kerosene is cheaper and gives off a lot less odor, just as effective. I let heavily gunked parts soak in it overnight, then clean with a stiff brush. After that, I hit things like gears with the wire wheel on a small drill press to get the last of the staining that the old lubricants left and clean out the teeth. You want to be careful with surfaces that are tolerance critical, though, and only use a wire brush on steel parts.

For surfaces that are tolerance critical, such as bed ways, I cleaned with a razor blade glass scraper lubricated with oil or WD-40. You can get those at any box store or hardware. The razor is harder than the bed and will dig in and leave a mark if you are not careful. Buy a full box of blades and change them often. I didn't worry too much about the staining left after the rust was removed, because any use of an abrasive will further erode the bedways, although probably only minimally.

Wish my DR had been in as nice of condition as yours. I already know I'm eventually going to have to learn to scrape, so I can get the saddle and tailstock ways back into shape, but at least the bed appears to be in decent shape. Haven't measured it yet.
 
Great I will have to get a gal of the rust remover. thanks for the tip.

Speaking of hot tank, you reminded me I have a block i need to get back from the machine shop thats been there for over a month i totally forgot about.
 
Got my parts order from Plaza Machinery. Thanks Joe!

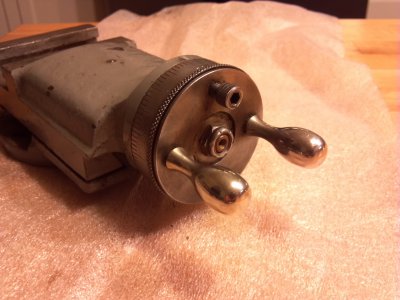
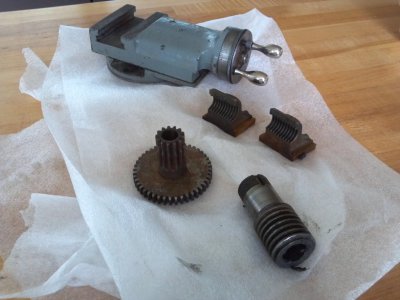
Received a complete compound, a worm, the compound gear for the carriage drive, and a set of half-nuts.

Only waiting on a tumbler gear now.

I have the South Bend 9A operational now, so I can get started making the shafts I need to replace. "To do" list for this week looks like this:

- Finish the new workbench for the South Bend
- Finish cleaning the DR bed and cabinet
- Paint some parts for both the DR and the SB
- Install all the new bushings in the DR QCGB and apron
- Make three new shafts - one for the QCGB and two for the apron

If I can get all that done this week, I'll start reassembly next week.

2013-12-14_20-18-40_430.jpg2013-12-15 09.57.53.jpg

2013-12-14_20-18-40_430.jpg 2013-12-15 09.57.53.jpg
 
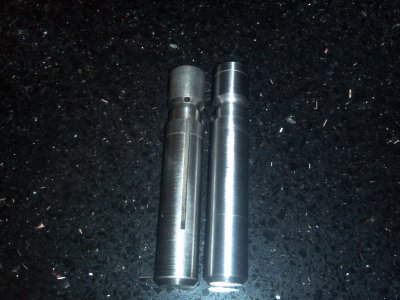
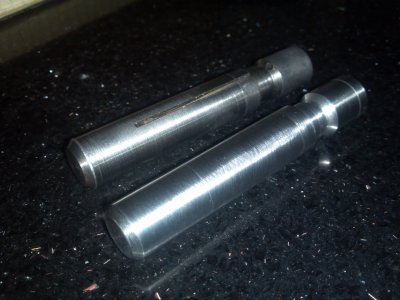
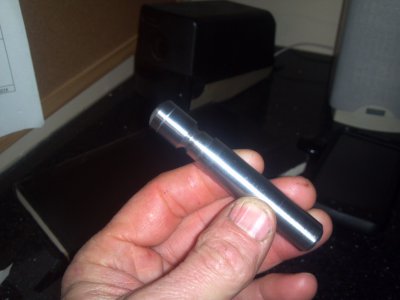
As my first efforts at becoming a hobby machinist, I have made two of the three shafts I need to replace on the DR11. One was just a matter of cutting to length, facing, and chamfering a piece of 1/2" TGP 1045. The other was a little more involved. I had a piece of 3/4" 1045 shafting that I turned down to about 9/16, then domed one end and machined an oil groove and set screw shoulder in it. I still have to drill the oil hole, machine a 1/16 oil groove lengthwise, and install the ball oiler in the end. It's been a fun learning project. I attached a couple pics of the latter shaft. You can see my little bugaboo in the end, where I turned the cross slide handle the wrong way and cut a small groove in the end. It won't show and won't affect performance, so it stays. The compound gear in the apron runs on this shaft to drive the carriage from the handwheel. There is no bushing, since it's a low speed application. Just steel on steel. The compound gear has a little wear and grooving inside (not too bad) and I don't have a reamer, so I left that end of the shaft a couple thou oversized (compared to the original) and I will use valve grinding compound to lap the shaft into the gear.

Tomorrow I'll finish this shaft up and make the shaft that holds the tumbler gears.

I'm having fun with my little South Bend 9A. Can't wait to be using the DR!

2013-12-18_21-03-39_908.jpg2013-12-18_21-03-04_137.jpg2013-12-18_21-04-19_917.jpg

2013-12-18_21-03-04_137.jpg 2013-12-18_21-03-39_908.jpg 2013-12-18_21-04-19_917.jpg
 
Tony, you might consider using a ball hone instead of lapping compound. Its a little more money but makes a beautiful fit. Tim
 
Lapping compound did the trick. You just have to watch that you don't get the parts stuck together while doing the lapping. I had the fit just a little too tight for lapping at first and got them stuck. Had to drive the rod out of the gear. Used a different rod to do the lapping until my shaft would fit enough to lap with. Came out beautifully, with about a thou or so of clearance for oil. Nice fit, no wiggle, and both the shaft and inside of the gear are smooth now.

Didn't get much time in the shop yesterday. Got the above done and turned a mandrel for the worm bushing, so I could turn it down to size. I'll finish that up today, I hope, then on to the last shaft and the last two bushings. Pics later.
 
Back
Top