Warco Wm14 Thread

I also looked at the Acorn - look's like just the job. Good luck with you next steps and do keep us updated.
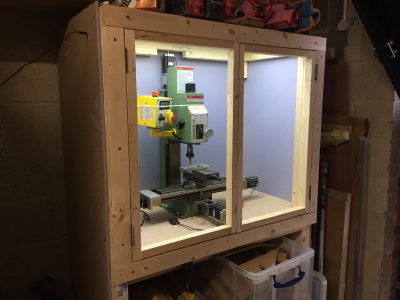
 
Here are some final pictures of the almost finished Warco WM14 CNC conversion which now works and has made chips! All I need to do now is to fit a front splash screen and to keep things simple, I’ve opted for a 0.75mm thick clear vinyl curtain to go across the front as the frame itself isn’t robust enough for sliding doors. As for coolant drainage I went for 2 x 1 ¼” sink drains which then flow through Mario Brothers inspired filtered pipework back to the tank. The coolant pump itself is a submersible pond pump 220V 60W from Ebay that cost £17.99 and works well.

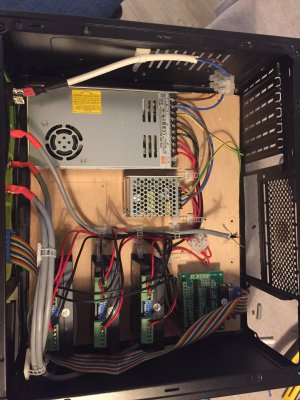
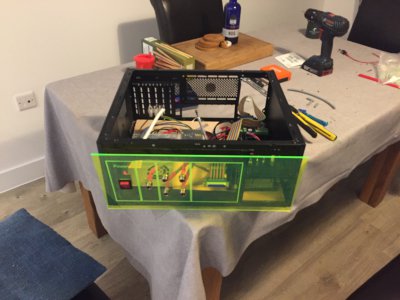
The control box has a 3mm clear acrylic cover which allows me to view the Centroid Acorn control board LED’s and provides sound proofing from all the cooling fans.

You may also have noticed the Xbox One controller by the PC keyboard. This is a brilliant addition which I first discovered via a brilliant YouTube video by a nice chap called Rick Sparber in which he demonstrates how to remap the controller and provides excellent instructional documentation
. I then found some further information on YouTube from another knowledgeable and informative chap called Franco CNC
, whose version of the controller remap I adopted. Fortunately, one of my sons had an Xbox One which he no longer uses so my controller was a freebie, I then went one stage further by purchasing a Microsoft Xbox One Wireless USB PC Adaptor so the controller fully remote.

Now the making stuff finally begins!
 

Attachments

  • IMG_20200916_123910.jpg
    IMG_20200916_123910.jpg
    4 MB · Views: 12
  • IMG_20200916_123933.jpg
    IMG_20200916_123933.jpg
    3.5 MB · Views: 12
  • IMG_20200916_123942.jpg
    IMG_20200916_123942.jpg
    3 MB · Views: 11
  • IMG_20200916_124113.jpg
    IMG_20200916_124113.jpg
    3.4 MB · Views: 12
  • IMG_20200916_124124.jpg
    IMG_20200916_124124.jpg
    3.2 MB · Views: 13
Here are some final pictures of the almost finished Warco WM14 CNC conversion which now works and has made chips! All I need to do now is to fit a front splash screen and to keep things simple, I’ve opted for a 0.75mm thick clear vinyl curtain to go across the front as the frame itself isn’t robust enough for sliding doors. As for coolant drainage I went for 2 x 1 ¼” sink drains which then flow through Mario Brothers inspired filtered pipework back to the tank. The coolant pump itself is a submersible pond pump 220V 60W from Ebay that cost £17.99 and works well.


The control box has a 3mm clear acrylic cover which allows me to view the Centroid Acorn control board LED’s and provides sound proofing from all the cooling fans.


You may also have noticed the Xbox One controller by the PC keyboard. This is a brilliant addition which I first discovered via a brilliant YouTube video by a nice chap called Rick Sparber in which he demonstrates how to remap the controller and provides excellent instructional documentation
. I then found some further information on YouTube from another knowledgeable and informative chap called Franco CNC
, whose version of the controller remap I adopted. Fortunately, one of my sons had an Xbox One which he no longer uses so my controller was a freebie, I then went one stage further by purchasing a Microsoft Xbox One Wireless USB PC Adaptor so the controller fully remote.


Now the making stuff finally begins!
 

Attachments

  • IMG_20200916_123910.jpg
    IMG_20200916_123910.jpg
    4 MB · Views: 15
  • IMG_20200916_123933.jpg
    IMG_20200916_123933.jpg
    3.5 MB · Views: 15
  • IMG_20200916_123942.jpg
    IMG_20200916_123942.jpg
    3 MB · Views: 12
  • IMG_20200916_124113.jpg
    IMG_20200916_124113.jpg
    3.4 MB · Views: 11
  • IMG_20200916_124124.jpg
    IMG_20200916_124124.jpg
    3.2 MB · Views: 11
That's so cool to see someone else had gone through this! I revisitied my cnc after a house move and some time away making a cnc router instead.

I decided I needed to child proof the machines and make them less noisy and smelly and also redo the electronics to get rid of some bugs, this included getting a new psu.

After a bit of tinkering and a lot of reading had it running well.

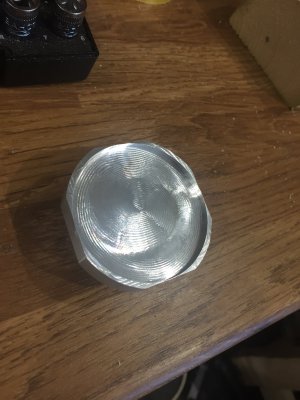
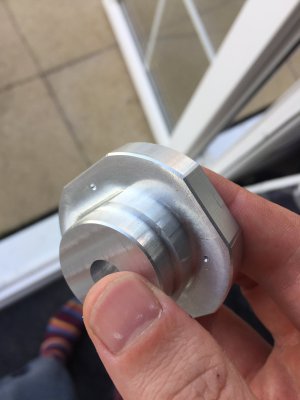
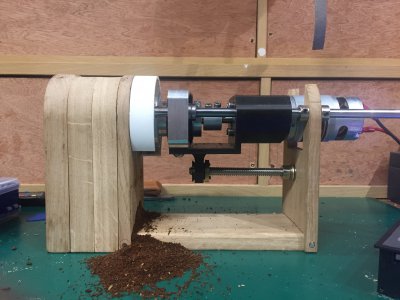
I started to build a coffee grinder earlier this year and here's a few snaps of components made on the warco wm14 and some progress along the way. Also learnt how to indicate and position workpieces for double sided work!
IMG_2195.jpgIMG_2414.jpgIMG_2413.jpgIMG_2734.jpgIMG_2737.jpg

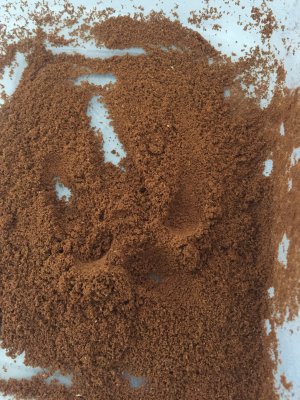
Oh and here's the grinder and it's output, the design is kind of flawed so it's on the back burner for a while!
IMG_2753.jpg
IMG_2579.jpg
 
Last edited:
Here are some final pictures of the almost finished Warco WM14 CNC conversion which now works and has made chips! All I need to do now is to fit a front splash screen and to keep things simple, I’ve opted for a 0.75mm thick clear vinyl curtain to go across the front as the frame itself isn’t robust enough for sliding doors. As for coolant drainage I went for 2 x 1 ¼” sink drains which then flow through Mario Brothers inspired filtered pipework back to the tank. The coolant pump itself is a submersible pond pump 220V 60W from Ebay that cost £17.99 and works well.


The control box has a 3mm clear acrylic cover which allows me to view the Centroid Acorn control board LED’s and provides sound proofing from all the cooling fans.


You may also have noticed the Xbox One controller by the PC keyboard. This is a brilliant addition which I first discovered via a brilliant YouTube video by a nice chap called Rick Sparber in which he demonstrates how to remap the controller and provides excellent instructional documentation
. I then found some further information on YouTube from another knowledgeable and informative chap called Franco CNC
, whose version of the controller remap I adopted. Fortunately, one of my sons had an Xbox One which he no longer uses so my controller was a freebie, I then went one stage further by purchasing a Microsoft Xbox One Wireless USB PC Adaptor so the controller fully remote.


Now the making stuff finally begins!
Impressive stuff Kaveman. Almost inspired to to get back to my CNC project. My mill has been out of action since Feb as I stripped a tooth off the hi-lo gear and had to wait for several months for Warco to get the are and be open to fit it for me. Easy job but there was just one 'cur clip' I could removed. I picked up the repair head last week so maybe now the nights are drawing in it's time to get back to the man cave. I'd be interested to see some of the finished pieces you have machined. what sort of tolerances are you getting compared to manual machining?
 
That's so cool to see someone else had gone through this! I revisitied my cnc after a house move and some time away making a cnc router instead.

I decided I needed to child proof the machines and make them less noisy and smelly and also redo the electronics to get rid of some bugs, this included getting a new psu.

After a bit of tinkering and a lot of reading had it running well.

I started to build a coffee grinder earlier this year and here's a few snaps of components made on the warco wm14 and some progress along the way. Also learnt how to indicate and position workpieces for double sided work!
View attachment 337373View attachment 337374View attachment 337375View attachment 337376View attachment 337372

Oh and here's the grinder and it's output, the design is kind of flawed so it's on the back burner for a while!
View attachment 337377
View attachment 337378
Ingenious design !
 
Hi, not sure if anyone is interested but I'm taking on the newer WM14B and converting it to cnc but keeping it usable as a manual machine too.
I have already converted the X-Axis and can provide cad files and pics as I continue.
 
Back
Top