What's a good technique to use telescoping inside bore gages?

For roughing on the lathe, I like to check this quick way, then take the fine measurements with precision measuring tools on the final finish.fig151.jpg
 
I have actually switched back to using inside spring calipers and micrometer instead of telescoping gauges. Probably because my set is not a great one (KMS tools, standard blue plastic pouch, enough said) but I get better results with the spring calipers, especially on smaller diameters. I suspect good quality gauges would be a different story but at moment I’m not springing (haha) for them.

-frank
 
Sherline did a video once on how to use ball and telescoping gauges that was really good but I can't find it. Here is one from Don Bailey of Suburban Tools.

Using ball gauges or small hole gauges is really a feel thing. You are trying to set the tensioning knob so that the contact point of the gauge touches the bore all the way around but not so tight that you cannot easily remove it. The only way to really tell if you have this technique down is to use an accurate ring gauge and practice until you can consistently hit the bore dead on.

Telescoping gauges are a different animal. It is less about feel and more about learning to set you spring tension on the locking knob correctly. The tension has to be set so that the movable arm can just move when you lever the gauge over as shown in most videos. I find that the tension is the key because you get one chance (per try) to get it right. Too tight and the gauge will read large; too loose and the arm will move as soon as you try to read it. Again, a ring gauge will help you to develop the feel that works for you.

The real advantage of a micrometer stand over a padded vise is that you can position the barrel of the mic so it can be read easily. The tips of the ball gauge or telescoping gauge should just contact the anvil/spindle of the mic; then take your reading. If you use a ring gauge to hone your skills so that you know what the ID should be, it takes only a short time to learn how to handle your mic. I find that if I haven't bored for a while, I have to practice for a few times to regain my feel. Once I do, I can usually nail a reading within half a tenth or better.
 
Don't over tighten the telescoping gauge lock more than necessary. It should take little effort to rock it over center. Also, if at all possible, get in a good position for rocking it and try to keep the rocking motion square in line with the hole bore center. I find that awkward holding positions for using telescoping gauges tend to make them read too small. The method requires doing it repeatably every time. Over tightening the gauge also can damage the plunger by galling it. And, keep the telescoping gage clean and dry, internal grit and rust are NOT your friends with them...
 
Some ring gauges have found there way to me. Need to practice this art some.
Guess the art is two fold - correct tension and rocking in the bore, and then correct tension on the micrometer. The mike ratchet seems too aggressive for this. But with these rings, hope to find a technique that works.
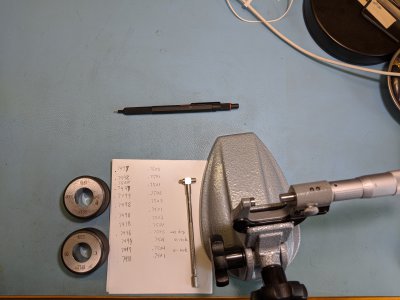
IMG_20200814_184109.jpg
0.3748, 0.3750, 0.7498, 0.7501, 1.5000
 
When reading in the mic, just touch the anvils to the tips of the telescoping gauge. You do not turn hard enough to click the ratchet. Just touch.
 
Just found out about the mike anvils while practicing. I think, if the mike is in the stand, it's ok to get the feel for just touching. What's not so easy for me right now is getting the consistent actual transfer of the bore to the bore gauge. I'll go through the rocking, measure it and say, hmm it's big. I then bring the gauge back to the bore ring and sure enough, the gauge is bigger than the bore. If I do it again (rocking through the bore) it seems to be closer to reality. Guess this is about the correct torquing and rocking the bore gauge. And, being able to do this in the shop - not sitting at a desk.

I measured the 0.7598 and 0.7501 ring bore gauges 12 times each. (At my desk.) You know, to practice. Mean measurement was 0.749825 and 0.750192. Standard deviation was 0.0000866 and 0.000108. I need more practice. This was with a non-pedigreed "B" telescoping bore gauge. Don't have the confidence that the measurement I'd take of an unknown would be close enough to reality. Need to drive that standard deviation down.
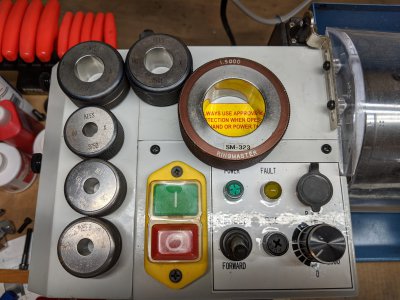
IMG_20200815_153818.jpg
Tried a few measurements with the 0.3750 ring gauges. Different feeling. Still hard to get the bore transferred correctly.
 
And then of course there is the physical surface you are measuring. If you are turning with a boring bar, your surface is a series mountain tops & valleys under magnification. And some of the mountain tops have 'snow on top' LOL (micro burrs). So at best your telescoping gauges are running across the tops. That's a 'measurement' all right, but may not be indicative of your final desired surface for precision work. Power feed turning or boring is no different that fine pitch threading although we don't think of it that way. The tool tip for turning has a larger radius so the overlapping scallops help keep the peak to crest undulations minimized, but eliminated.

I have a ritual on my final 2 passes where I dial in the exact same DOC (say 0.005") and I switch to 2 finer feeds. This does a few things. The DOC gives some consistency to the combination of material, tool & diameter. Sneaking up thou by thou can work on certain materials but not others especially if they like to work harden. You are giving the boring bar an opportunity to spring pass (relieve bending in the bar). Different feed also cuts across the hilltops as opposed to just deepening the same grooves like a record player needle if you keep the same feed. Also if you have been doing some roughing just prior the part temperature may well till be elevated. It may measure differently 5 minutes later as it cools.

To get the technique down, just find a bearing race & measure many times. The surface is hard & likely quite precise. So if you are varying +/- 0.001" its probably some combination of technique, gages or micrometer.

When you start getting into half thou or tenths you might be exiting the realm of turning & should be lapping. Even jaw/collet pressure can have a proportionately large impact depending on the material & wall thickness etc.
 
Last edited:
So if you are varying +/- 0.001" its probably some combination of technique, gages or micrometer.
This is the realm I am working in right now, when I'm careful.
When you start getting into half thou or tenths you might be exiting the realm of turning & should be lapping.
How is this done? Soft metal insert and slurry?
 
Also interesting on spring passes at different speeds to smooth out (a little) the bore. I'm not happy with the bore quality. There are some micro ridges in places that I can feel with my finger nail. Other parts of the bore are quite smooth. I could never measure the ridges with one of these telescoping things.
 
Back
Top