- Joined
- Oct 7, 2020
- Messages
- 2,113
That's exactly what I was thinking!Those ratchets will be shot very quickly turning with the spindle.

That's exactly what I was thinking!Those ratchets will be shot very quickly turning with the spindle.
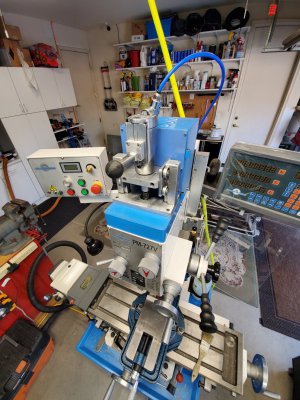
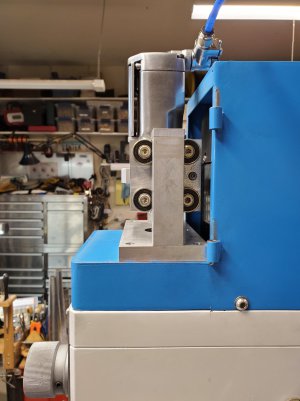
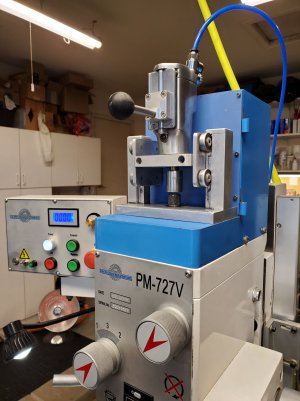
The idea was to have the impact engaged when the spindle is at the top most position. After making a bracket and using this design, I found that that when I frequently use the drilling function and raising the quill it wouldn't (at times) cleanly engage and make unexpected noise. Further more when engaged it would make a noise that was somewhat annoying, but that is easily overcome buy lowering the quill 1/2" as #Tio Loco pointed out. I also agree with #Tio Loco that most of the designs are way over thought and engineered. The unit I designed cost about $60 for the impact, materials and fittings. I've been using it for a few weeks now and it works like a charm.If you don't like the impact wrench setup, what's the alternative to purchasing an expensive custom power draw bar? Yes, I get making one, but what type? Tool(s)? Designs? I would like to be able to use R8 collet chucks to hold my tooling with the use of a power draw bar. Any suggestions?
KVan nailed it. My original design was a PITA to use. Noisy if the ratchet was engaged, and always fiddly if trying to use the quill for drilling multiple holes where you don't want the quill returning far enough to engage.The idea was to have the impact engaged when the spindle is at the top most position. After making a bracket and using this design, I found that that when I frequently use the drilling function and raising the quill it wouldn't (at times) cleanly engage and make unexpected noise. Further more when engaged it would make a noise that was somewhat annoying, but that is easily overcome buy lowering the quill 1/2" as #Tio Loco pointed out.
")