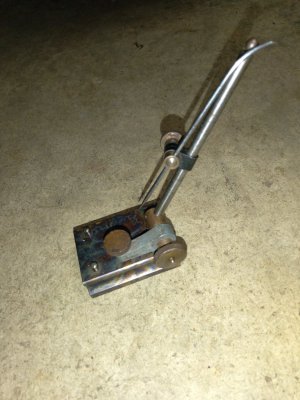
.030 taper while using a boring bar (?) you get what you pay for, the HF dial indicator stand makes a better frisbee than it does a tool, etc.

And yes, acetate = acetyl = Delrin.
Not the same thing.

Acetate is a human-made, semi-synthetic material derived from cellulose. More precisely, it's made from wood pulp combined with chemicals like acetic acid (vinegar), acetic anhydride, and sulphuric acid. Rayon is an acetate fiber.

Acetal (polyoxymethylene or POM) is a high strength, low friction engineering plastic that has excellent wear properties in both wet and dry environments. Acetal is chemically resistant to hydrocarbons, solvents, and neutral chemicals.
 
Last edited:
A 3/8" 2 flute end mill clamped in your toolholder would make a good boring bar for a 1/2 inch hole... clamp the end mill in the holder with the end cutting faces level and rotate the tool post counterclockwise a couple of degrees for clearance.

I do this occasionally for boring smaller holes.

-Bear
I've used end mills as small boring bars (on brass and plastic). They work great for through holes. And +1 on rotating the tool post a little, to get some side relief.

Attempting to bore a blind hole this way is a bit problematic because the end mill is rotated slightly -- so the bottom of your hole isn't going to be flat. You may not want to take this approach for your current project but it's a useful trick to know for future reference.
 
Flex in the boring bar is the same at the beginning and the end of the bore.
Probably just being argumentative, so forgiving me for that.
This is true in a proper cutting boring bar, but if the boring bar is cutting improperly, then the front edge can start the cut pretty much on diameter, but if the bar is rubbing, depending on exact boring bar geometry, it often won't start doing that immediately. This can lead to increasing pressure on the bar (and forces on the delrin/chuck) as it penetrates and the noncutting/rubbing part moves into contact. That becomes cyclical as the slightly narrower bore then increases deflection. Had it happen to me ...
Flex is likely occurring but it isn't the root cause. Delrin requires comparatively little cutting force with proper tool geometry. Something else is amiss. As you explained in post #11, ; either poor tool grind or rubbing due to improper geometry.
 
You mentioned that you had to completely disassemble your lathe because of space issues, If you removed the headstock, That is most likely the reason you are cutting a taper. The headstock will not be in alignment anymore if you just stuck it back on and bolted it down. Put a piece of material in the chuck and face it off, Run an indicator across the face or even use a straight edge with a flashlight under it, If it cut a dish and is not flat that is an indication that the head is not parallel to the ways.
 
You mentioned that you had to completely disassemble your lathe because of space issues, If you removed the headstock, That is most likely the reason you are cutting a taper. The headstock will not be in alignment anymore if you just stuck it back on and bolted it down. Put a piece of material in the chuck and face it off, Run an indicator across the face or even use a straight edge with a flashlight under it, If it cut a dish and is not flat that is an indication that the head is not parallel to the ways.
Or wear in either slide......
 
Your for the heck of it . Put the best running peice of roundstock you have in the chuck. Indicate runout within one thousandth. Take a layout stand and run it on the bed way flat where the tailstock rides put the pegs down on the stand so you can run down the edge of the flat.
Put an .0005 indicator in and see what you get. Because the tailback ways don't generally see as much wear it can be a possible clue as to what direction the head points.16797039718516028038204405019930.jpg
 
Your for the heck of it . Put the best running peice of roundstock you have in the chuck. Indicate runout within one thousandth. Take a layout stand and run it on the bed way flat where the tailstock rides put the pegs down on the stand so you can run down the edge of the flat.
Put an .0005 indicator in and see what you get. Because the tailback ways don't generally see as much wear it can be a possible clue as to what direction the head points.View attachment 442368
The ways on a unimat are round, not flat.

When I meant I had to tear my lathe down, I meant after the project was complete, which is why I couldn't take any set up pictures, not that I was taking it down each day and then having to realign it.

But I DO need a decent dial indicator stand, the one I bought from HF is not cutting it.

Especially since TTBOMK there is no DRO set up for a Unimat. (Though I guess I could make one with some spare digital dial calipers)
Look into a genuine Noga indicator stand. They are a bit more expensive than junk stands, but they work a lot better! I had one of those HF stands, and it was a terrible thing. Got a Noga, and my indicating issues went away. A lot more rigid.
 
Back
Top