1969 Honda CT90 Riding Restoration

well i went and done it again....

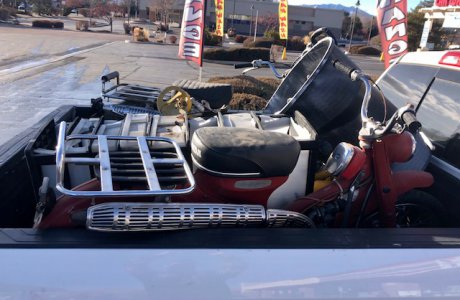
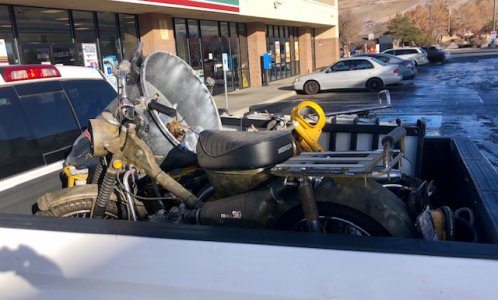
i found a heap of Honda CT90's
2 of the lil bikes are near running, as well as 3 disassembled frames, with motors, in differing states of decay.
i had to make a trip to Reno to do it, but i got a whole heap of stuff

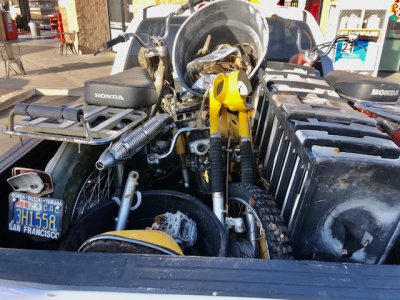
here is pictures of the haul !

it don't look like it, but there is a 1967 CT90, a 1970 CT 90 that are 95% machines
there are 2 1970's CT90 Frames and 1 1968 CT90 frame too
the motors have been partially disassembled on the 3 parts bikes-
i'll consider reassembly a challenge to take up!
there is a rolling organizer filled with gasket sets, seals, light bulbs, various electrical and ignition parts as well as used accessories.
IMG_4419.jpg
IMG_4420.jpg
IMG_4421.jpg


the fun has just begun!!!
 
Last edited:
Looks like a new disease....

When I get mine done you'll have to come over to Santa Cruz for a ride :)

John
 
Looks like a new disease....

When I get mine done you'll have to come over to Santa Cruz for a ride :)

John
i fell in love again!
i rode the lil trail 90 and i decided to get one for the wife!
now she is part of the crime ;) , or should i say grime :grin big:

i would love to bang bars with you John!


Mike, a new hobby?
That aught to take care of all the free time you had!
-brino
Free Time ????
what's this free time you speak of?
i heard the term long ago, but it's been so long i know little but passing remembrances...

nowadays, i just keep a wrench in my right hand.
i bang it around ever so often and all but a few don't bother me-
'cause i look like i'm doing something or other :shhh:
 
from the latest haul, i started to consider putting one of the CT90 humpty dumpty motors together again.

the motor was missing the cylinder, but the piston was exposed and had no signs of scoring.
the rings were rusted, but otherwise not indicative of major issues
i have a 2 cylinders that are less than stellar in appearance , but may clean up- (or be able to be punched out to the next oversize :grin: )

i have not had a CT motor apart before.
i have had many small engines apart before, i'm not scared :grin:
i have downloaded a copy of the CT manual.

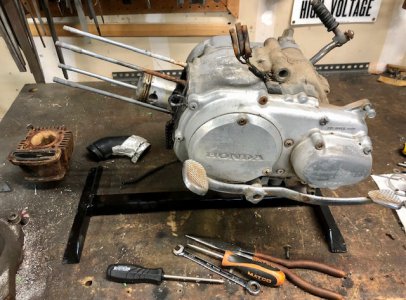
the first thing i need is an engine stand...
A} i could have bought one on ebay for $50, but where is the fun in that ?
B} i have all kinds of materials at my disposal as well as the equipment and skill, i could make one.
i chose B !
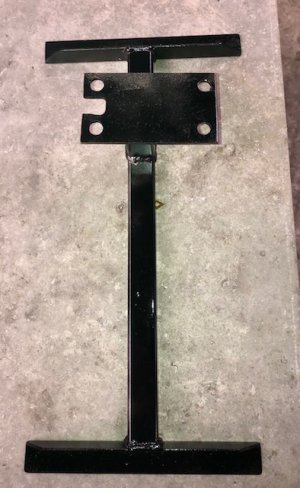
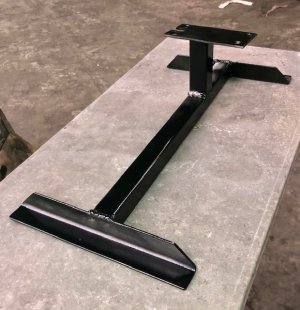
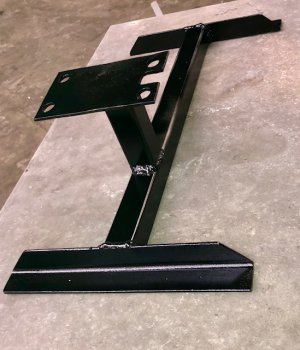
here's the proof!

material list
2ea 1/8"x 1.25" x 1.25" x 10" angle iron
1ea 1/8" x 1.125" square tubing x 17.5" long
1ea 1/8" x 125mm x 65mm flat stock ( laid out with 4, 10 mm holes spaced in a 105mm x 44mm spread)
mig welder E309L filler, Tri-mix
(i welded the stand up at work. my mig is dedicated for stainless, hence the 309l and the tri-mix)

IMG_4429.jpgIMG_4430.jpgIMG_4432.jpgIMG_4434.jpg

i bolted the motor to the stand.

now i can move on!
 
Update 1/17/21

i have been bouncing back and forth between repairing and troubleshooting 2 of the CT90's.
I'm also developing tools and various items to aid in the repair of these cool lil bikes simultaneously, never a dull moment here!

as far as the bikes go....
the 1969 CT90 suffered a setback.
the previous owner decided he was going to "fix" the wiring in the bike
his "fix" was connecting wires that had no business being connected together. :bang head:
ultimately, the bonehead move, led to the untimely failure of the coil during a test run.

for the uninitiated, the coil and ignition condenser is located under the seat, inside the frame of the 1969 CT90 K1
i removed the coil as well as all the factory wiring from the frame,
I DO NOT trust the moron that was there before me. :face slap:.
wiring replacement is my only option for my sanity.
since i have started the process of running new wire, i know without uncertainty that the wiring will be 100% .
the coil ($25) will be delivered tomorrow
i'll be installing a new condenser ($15), (although the old one tested satisfactory)
i have a full grasp of the wiring since i made a poster size blowup of the factory wiring diagram
the wiring is really simple, i don't anticipate challenges there
I'll post more as it comes closer to running...

The 1967 CT90 K0 has not run yet
i just reset the ignition timing. its showing good spark
the carburetor leaks like a sieve,
i had the carb apart, the carb is in poor shape-
i suspect a pinhole in the bowel casting- it drips onto the cylinder, i'm eying a replacement carb before further attempt to start.
i have kicked it over, but it feels like the is an intermittent bind noticed when i kick it.
i'm wondering if there is a kickstart gearing problem, or possibly a cylinder/piston issue, or if somehow something else is dragging :dunno:
that's gonna be a story for another day....


Yesterday, i had the battery out of the 1969 CT90 K1
i noticed that the battery wasn't being held down like in the 1967 CT90 K0.
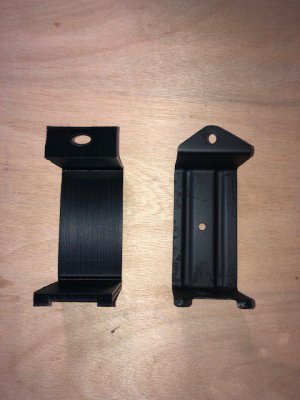
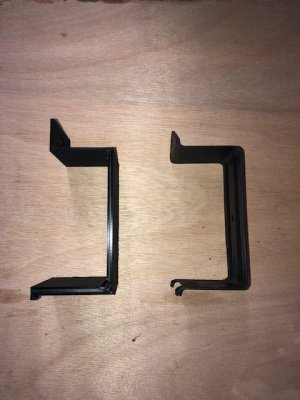
the K1 was missing the inner battery strap .
i took it as a challenge to replicate the missing inner battery strap.
i designed and 3D printed a robust replacement, in PLA plastic


IMG_4439.jpgIMG_4440.jpg

the copy actually fits the battery better than the stamped steel OEM inner battery strap !

i'll be torture testing the strap and scrutinizing it for performance, i'll post results as they reveal themselves !

thanks for reading- there is lots stuff to come!!!!
 
i have a full grasp of the wiring since i made a poster size blowup of the factory wiring diagram
the wiring is really simple, i don't anticipate challenges there

What no A.C. compressor?

Jeez, I wish I could do that with my 2012 Ram truck.
I'd be so happy without the several computers, anti-theft, A.C., etc.

The only thing I'd like to add is a rear-window defrost.......another thing you do not need to think about.

-brino
 
Back
Top