2016 POTD Thread Archive

...
I've read you should use the pinion marked 0 to get the best results. I do but to be honest have never noticed any difference. I tightened the chuck on the spacers using the 0 one before I ground the jaws. Now if I use the other pinions I get 4 to 5 thou runout on the test pin, never better than 3

I don't think there's anything magic about the pinion, as long as the same one used to grind the jaws is used subsequently. I suspect it's mostly a matter of how much play is in the scroll plate. If there was no play in the scroll plate then it wouldn't matter which pinion you used. Of course, then you wouldn't be able to turn it, either.
 
I finally got paid for a job I ran on the router and that money is earmarked for some shop maintenance and machine upgrades. One of those upgrades is a vari-drive to direct drive conversion on my mill. I'll post a thread on that one when I get to it in the next week or so. But in order to do that I need to move the mill about 4 feet east, out from under the mezzanine so I can get to the spindle motor with the forklift. There is only about 4 inches between the motor and the floor of the mezzanine. So today I decided I had better get the brakes fixed on the little forklift so I can safely move the mill. They have been failing and leaking fluid for some time now and to stop I have just been switching from Forward/Neutral/Reverse or vise versa as needed. I haven't needed precise positioning for most stuff and at my normal creep speed, not really too much problem. :cautious:

So the right front was leaking fluid. So I pulled the wheel and brake drum, and as expected it was wet with fluid. But only from the axle down.:confused: The wheel cylinder was fine, completely dry. Huh? It turns out that unlike most vehicles, this backing plate is attached such that there is a small gap between the top of the axle and the backing plate. There was a leak in the line where it screwed into the wheel cylinder and the fluid was running down the outside of the backing plate and then through the gap and into the drum. Never seen that one before.o_O

The brake line had been replaced by some (being politically correct here) mechanically challenged individual who apparently ''flared'' the tube with a center punch or something:mad:. There was about 1/3 of a single flare on it, rather than a proper double flare. Both ends were like that. It has a double flares now:encourage:
 
Last edited:
Jim
Don't you just love it when people who should never hold a wrench attempt to fix machinery!? Seems I always end up with stuff that has been repaired that way in a previous life. The I have to fix the original problem, along with all of the other damage that it caused!
Glad it was a fairly simple job for you this time! :D
 
Last edited by a moderator:
That reminds me..sunday at the store some guy was having a fit because he didn't know what oil his truck took..he was complaining to his wife, asking passers by....can't imagine him actually changing the oil..
 
Last edited by a moderator:
Don't you just love it when people who should never hold a wrench attempt to fix machinery!?
You should look at this Reddit sub-site https://www.reddit.com/r/justrolledintotheshop It's always got some new jaw-dropping bit of idiocy, as well as useful insites into how difficult some cars are to work on. :)

Here's a great example of a Do it yourselfer who shouldn't have. The link is on the first page and is titled "Customer states "I changed some exhaust parts and the hangers dont really line up, could you hang it for me?"
Here's the imgur pics it links to: Photos
 
Here's a great example of a Do it yourselfer who shouldn't have. The link is on the first page and is titled "Customer states "I changed some exhaust parts and the hangers dont really line up, could you hang it for me?"
Here's the imgur pics it links to: Photos

Those are classic examples of red neck aerodynamics. The vertical placement of the muffler to reduce drag and create a side flow Venturi effect thus ensuring minimal beverage spillage while performing circular motions in over-hydrated agricultural locations. The use of advanced oxidation to lighten the weight of the shocks resulting in instant driver feedback of road irregularities...

Of course... There was a period of my life when if it was a choice between beer or muffler brackets beer won out! Baling wire....duct tape of the south!


Sent from my iPad using Tapatalk
 
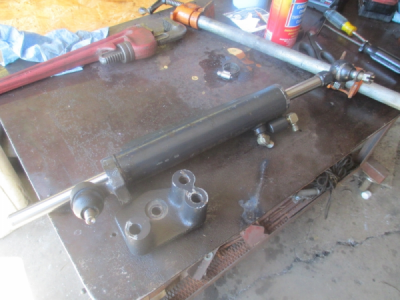
My neighbor broke one of the rod ends on the steering cylinder on his Massey-Ferguson tractor. The only replacement part available is the complete cylinder assembly for big $$$$. :eek: He found another rod end that had the same taper dimensions and would kinda work so I get the task making it work. I need to get the tractor back on line anyway because I need to use it to finish getting through my jungle of a back yard.;)

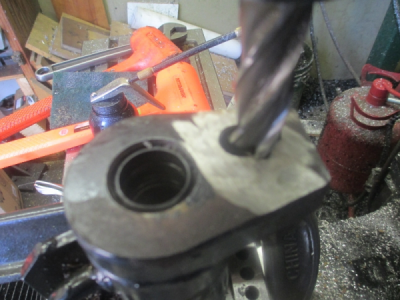
This picture was taken after I cut the broken part of of the cylinder and had the cylinder set up in the mill. I just used the band saw to cut through the weld and then just ground off what was left. The reason it is in the mill is that the rod end has a female thread, rather than the normal male thread, so I have to increase the size and move the locating pocket in the cylinder tab.
upload_2016-7-28_20-37-12.png

I didn't have much height clearance so the cylinder needed to sit on the table. The good news i that I have a precision machinists vice to grab the cylinder. I could have used an angle plate and lashed up something also. I could have even run a bolt down through the cylinder and secured it right to the T-slots.
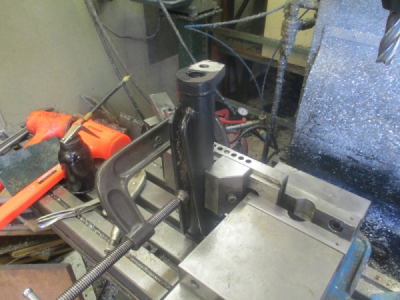
upload_2016-7-28_20-44-17.png

And another view of the setup. The mill vice holds one side just fine, but I couldn't just leave it hanging out in space, so clamped and supported on the other end. The clamp is pretty much centered over the jack screw.
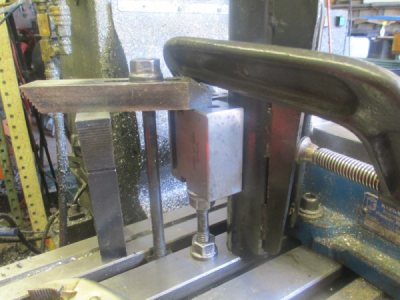
upload_2016-7-28_20-46-6.png

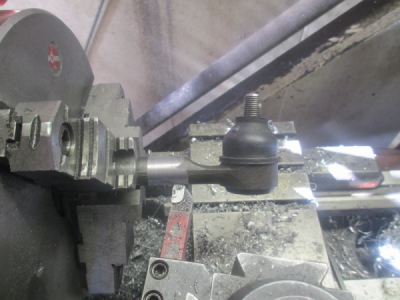
I chucked up the new rod end and just took enough off to get a round surface. Size didn't matter, just round (ish) It came out at 0.7165. A lot of tool hang out to clear the taper.:cautious:
upload_2016-7-28_20-49-47.png

And kinda in place, but a tad long. I'll fix that later.
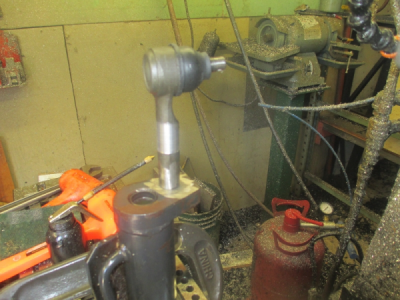
upload_2016-7-28_20-52-17.png

So now to bore and move the hole over. I am going to go through so it needs to be moved about 0.090 away from the cylinder tube and bored to 0.716 to get a light press fit.
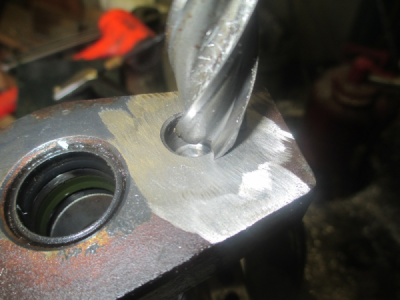
upload_2016-7-28_21-0-0.png

I thought I was going to rough out the hole with a 0.625 end mill, but the the tab had other ideas. The weld area was a bit on the hard side and it just laughed at my HSS end mill. :D OK, time for the big guns, CARBIDE. I just ran a pocket routine and machined the bore, came out perfect on the first try. Didn't have to make a spring cut.
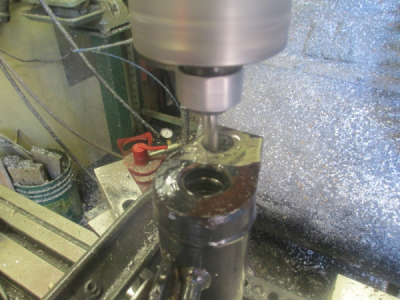
upload_2016-7-28_21-0-40.png

OK, time to trim the rod end using my junk import vertical band saw, complete with HF blade. A couple of aluminum scraps to support the part while cutting.
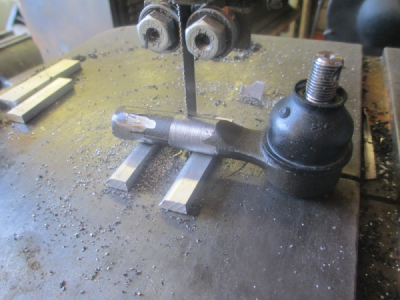
upload_2016-7-28_21-10-49.png

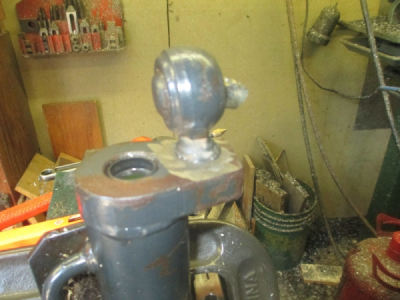
So once cut off I welded it in place. 3/32 7018 rod, 95 amps DC reverse. I put stainless steel tape over the rod hole and over the taper on the rod end.
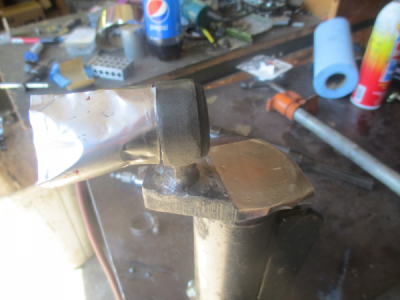
upload_2016-7-28_21-14-2.png

And the back side. That weld is not as ugly as it looks, the center of the rod end is hollow. My HF needle scaler in the back ground, actually has worked pretty good for a number of years.
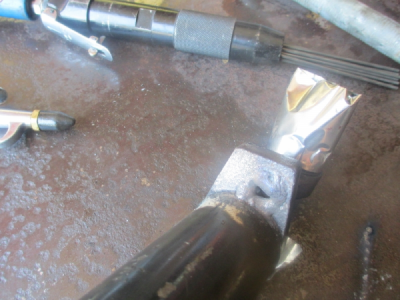
upload_2016-7-28_21-14-36.png

I had to be really careful not to let things get too hot. I was worried about the seal in the cylinder. No way to get it out without destroying it. So weld a bit then blow air, let it cool down, rinse repeat. The seal never got over about 140° F

Then on reassembly I found the cylinder rod was bent, had about 0.250 TIR bend in it:mad:. So over to the press and get it more or less straight.
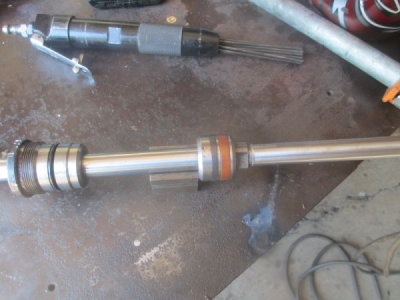
upload_2016-7-28_21-24-53.png

And the finished assembly ready to install. This is going to cost the neighbor a couple of his grilled hamburgers, each one is about two meals for me. :) I work for food! :rolleyes:

upload_2016-7-28_21-25-51.png

upload_2016-7-28_20-56-39.png
 
Back
Top