2018 POTD Thread Archive

2volts

H-M Supporter - Sustaining Member
H-M Platinum Supporter
Joined
Oct 20, 2014
Messages
133
"Recent" rather than "of the day" -
IMG_0316-L.jpg

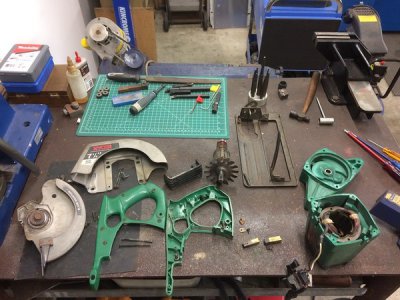
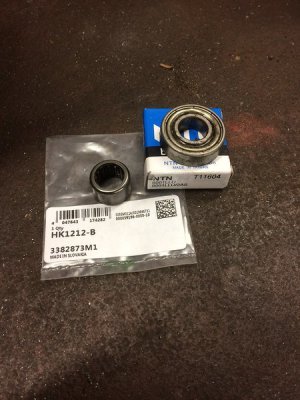
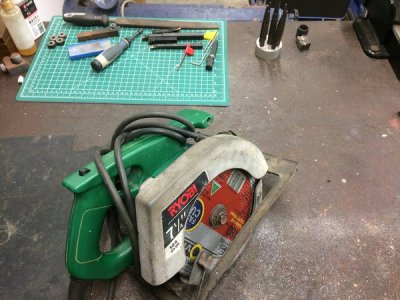
I had given my circular saw a thrashing while using a cutoff blade to dismantle an old bench and it got very hot and bothered. So I disassembled it to see what was happening inside it. The needle roller had lost a few "needles" and the sealed ball bearing was very rough.
IMG_0323-XL.jpg

Off to the bearing shop for replacements and now it lives to cut again...
IMG_0317-L.jpg

Fortunately its ~20 years old and can be pulled apart and reassembled whereas you probably can't get inside a "modern" one without destroying it.

pete
 
Nicely done Pete. It always gives satisfaction bringing something back to It's former state of usefulness. Now if we could just do that with ourselves (youngsters here please ignore). Hand me that 1/2" rejuvo thermo-epissculator would you R2D2. Cheers, Mike
 
Nothing overly complex but I finally got around to fixing (or starting to fix) my vintage Dymo Label machine, it's the all metal one which will work with stainless steel strip. Mechanically the Dymo is fine except that the rubber tyres on the tape drive wheels have degraded with time, and although not falling apart they no longer grip adequately.
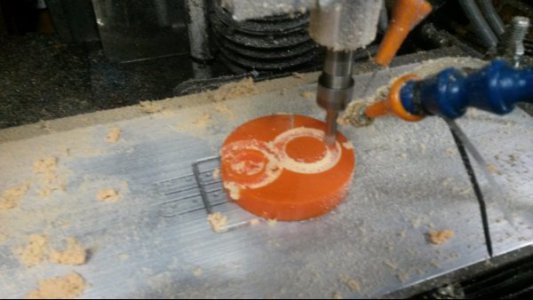
I normally cut polyurethane on the lathe but my stock of 60 Shore hardness material is both too big and too floppy to turn so I cut off a slice and faced and cut it on my little CNC mill -

CNCMillingPU01.jpg

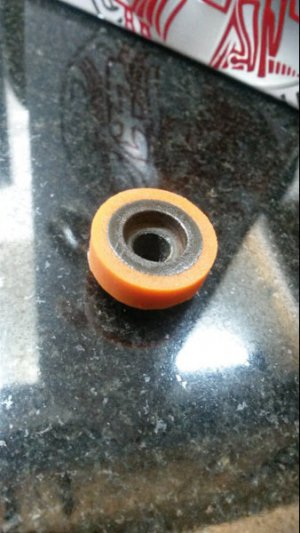
Here's the first "Tyre" freed from the stock and pressed onto the hub waiting for the Gorilla Glue to set.

CNCMilledPUTyre.jpg

It just might work ;-)

Edit - Job Detail - disposable 1/4" 3 Flute HSS end mill running at 30,000rpm with 0.2mm DOC
 
Last edited:
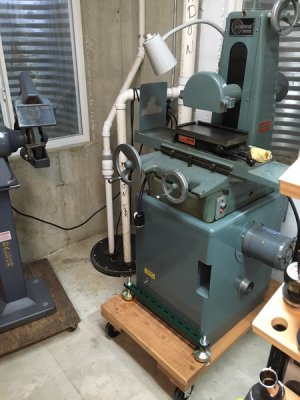
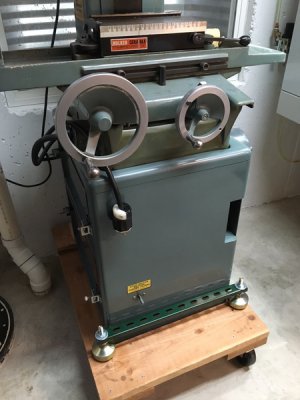
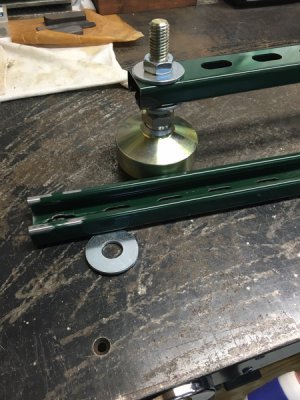
Made some leveling pad mounting bars for my surface grinder. Used low profile 12 ga unistrut and some 5/8" fender washers. I welded the washers to keep the strut from spreading open although I doubt 750# spread over 4 points will faze it. Its been setting on a caster dolly "temporarily" now for 2 years while I procrastinated and debated its semi final position in the shop. Being in a basement shop I like to have all my equipment off the ground 3" or so which allows getting a pallet jack underneath as well as leveling. Next step will be lifting the grinder off the base and bolting the struts from the bottom to existing threaded pads.1aaab39a888756f0599c71595a97e79b.jpg53e0c3edb3ad0d02ba813275c75af5df.jpg
6be675d8573e3908e4e37539607c121e.jpg
8dc165cb92bb1925bd3eb5f669c9091e.jpg
d940221af083ca804aca56dd3153ad80.jpg
 
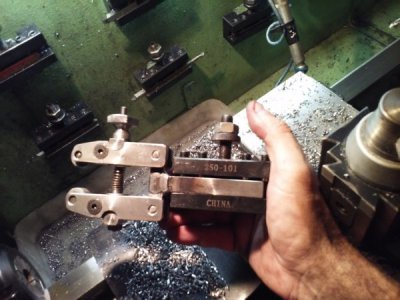
Your tools look great as well as the boxes. What's the QCTP holder with the handle for?
Thanks,
Thats an over engineered ball turner I made a little while ago. In true home shop form rather than buy a boring head I made the equivalent to adjust the dia.

Greg
 
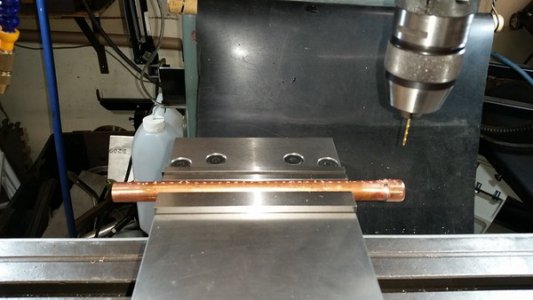
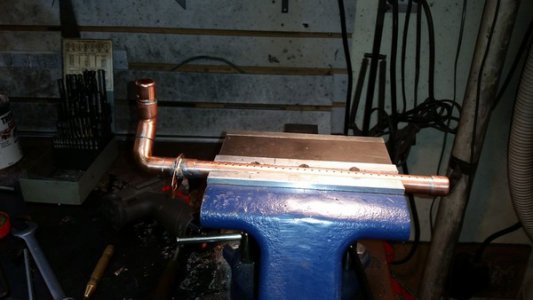
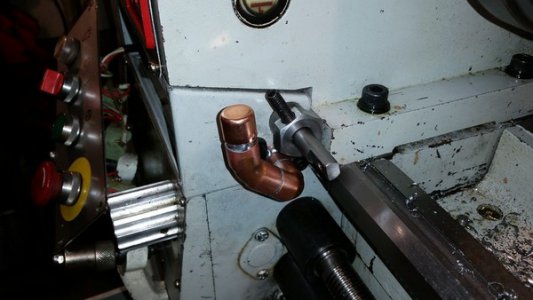
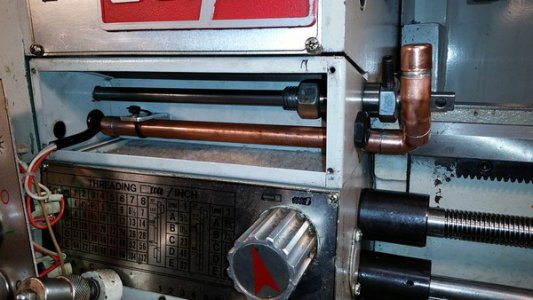
I've always disliked the lube provision for the quick change gear box on my CanTek 1440 lathe. It required removing a plastic plug and squirting oil into a blind hole which soaked a felt pad which then dripped oil onto the gears and shaft below through some holes drilled in the casting above the gearbox. I was never really sure that all the gears were getting lubed. I did a little plumbing today with some 1/2"copper pipe and fittings and made up an oil manifold that sits in the housing above the gear box and drips oil evenly along the entire length of the gear box. Now I just remove a copper cap and give a few squirts of oil and I can be sure the oil is going to all the gearbox components. Here are pics and a video link showing the finished product.

i-txMfng6-L.jpg

i-PRQjc32-L.jpg

i-rXHbJ39-L.jpg

i-r8zMr4t-L.jpg

 
I've always disliked the lube provision for the quick change gear box on my CanTek 1440 lathe. It required removing a plastic plug and squirting oil into a blind hole which soaked a felt pad which then dripped oil onto the gears and shaft below through some holes drilled in the casting above the gearbox. I was never really sure that all the gears were getting lubed. I did a little plumbing today with some 1/2"copper pipe and fittings and made up an oil manifold that sits in the housing above the gear box and drips oil evenly along the entire length of the gear box. Now I just remove a copper cap and give a few squirts of oil and I can be sure the oil is going to all the gearbox components.
My vintage Grizzly 12x24 has the same arrangement for the QCGB. Your design is definitely worth duplicating. Thanks!!!
 
Back
Top