7x14 to 7x16 Rebuild

GrifterGuru

H-M Supporter - Diamond Member
H-M Lifetime Diamond Member
Joined
Aug 19, 2023
Messages
437
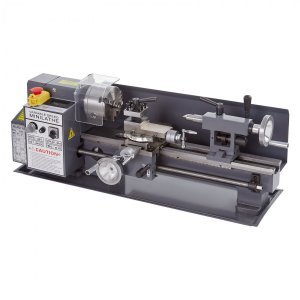
Ok, so here is what I started with. A Crenex MX-0618 brushed motor 7x14.
s-l1600.jpg

Most of what you see is now gone, replaced with better quality parts (well, better than they were at least), with the exception of the apron and motor guard.

The rebuild has been an ongoing saga of sourcing parts to replace the junk parts, along with a few direction changes with certain parts, then throwing an ELS into the mix. This has been spread out over almost two years due to other matters taking priority.

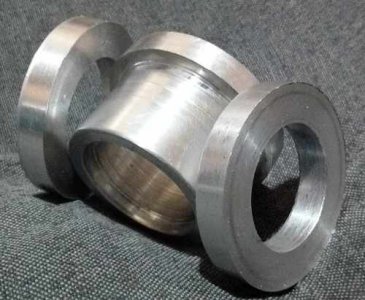
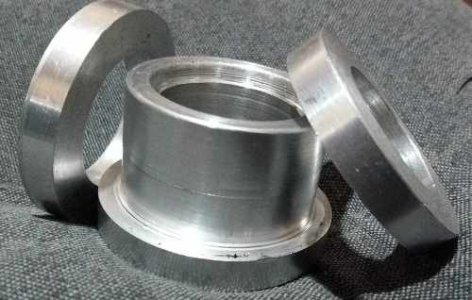
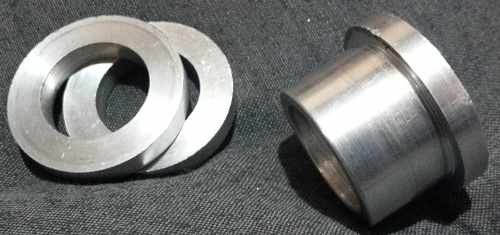
I finally got around to getting back to the rebuild today, when I prototyped some spacers for the spindle out of 6082 T6.

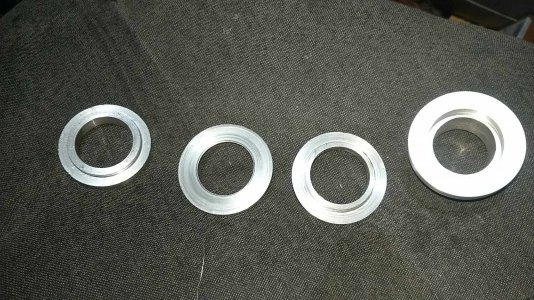
Two spacers for the spindle gear, one shouldered spacer for the tail end of the spindle to space the spindle-to-idler gear...


I bored them slightly over sized for ease of fitment and removal. When I machine the actual spacers, I will bore to a thou over spindle diameter. The tail end spindle spacer is fine other than being boreed over size. Anyone spot the internally bored shoulder of the spindle tail shouldered spacer? I will explain that at a later date.

Yes, I used mm. Much as I hate it, I was in no mood for fractions today, what with severe dental pain and all, though the Ardbeg Wee Beastie helped once I cleared up the mess I made with stringy aluminium! The Laphroig also helped later in the evening.

Spindle Gear Spacers and spindle tail spacer
432105379_923103526028697_4817362035467108797_n.jpg
432075672_266491919840577_992300846864086328_n.jpg
431914409_1765497927303381_2981971761073785947_n.jpg

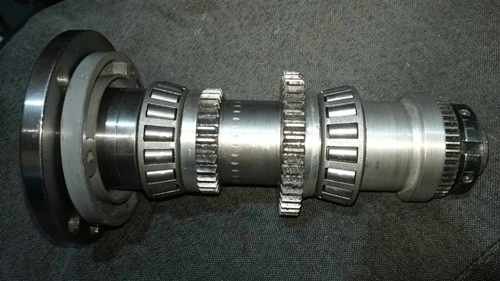
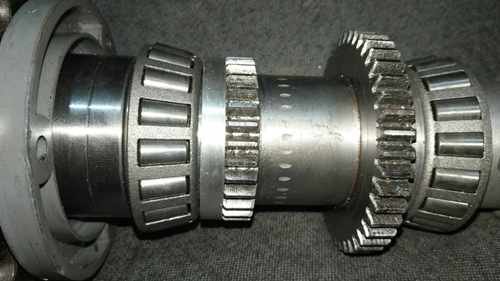
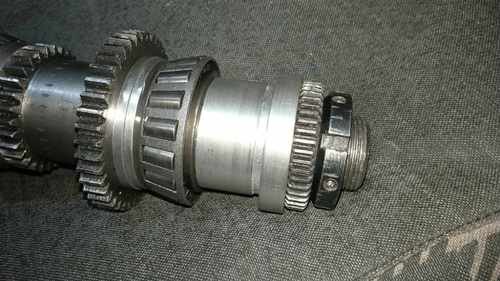
And fitted to the spindle I am using to mock everything up. This is an old single speed spindle with a damaged mounting flange so is going into the scrap bin soon.
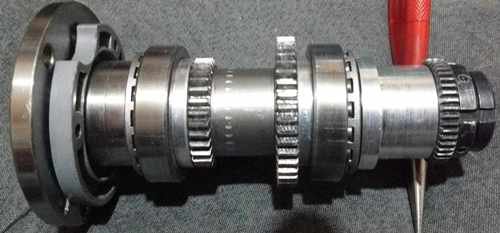
431872886_1688840634857468_1878852150124614353_n.jpg


I will update as and when time allows or when I actually get time to get on with the project.
 
I actually found time today to machine the proper spindle spacers up out of 6082 T6 Aluminium (yes, that is spelt correctly ;) )

431684136_1326720484593201_9205370180268033533_n.jpg
432189327_1648112212609602_5145359103612808368_n.jpg
431761856_1444568322800128_3143861097894156712_n.jpg

These spacers sit either side of the spindle two-speed gear and both are shouldered so that they are compatible with plain, A/C and TR bearings. The only caveat being that they need to be wide enough to stop the spindle gear floating along the spindle between the inner faces of the casting, yet be narrow enough to allow an A/C bearing to gain preload. I found the exact width was 0.3189" (5/16" give or take).

I also turned a "sacraficial" spacer that can be turned down if needed to gain further clearance.

431675173_638645861729190_8257238599826040788_n.jpg

The outer spacer sleeve for the tail of the spindle does not require a shoulder since the large diameter sits niceley on the outside face of the centre bearing carrier. One thing I did do though, is counterbore each end.

Counterbores are 3mm deep and 3mm wider than the main through bore (again with the metric! Grrrrr) to allow for the spindle spur-gear key to be fitted and removed. Why counter-bores at both ends? simply put, it means the spacer can be fitted either way around, as well as catering to the 30mm diameter of the main spindle section the bearings are seated on.

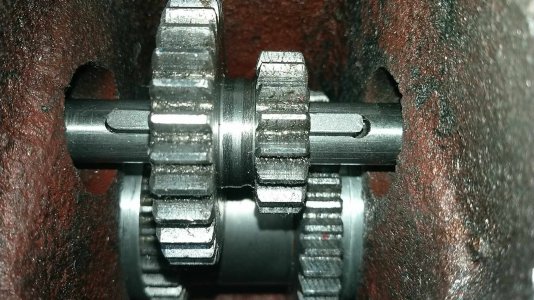
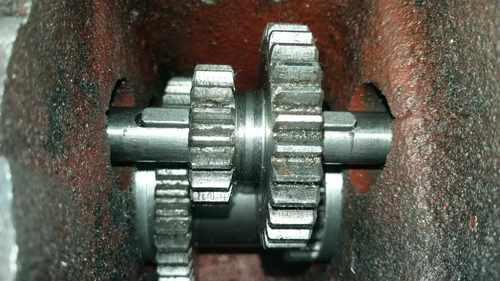
Looking up the inside of the headstock casting from the bottom, the spacers can just be seen to the left and right of the spindle gear.

431664213_737794581777416_6981736695966496536_n.jpg
432240149_323185177408347_3449825959710333880_n.jpg

Nice to be using my boring bars, makes a change from normal turning, facing and parting off.

Next up, time to make the lamp mount (see photo below) out of EN1A....

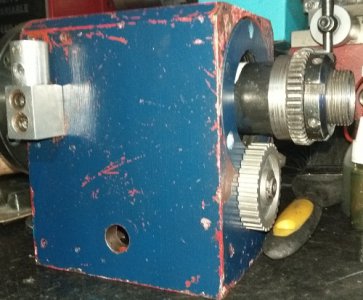
The lamp mount, top left of headstock in below photo, allows the mounting of a flexi-shaft work light directly to the headstock instead of being sat on top of the headstock using a mag base from a DTI stand.

IMG020240306_194930.jpeg
 
Last edited:
Just a quick update...

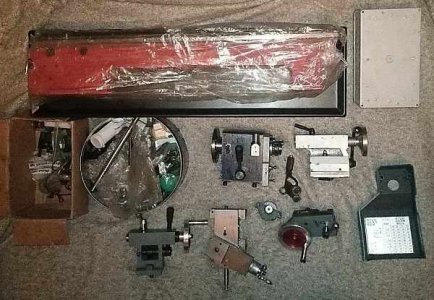
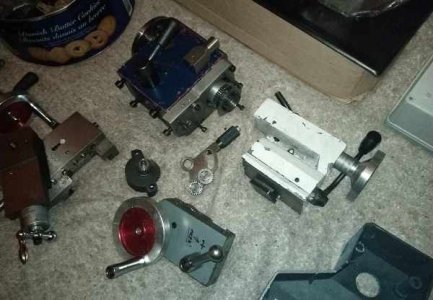
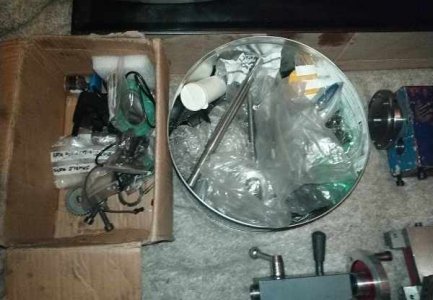
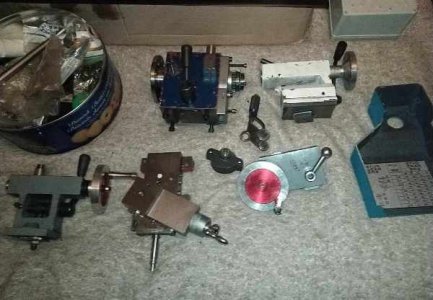
Finally made time to go through all the parts for the lathe and laid them out as I went through them. Can't see eveything and the leadscrews are not shown (one metric, one imperial).

Other than a Motor & Controller, ELS, Rack and a couple of small parts and machining the Extended cross slide boss, new feed screw and feedscrew nut, everything is ready to start putting the lathe back together.

I have intentionally kept it in pieces for easier storage whilst I carry out work on each area.

Yes, I have two tailstocks. The white one is the main one (which I am currently using on my SC3 as it is is superior). The grey tailstock is the original from the originanation of the lathe and I treat it as a spare. I have only ever used it when fighting for space on the bedway.

1.jpg

3.jpg

4.jpg

5.jpg
 
Another small update, whilst I fight to make time to get on with the rebuild..

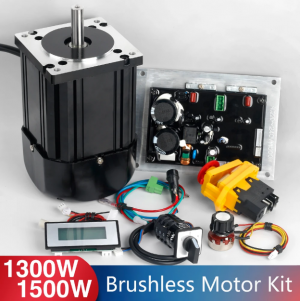
Chose to purchase a Brushless motor/controller kit over the option I had to hand as a better way forwards. A little pricey, but it will do what I need it to and replacement main boards are available. At least 6 main boards will be acquired as spares for future usage should they be required.

motor kit.png
 
At least 6 main boards will be acquired

What you've previously said about the space you have available is the only thing stopping me from asking if getting something like a Boxford BUD (or an ML7, if you can bear the small spindle bore) might be a better use of money.:grin:
 
What you've previously said about the space you have available is the only thing stopping me from asking if getting something like a Boxford BUD (or an ML7, if you can bear the small spindle bore) might be a better use of money.:grin:

Oh trust me, If I had the room, I would go with a boxford. ML7s are all well and good, but the small bore spindle is the problem, not to mention the £££ involved for a pre-owned machine that is likely to have worn ways. vAt least the money for a boxford is more palletable than that for a myford.
 
Last edited:
Yep, you're not wrong, Myford owners selling their pride and joys do need some sense knocked into them!:grin:
 
I actually found time today to machine the proper spindle spacers up out of 6082 T6 Aluminium (yes, that is spelt correctly ;) )

View attachment 482208
View attachment 482209
View attachment 482210

These spacers sit either side of the spindle two-speed gear and both are shouldered so that they are compatible with plain, A/C and TR bearings. The only caveat being that they need to be wide enough to stop the spindle gear floating along the spindle between the inner faces of the casting, yet be narrow enough to allow an A/C bearing to gain preload. I found the exact width was 0.3189" (5/16" give or take).

I also turned a "sacraficial" spacer that can be turned down if needed to gain further clearance.

View attachment 482214

The outer spacer sleeve for the tail of the spindle does not require a shoulder since the large diameter sits niceley on the outside face of the centre bearing carrier. One thing I did do though, is counterbore each end.

Counterbores are 3mm deep and 3mm wider than the main through bore (again with the metric! Grrrrr) to allow for the spindle spur-gear key to be fitted and removed. Why counter-bores at both ends? simply put, it means the spacer can be fitted either way around, as well as catering to the 30mm diameter of the main spindle section the bearings are seated on.

Looking up the inside of the headstock casting from the bottom, the spacers can just be seen to the left and right of the spindle gear.

View attachment 482211
View attachment 482212

Nice to be using my boring bars, makes a change from normal turning, facing and parting off.

Next up, time to make the lamp mount (see photo below) out of EN1A....

The lamp mount, top left of headstock in below photo, allows the mounting of a flexi-shaft work light directly to the headstock instead of being sat on top of the headstock using a mag base from a DTI stand.

View attachment 482216
I'd have been tempted top cut those from brass....
 
Back
Top