90's Delta 33-400 Radial Arm Saw Refresh

projectnut

Registered
Registered
Joined
Apr 14, 2014
Messages
3,152
I thought I'd start a new thread covering the refreshing of my latest acquisition. That being a Delta 33-400 long arm radial saw. I've been watching Mike's total rebuild on a similar 16" model and have gotten great advice as to some of the intricacies of the machine, and nice improvements he's made. Rather than continue to hijack his thread I thought it would be prudent to move my questions and progress to an independent thread.

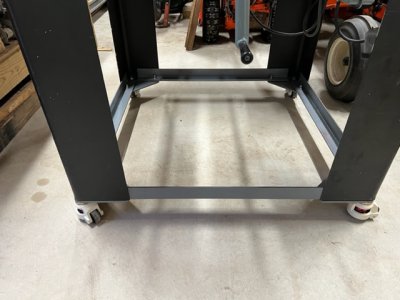
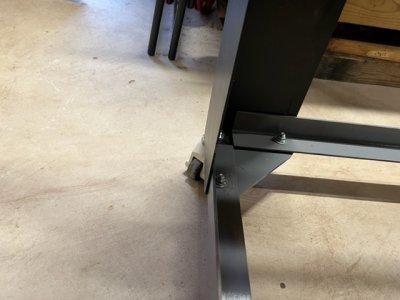
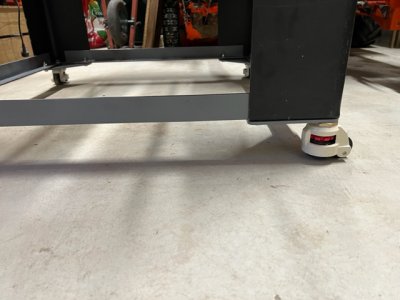
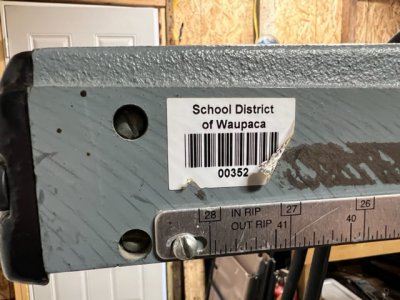
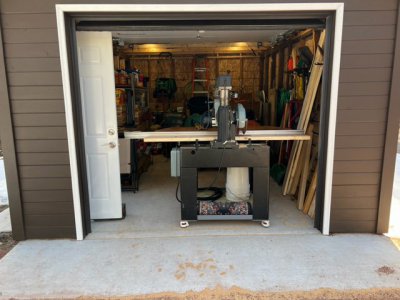
The machine I am working on is a 14" radial arm saw as described in the title. I found it at one of my favorite used equipment dealers in October. I purchased it almost immediately and had it delivered to the garage at our family cottage. I've been working on it off and on as time allows, and am finally to the point I can make what are hopefully the final adjustments and put it to work. So far, I've managed to repair some electrical problems, add a new power cord, install some casters for easier movement, and add the necessary 220 single phase outlets to the garage. The next steps are to modify the table for easier use and make all the adjustments for proper cuts.

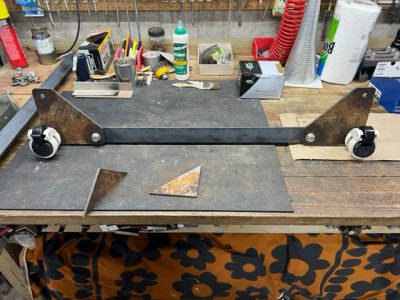
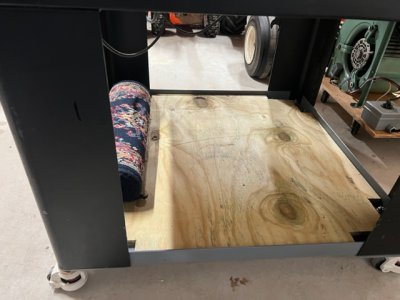
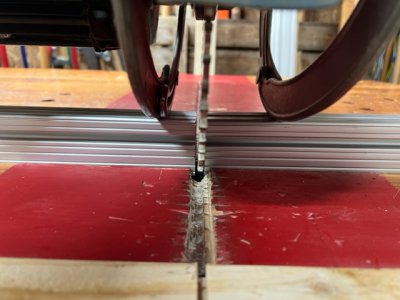
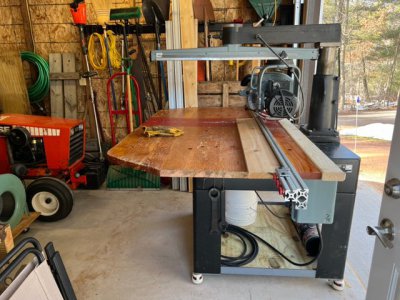
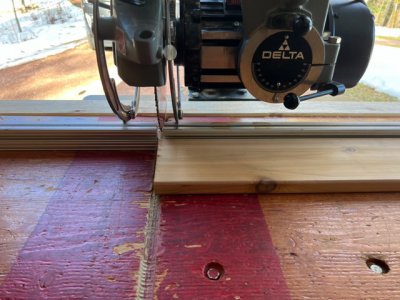
After the addition of the casters, I reinstalled the original table. I was originally going to shorten it since it's currently 6" long. I've decided to leave it the original length but find it necessary to decrease the depth. It's currently 45" deep which makes it difficult to reach the handle (I'm only 5' 8" tall) when the head is fully retracted to the rear of the machine. I'll get some time tomorrow to make the crosscut, miter, and bevel head adjustments, but then it's time to head home. Hopefully I can get everything aligned properly so the next time up we can start cutting lumber for the new pier decking.

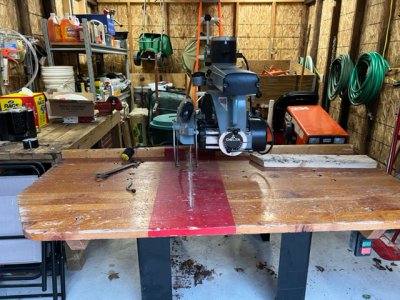
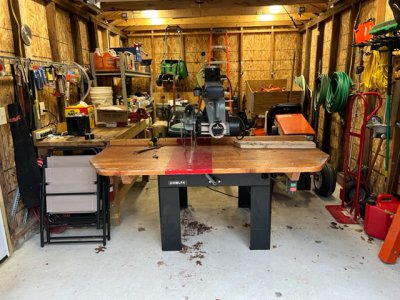
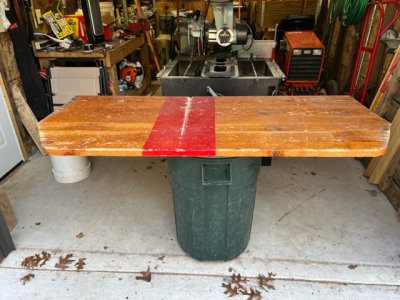
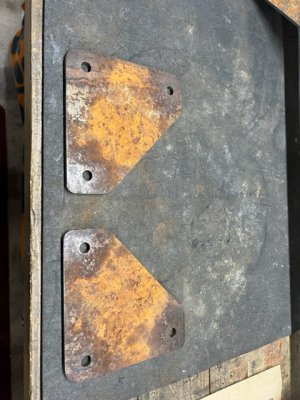
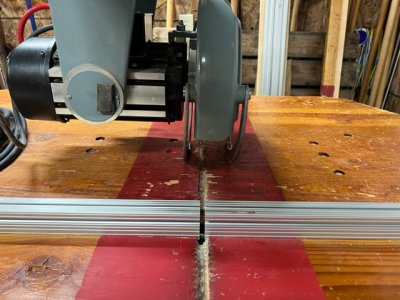
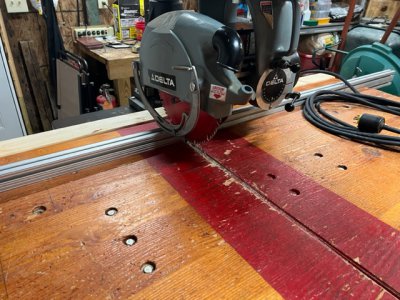
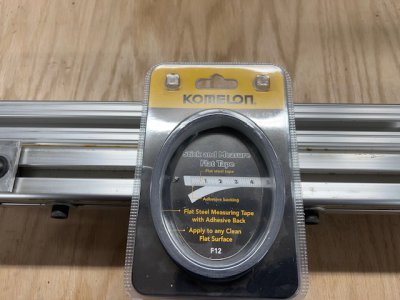
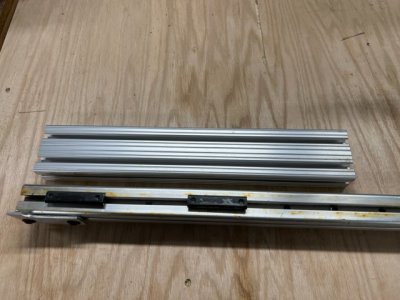
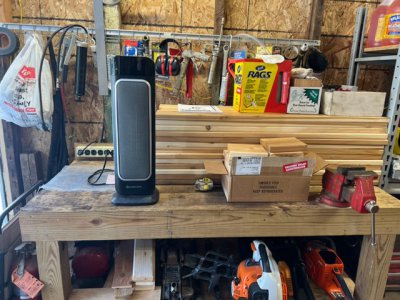
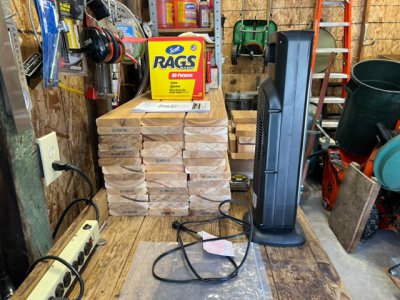
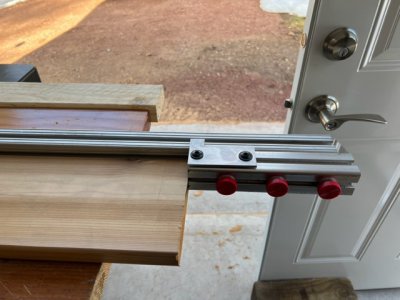
Here are a few pictures of the machine.
 

Attachments

  • IMG_1782.jpg
    IMG_1782.jpg
    194.2 KB · Views: 28
  • IMG_1783.jpg
    IMG_1783.jpg
    184.8 KB · Views: 25
  • IMG_1800.jpg
    IMG_1800.jpg
    164.3 KB · Views: 24
  • IMG_1843.jpg
    IMG_1843.jpg
    111.2 KB · Views: 23
  • IMG_1846.jpg
    IMG_1846.jpg
    103.3 KB · Views: 25
  • IMG_1844.jpg
    IMG_1844.jpg
    99.8 KB · Views: 26
That was a great idea for the feet! Looks awesome too.
Did you take it all apart to repaint?
I didn’t want to do that with mine, but I have a feeling I’ll not be satisfied until I do.
 
That was a great idea for the feet! Looks awesome too.
Did you take it all apart to repaint?
I didn’t want to do that with mine, but I have a feeling I’ll not be satisfied until I do.
The only things that needed painting were the new pads and stringers for the base. Everything else was in good shape. I would guess the saw was built around 1993. It was permanently built into a counter with an infeed and outfeed table so there was no abuse from running into it with other pieces of equipment or raw materials I should have looked at the pictures I took of the saw before painting the pads. Out of habit I painted the new parts Machinery Grey since almost all the other machines I own are that color. When I got to the cottage to install them, I realized only the saw itself is machinery grey. Unlike the base in Mikes rebuild thread the base on this saw is flat black.

The saw came from the Waupaca high school. It's been setting in storage for at least a year or two. They were taking bids on it last year along with several other pieces of shop equipment. The used equipment dealer bought several of the other pieces, but they decided to keep the saw and a DoAll contour saw thinking they could get more money by listing them on Craigslist. The listing never happened so they asked the dealer if he was still interested in buying them. He said yes, so the school maintenance department delivered them to his shop. I happened by a couple days later and made the purchase.
 

Attachments

  • IMG_1811.jpg
    IMG_1811.jpg
    134.3 KB · Views: 12
  • IMG_1833.jpg
    IMG_1833.jpg
    171.9 KB · Views: 11
  • IMG_1836.jpg
    IMG_1836.jpg
    164.7 KB · Views: 11
  • IMG_1837.jpg
    IMG_1837.jpg
    80.1 KB · Views: 11
Last edited:
Got a little time last weekend to check the alignment of the head to the table. Ater a little head scratching and a more than obvious self-induced problem when reinstalling the table all turned out well. I will need to shorten the depth of the table to make it easier to use, and will add a shelf on the caster framework.

When doing cleaning and adjusting I found some manufacturing tags on pieces I removed. Many of them have a date of manufacture as 3 of 2004. That makes the saw only a maximum of 19 years old rather than my original guestimate of being built in 1993.
 
A little more progress on the saw today. I made a shelf to sit on the framework supporting the casters and added a fence for ripping and cross cutting. When finished the fence will have a moveable stop to make it easier to cut multiple boards the same length. When completed the machine's first job will be to cut around 100 boards for pier decking and support runners.

Here's the material I used for the fence. I found it at a local used equipment dealer. Rather than being $1.42 an inch it cost $2.50 a foot. The Original Saw company uses similar material from the same Company for their fence measuring systems. When finished I'll have about $60.00 in the system rather than $369.00.


Here's the system from the Original Saw Company. I'll have to wait a few weeks for the weather to warm up a bit before applying the measuring tape. It's currently 14*F outside, and all the way up to 20*F in the garage. I doubt the tape will adhere to the metal very well in these temperatures. I'll get some pictures when my fingers thaw out.

 
A little more progress on the refresh today. Over the weekend I added the storage shelf to the framework and set the rip/crosscut fence in place. The fence is only temporarily sitting on the framework to be sure it will fit in the space I allowed for it. With temps starting at -8* and going all the way up to 14* it was a bit too cool to go any farther.

Today I put together a prototype of the measuring/stop mechanism that will eventually be attached to the metal fence sitting on the saw. An adhesive backed tape measure will be attached to the top of the fence for measuring purposes. A second smaller section of linear rail will be attached to the front surface of the fence. This piece will be able to slide along the length of the fence and locked in place to act as a stop for crosscutting. The sliding section has an indicator fixed to the top that will move over the tape measure affixed to the fence. There's about 1/16" clearance between the bottom of the indicator and the top of the tape.

The fence is actually 2 pieces held together by 3 threaded plates like those in picture 1867. The sections can have a gap of up to 1/2" between them. Picture 1858 shows them at the minimum width. This fence will only be used for cross cutting or ripping. The original wood fence will be used for any mitering operations.

The socket head bolts in the sliding section will have caps like these attached to the heads so they can be loosened and tightened by hand.


Attachments

  • IMG_1859.jpg
    IMG_1859.jpg
    107.3 KB · Views: 14
  • IMG_1858.jpg
    IMG_1858.jpg
    102 KB · Views: 12
  • IMG_1857.jpg
    IMG_1857.jpg
    141.1 KB · Views: 16
  • IMG_1861.jpg
    IMG_1861.jpg
    181.7 KB · Views: 16
  • IMG_1863.jpg
    IMG_1863.jpg
    109.6 KB · Views: 13
  • IMG_1865.jpg
    IMG_1865.jpg
    122.3 KB · Views: 11
  • IMG_1866.jpg
    IMG_1866.jpg
    79.4 KB · Views: 12
  • IMG_1867.jpg
    IMG_1867.jpg
    116.3 KB · Views: 13
Last edited:
Got the saw up and running yesterday and cut a few boards for the new pier decking. The new fence works great for crosscutting. For the preliminary cuts I had to measure from the blade to the stop point. It's still too cold to install the measuring tape. According to the instructions the material has to be above 50* I haven't tried any ripping yet. I didn't want to try it without the hold down fixture which is still sitting at home in the shop.

Yesterday reached a high of 50* but today it's only in the low 30's. Still nice for this time of year, but a little cool on the fingers when working outside without gloves. So far, I've spent around 40 hours making a few repairs on the saw, modifying the base and fence, and installing the circuitry and outlets in the garage to run it. I spent less than half an hour cutting the boards. There are still plenty of boards to cut, but we only brought 20 along due to space constraints in the truck. Next time up we'll bring along the remainder of the deck boards and as many stringers as space allows. The fixture will be brought up a little later in the spring when the weather warms enough to start glueing and assembly in the garage.

Here are a few pictures of the saw as it stands today and the pile of boards I cut yesterday.
 

Attachments

  • IMG_1870.jpg
    IMG_1870.jpg
    81.6 KB · Views: 19
  • IMG_1868.jpg
    IMG_1868.jpg
    59.3 KB · Views: 12
  • IMG_1872.jpg
    IMG_1872.jpg
    87.7 KB · Views: 13
  • IMG_1873.jpg
    IMG_1873.jpg
    92.3 KB · Views: 12
  • IMG_1874.jpg
    IMG_1874.jpg
    51.3 KB · Views: 18
  • IMG_1875.jpg
    IMG_1875.jpg
    67.3 KB · Views: 18
I spent nearly half the morning online looking for 14" negative hook blades for my Delta 33-400 radial arm saw. The search engines for most vendors are all but useless. I put in all the information I'm looking for like blade diameter, material to be cut, tooth count, type of grind, hook angle, etc., etc., but keep getting reams of random information. About the only company that actually gives the relevant info is the Original Saw Company. I'm sure they have high quality blades, but I'm not sure I need $300.00 blades for the type of work this saw is going to be doing.

Before I continue the project, I would like to get at least a couple new blades. One for crosscutting, and another for ripping. The saw is currently equipped with a Diablo 14", 70 tooth combination blade with a 10* hook, and ATB grind. It feeds fine and cuts smoothly, but there is come blow out. I'm not sure if the blowout is a function of the style blade currently on the machine, or the possibility that it needs to be resharpened. In any case I'd like some recommendations as to vendors who might have moderately priced 14" blades with a similar number of teeth, a negative hook with either an ATB or triple chip grind.

I see the blade currently on the machine is still available from Freud at around $125.00. Questions for the experts. Do you think the blow out problems I've encountered are more a problem with the blade style or sharpness? Also, the material currently being cut is Western Red Cedar. It takes about 6 pounds of pressure to pull the blade through the material. There is some blow out, but not an excessive amount. The blade cuts through easily but doesn't want to self-feed. Is a negative hook blade necessary for this material? Future projects will include cutting yellow pine, treated yellow pine, and oak. Would you recommend negative hook blades for these materials?
 
I may have found a couple new blades for the saw. I’m currently looking at some Gmaxx 2400.140N10 combination blades. They’re supposedly 14” in diameter with 100 teeth, a triple chip grind, a negative hook, and a 1” arbor.

I’ve never heard of this brand before, but there are a number of good online reviews. Hopefully someone here has experience with them and can let me know if they will be of sufficient quality for the current pier decking project and other similar projects in the future.
 
When I looked at 14" blades for my 40B I didn't find a lot of moderately priced stuff out there. Especially if you're set on negative hook. I found a NOS FS Tool LM6350 on eBay which is -15 rake and I don't notice any difference in tendency to self-feed vs the positive 10 degree Freud's I had on my smaller saws. If the wood pinches the blade it's going to try to self feed regardless of rake. It's a great blade though but $260 new from a retailer.

Tenryu has some good looking moderately priced 14" blades. I was going to try one of those next. Their IW-35560AB2 is $90, -3 rake, 60 tooth ATBR. Tenryu gets great reviews everywhere I look.

Are you getting blow out on the table side or the fence side?
 
Back
Top