- Joined
- Apr 18, 2012
- Messages
- 5
So here is my first attempt with VFD’s. I spent countless hours on this site and several others schooling myself on the process. VFD’s can be intimidating, but after some education they are quite simple. The following is my VFD build from start to finish.
VFD choice: I spent much time deliberating between brands and prices. I noticed that the TECO VFD was the most popular choice and there was more detailed information about setting these up. The price was right and it met my requirements. I purchased mine from Dealers Electric http://dealerselectric.com/item.asp?PID=4709
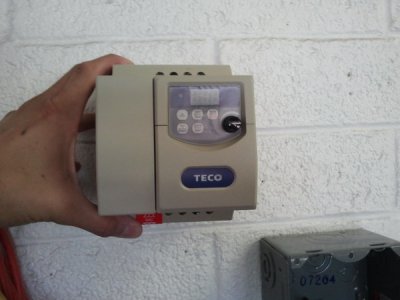
I elected to not mount the VFD inside a protective box. Instead, I used a piece of aluminum plate that mounts to the wall and the VFD is mounted to the aluminum.
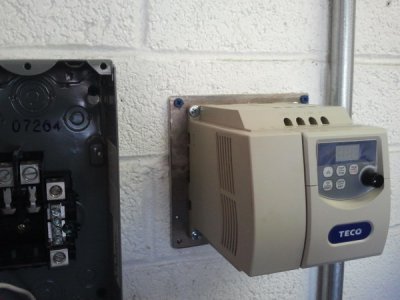
Next up was finding a source for power. I already have single phase 220 for a welder and air compressor, so that was the ticket. I bent up some conduit and placed a 70 amp load center near the VFD.
Here is the 70 amp load center from Home Depot
http://www.homedepot.com/h_d1/N-5yc...d=-1&keyword=70+amp+load+center&storeId=10051
On the wall and conduit attached
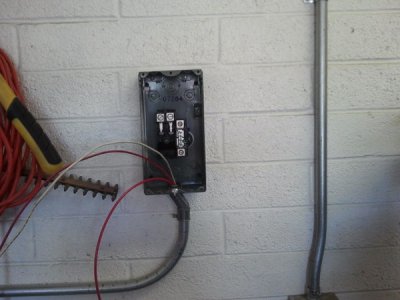
I used 10 gauge wire to feed the two pole 30 amp breaker.
Then I used 14 gauge wire from the output side of the 30 amp breaker to the input of the VFD. I used flexible conduit to cover the 14 gauge to the VFD.
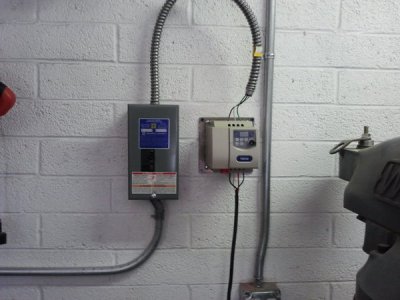
Next up was to figure out the wiring to the Taiwan made 2HP motor. Luckily the data tag on the motor was still legible, so I was able to attach all the wires easily. These 3 phase motors are labeled “X,Y,Z”
Old switch
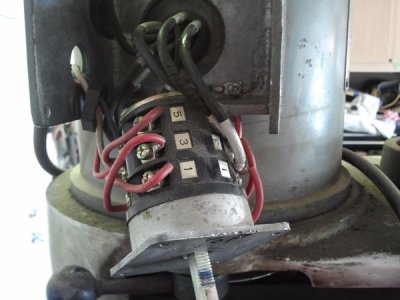
Switch removed and wires tied
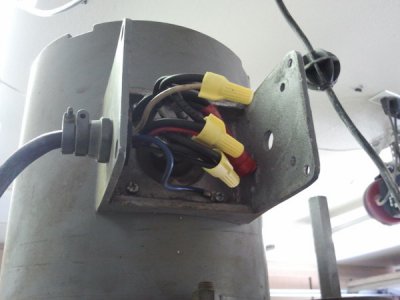
At this point I flipped the circuit breaker and the VFD powered up. After some initial programming on the VFD the Webb sprung to life. It is possible to use the VFD for all of the start/stop and forward/reverse functions, but operating the VFD on a wall behind the mill would be a pain. After some more searching I figured out a clean way to have a remote set up for my controls.
I didn’t want to spend a lot on the remote set up, and so after many hours searching I found a weatherproof one gang electrical box along with a blank cover.
Found at Home Depot.
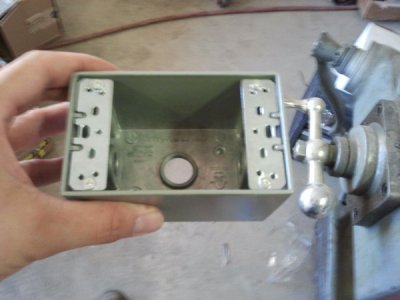
I wanted a switch that would hold up to years of use, so I spent a little more on this switch.
http://www.automationdirect.com/adc...a-_Non-Illuminated/Non-Illuminated/GCX3370-22
I found a nice 10K pot at Frys Electronics along with a knob
Black knob for pot…Frys item 5588360
http://www.frys.com/search?search_type=regular&sqxts=1&query_string=5588360&cat=0
In order to make the pot and 3 position switch work you will need some shielded cable.
Also from Fry’s Electronics..item 3550844
This is a 9 conductor 24 gauge shielded cable 25 feet long.
http://www.frys.com/search?search_type=regular&sqxts=1&query_string=3550844&cat=0
Pics of front and back side of switch cover plate
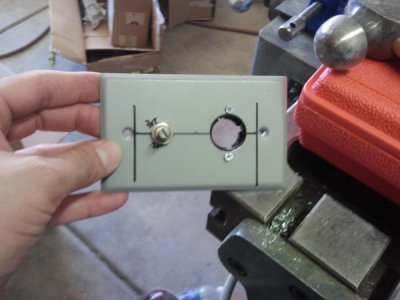
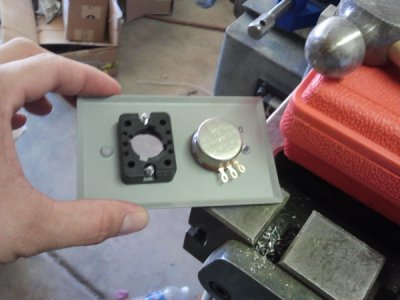
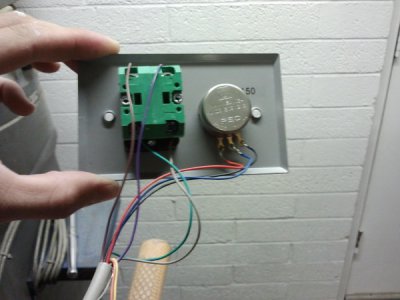
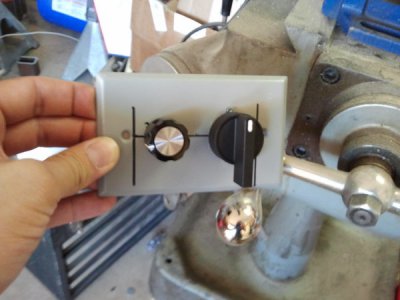
The 3 pot wires attach to location 9,10,11 on the control signal terminal.
The 3 position switch uses a total of 4 wires. Two wires share spot 3 on the terminal. The other two wires attach to spot 4 and 5 respectively.
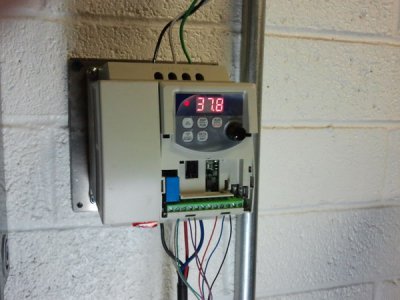
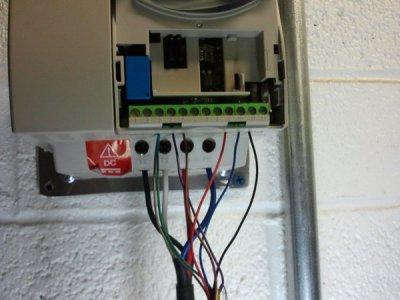
After some testing and changes to the settings in the VFD, the remote system came to life.
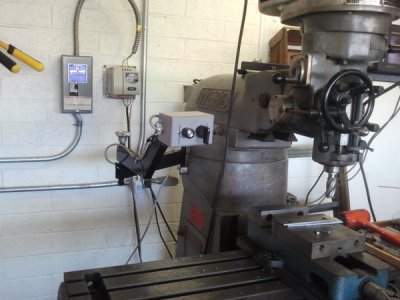
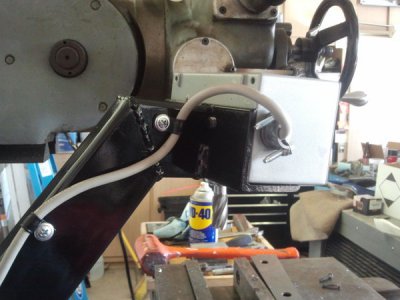
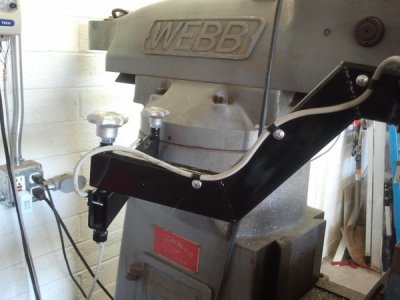
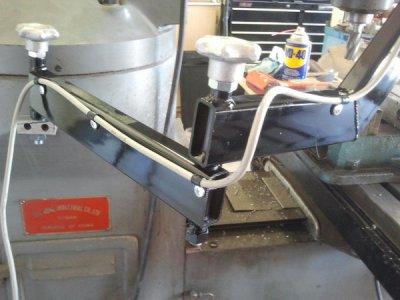
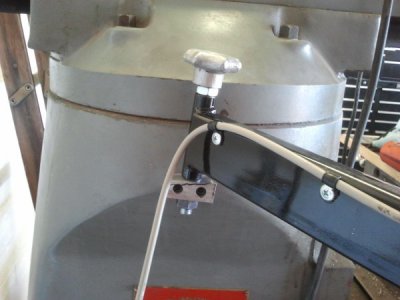
At this point I decided to make a clean and functional way to mount the switch box. I could have mounted it to the side of the mill, but that would be too easy. I knew I wanted to have the switch box at a location and height that would be user friendly. I decided on a flexable arm that would pivot at two places to allow for maximum maneuverability. I used some scrap 1x2 steel along with some angle iron, round tubing , ½” all thread and some aluminum knobs I found.
I really like the end product.
VFD choice: I spent much time deliberating between brands and prices. I noticed that the TECO VFD was the most popular choice and there was more detailed information about setting these up. The price was right and it met my requirements. I purchased mine from Dealers Electric http://dealerselectric.com/item.asp?PID=4709

I elected to not mount the VFD inside a protective box. Instead, I used a piece of aluminum plate that mounts to the wall and the VFD is mounted to the aluminum.

Next up was finding a source for power. I already have single phase 220 for a welder and air compressor, so that was the ticket. I bent up some conduit and placed a 70 amp load center near the VFD.
Here is the 70 amp load center from Home Depot
http://www.homedepot.com/h_d1/N-5yc...d=-1&keyword=70+amp+load+center&storeId=10051
On the wall and conduit attached

I used 10 gauge wire to feed the two pole 30 amp breaker.
Then I used 14 gauge wire from the output side of the 30 amp breaker to the input of the VFD. I used flexible conduit to cover the 14 gauge to the VFD.

Next up was to figure out the wiring to the Taiwan made 2HP motor. Luckily the data tag on the motor was still legible, so I was able to attach all the wires easily. These 3 phase motors are labeled “X,Y,Z”
Old switch

Switch removed and wires tied

At this point I flipped the circuit breaker and the VFD powered up. After some initial programming on the VFD the Webb sprung to life. It is possible to use the VFD for all of the start/stop and forward/reverse functions, but operating the VFD on a wall behind the mill would be a pain. After some more searching I figured out a clean way to have a remote set up for my controls.
I didn’t want to spend a lot on the remote set up, and so after many hours searching I found a weatherproof one gang electrical box along with a blank cover.
Found at Home Depot.

I wanted a switch that would hold up to years of use, so I spent a little more on this switch.
http://www.automationdirect.com/adc...a-_Non-Illuminated/Non-Illuminated/GCX3370-22
I found a nice 10K pot at Frys Electronics along with a knob
Black knob for pot…Frys item 5588360
http://www.frys.com/search?search_type=regular&sqxts=1&query_string=5588360&cat=0
In order to make the pot and 3 position switch work you will need some shielded cable.
Also from Fry’s Electronics..item 3550844
This is a 9 conductor 24 gauge shielded cable 25 feet long.
http://www.frys.com/search?search_type=regular&sqxts=1&query_string=3550844&cat=0
Pics of front and back side of switch cover plate


The 3 pot wires attach to location 9,10,11 on the control signal terminal.
The 3 position switch uses a total of 4 wires. Two wires share spot 3 on the terminal. The other two wires attach to spot 4 and 5 respectively.


After some testing and changes to the settings in the VFD, the remote system came to life.
At this point I decided to make a clean and functional way to mount the switch box. I could have mounted it to the side of the mill, but that would be too easy. I knew I wanted to have the switch box at a location and height that would be user friendly. I decided on a flexable arm that would pivot at two places to allow for maximum maneuverability. I used some scrap 1x2 steel along with some angle iron, round tubing , ½” all thread and some aluminum knobs I found.
I really like the end product.


