- Joined
- Nov 7, 2019
- Messages
- 434
Thanks for all the input! Played around quite a bit and getting ever so slightly better at this..
Things I've noticed:
-My digital micrometer is very difficult to get precise measurements with, measuring the same standard it will sometimes show 25.000 directly, sometimes start at 25.050-ish and require a lot of wiggling around to get back down to 25.000 etc. Maybe dust/grime but I try to keep it as clean as possible. I always use the torque thing to make sure it's not over-tightened. If I'm very careful this is however the most accurate for outside dimensions right now.
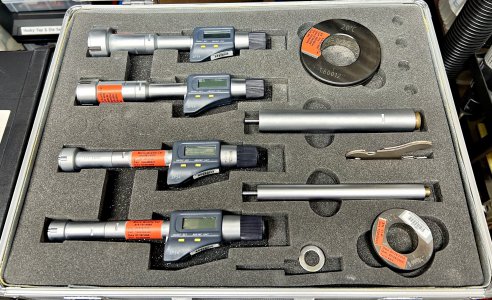
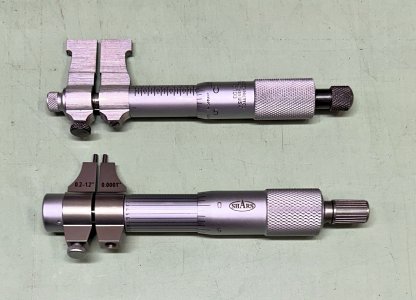
-My two analog inside micrometers are both ... Not great. Even using their torque function you can tell they're overtorqueing. Furthermore they both are out of calibration. Properly seating my digital micrometer against my 25mm standard, locking it and trying to measure the micrometer with the two internal micrometers gives me -0.08 and +0.06 on the two analog mics, where the smaller of them also has a big flex problem and the second has way too much wiggleroom in the jaws(they can rotate several degrees to the side).
-The bore gauge is insanely difficult to use despite being easy in theory. I've carefully set it and rechecked several time against the digital micrometer and it stays "calibrated" HOWEVER when I try to measure something I've bored it's both very sensitive to the surface finish and also tends to give faulty readings. I have an endmill that is confirmed to be 24.91mm but I absolutely can not replicate that measurement with the bore gauge.
-The bearings were actually 27.9mm and not 28mm outer diameter, no wonder ~27.95 resulted in a slide-fit.. I had just assumed they'd be 28.00.
I've bored maybe 15-20 different sizes of holes and kept trying all different kinds of measuring tools but so far none of them feels reliable to me when looking for 0.01 mm accuracy.
Also just to clarify, I can hit the same 0.01mm dimension with my machine, it's measuring exactly what the dimension actually is that is a problem.
ie I can hit 24.95 on my digital micrometer all day long but it often feels like the 24.95 is a faulty measurement despite measuring the same way with the same force, temp etc.
Next time I need to experiment more with the telescopic gauges and see if that's more repeatable for me.
Also the bearings are for a sanding belt roller. ~51mm diameter and <35m/s surface speed so around 7500-12000RPM with a fairly light load, I don't expect to see much more than ~50-100N.
Last edited:


