Another Anodising query - sorry

I've been doing the anodizing thing for a little over a year now. I must say I've had great results with the exception of I was anodizing the aluminum pulleys on my '68 Camaro and to my dismay the pulleys I tried to anodize were not "billet" or pure aluminum. At this point the parts do really weird things. On my process I do use the 720 rule and stick by it. I do the acid bath (which does not need to get over 70 degrees temp wise) then out of the bath and into the ro/di rinse water. I use only titanium wire and bolts and nuts for hanging the parts. Watch what aluminum your trying to anodize, some doesn't do well. Anyway, after the rinse step I go into the dye solution I've tried several temps on different colors. You need to keep this temp pretty consistent. I use no more than 140 degrees on most things but try to stay below this. On red colors I go between 125-130 degrees for best color saturation, as stated above anything hotter starts to seal the anodizing. The longer in the dye, the deeper the color. I have left parts in the dye for 30 minutes before without any problems. I mixed some red bordeaux and black for my pulleys and they turned out really nice. After the dye, I rinse in ro/di water and then into the sealing solution (some use just boiling water) I use the nickel acetate solution, for about 15 minutes. Rinse in ro/di and your finished. I have a link to where I bought my goods, just didn't know if it was ok to post here. Any questions let me know and I'll try to help.
 
Thats great many thanks. Gave up for little while and only today dug out my notes from last time. I will persevere this time and let you know how I get on. Regards
 
Agree with many posts. Desmutting is important. And absolutely you need a good connection. Titanium wire with a secure electrical connection. And.. try to maintain the right temperature plus voltage/amp
 
The connection seems to be the key element for me as everything else is under control. How thick a wire are we talking guys??
 
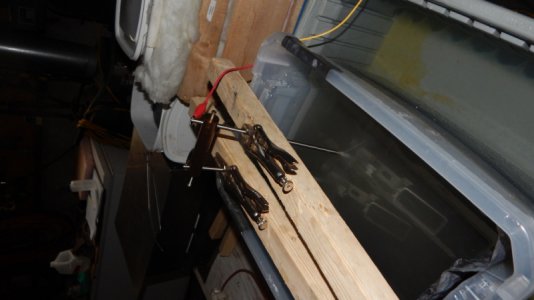
I totally agree. I went to a copper bus bar over the bath with 1/4" holes and set screw to hold 1/4" titanium rods attached to the part to be anodized. This also really helps with placing the part centered in the bath.

So far, all the parts I've done have had a spot to drill and tap so the titanium rod works.
 

Attachments

  • anodize tank copper bus bar.jpg
    anodize tank copper bus bar.jpg
    213 KB · Views: 13
Last edited:
Looks like your projects are much bigger than mine Karl but all same principle I guess.

Just a quick query, I tried again earlier today and everything went fine but still couldn't get dye to take so I ordered new batch, with the power am I looking for continous current or continous voltage, finding it difficult to get both??
 
You will never achieve constant voltage and constant current. The laws of physics says so. As the anodize builds up the resistance also goes up. As the resistance goes up the current goes down, that is why you have to raise the voltage to hold the current steady. Or if you want constant voltage the current will drop due the increasing resistance.
 
you want constant current power supply. set amps to so much per unit area. Look at my write up, back a ways. The voltage will climb as anodize progresses. When it starts to drop, you are done. lower amps for longer time seems to work better.
 
Spot on thanks Karl, for most of the 'cycle' I had it on constant voltage. We shall endeavour to persevere :encourage:
 
Many thanks Flyinfool only just seen your comment sorry. You obviously know much more about physics than I do but I love hearing good advice.
 
Back
Top