Second fly cutting question from the nuub.
First time fly cutting, had issues with hard spots and used braised carbide lathe cutter to address the hardness but the bit had no radius in the cutting tip. So finish was not great.
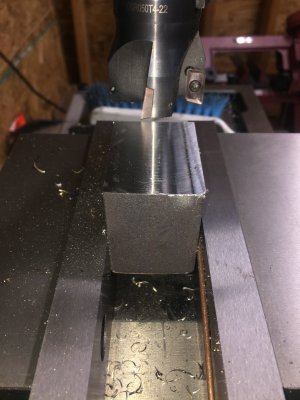
My question is about how the cut changed on my mill based on the table feed direction. Should direction of table travel change the cut quality?
This first two pics show travel left to right with clockwise cutter rotation.
The second pics show left to right table with clockwise cutter rotation.
There is a significant difference in cut quality and it seems left to right is much cleaner.
Is this my old mill wear and tear showing up or tram issues or ? Your thoughts are appreciated.
John in MN


Sent from my iPhone using Tapatalk
First time fly cutting, had issues with hard spots and used braised carbide lathe cutter to address the hardness but the bit had no radius in the cutting tip. So finish was not great.
My question is about how the cut changed on my mill based on the table feed direction. Should direction of table travel change the cut quality?
This first two pics show travel left to right with clockwise cutter rotation.
The second pics show left to right table with clockwise cutter rotation.
There is a significant difference in cut quality and it seems left to right is much cleaner.
Is this my old mill wear and tear showing up or tram issues or ? Your thoughts are appreciated.
John in MN
Sent from my iPhone using Tapatalk