-
Welcome back Guest! Did you know you can mentor other members here at H-M? If not, please check out our Relaunch of Hobby Machinist Mentoring Program!
You are using an out of date browser. It may not display this or other websites correctly.
You should upgrade or use an alternative browser.
You should upgrade or use an alternative browser.
Any tips to un-warp a butcher's block bench top?
- Thread starter strantor
- Start date
- Joined
- Dec 21, 2018
- Messages
- 1,816
We are getting off track with woodworking. For those interested in proper methods I highly recommend: The Wood Doctors Rx by Eugene M. Wengert. He was an Extension Specialist - Wood Processing, U of Wisconsin See chapter 60, "Finding a cure for warped counter tops."
I ran a commercial wood products manufacturing business for most of my life. We processed mainly for other businesses but would also do one offs. The glue of choice was Titebond Original, an aliphatic resin variety of PVA. For exterior work it was Resorcinol., a totally water proof glue. Expensive, time critical two component glue. Urethane glues, Gorilla and many others are excellent but more expensive glue with some characteristics that make it undesirable for the production shop. Melamine glues are often mixtures with other resins and have better bonding to very smooth surfaces in addition to wood.
Almost all glues have formulation variations to adjust their qualities to the materials and conditions they will be used under. Some glues require some acidity for the chemical reaction to work well. USA domestic lumber is almost always somewhat acidic so that is what most glues are formulated for. Variations in PH will affect cure times and temperatures. Some import lumber is basic and has problems with the formulations for domestic lumber. If you use exotics, best to do some tests before the main project.
Glue line failures are almost always failures to follow best practice. Few glues have good gap filling ability. Ideally the surfaces should touch and never more than .004 gap. Cold temperatures will cause failures in most glues or extend the cure time to very long times. If a PVA glue shows a chalky white on the surface it has been too cold to get a proper bond. Twisted, cupped or bowed surface can be forced into ± contact but will cause weak joints if taken too far. Ideally the joints should be freshly cut so oxidation, dust and dirt don't contaminate the surface.
Clamping force: As long as both surfaces come into very close contact No clamping is required. A rubbed joint works fine for small parts. Some clamping pressure is usually needed to push the excess glue out & bring the surfaces together. I have tested the idea that a glue joint can be starved by excessive pressure and I call that idea BS. Two 4x6 x1" hard maple blocks that had been laying in the scrap pile, surfaces are from the molder. 1" steel on both sides placed into a 20 ton press at full pressure. Titebond original, 24 hour cure, Put a V notch on the end aligned with the joint. Use a V shaped steel wedge on the joint and apply pressure in the press. The wood failed. Not the glue line. I rest my case.
Our normal practice, for panel edges to be glued, is straight line ripsaw and glue the sawn line in a Taylor clamp system. Curved moldings are strip laminated. Strips are varied in thickness depending on the radius of the molding. Too thin and the curve will pull in to a tighter curve, too thick and it will expand out to a lesser curve. Always Titebond original except for exterior moldings. Some glues are sensitive to moderate heat, 150F, will weaken them.
- Joined
- Oct 29, 2012
- Messages
- 1,329
I believe you but I would have to also say that hardly anyone follows best practice then (myself included), because the glue-line failures of this table top are representative of the whole of my experience about how these things fail. The only time I have seen wood break somewhere other than the glued joint was on YouTube. I suppose if someone is gluing wood on YouTube they know best practice so their results shouldn't be surprising.Glue line failures are almost always failures to follow best practice.
- Joined
- Dec 2, 2012
- Messages
- 1,729
Well, now that it is only half as wide as before, do you have access to a planer, or do you would you like to build up your triceps with a handplane? Then you can joint the edge and glue it back together.
And you can plane the bend out of it also (if it started off thick enough).
Stu
- Joined
- Dec 21, 2018
- Messages
- 1,816
That's pretty funny given what gets posted on YT.I suppose if someone is gluing wood on YouTube they know best practice so their results shouldn't be surprising.
Several old sayings come to mind: "Made in a factory must be right." "Been doing it this way for years" "That's how I was taught."
If anyone still has an interest, here are some of my experiences, relating to the above old sayings.
A professor teaching woodworking to future school teachers produced a very expensive desk. Beautiful wood, very nice appearance when first displayed at a major art gallery. When I saw it, I couldn't believe that someone that knew what they were doing, would do what I saw. The gallery bought it for it's permanent collection. Ideal storage conditions. I asked to see it several years latter. I knew one of the gallery employees. We went down into the storage vaults and found it. It was a disaster, full of cracks and failed joints. Why? because the maker didn't understand his material. Wood moves differentially, depending on the grain orientation. This piece was cross laminated! Designed to fail.
What bothers me most about this: he was hired by the university and was not qualified. He taught future teachers to be "not qualified." I had one of those shop teachers come to my shop with a pile of student projects that had failed. Exactly the same reason they had failed, as the desk.
I had a friend that worked for a chain of machinery retailers. He loved to fly small planes and convinced them he could be their service tech. When there was a problem in the field, we would load our tool boxes in a rental plane and fly all over the Midwest to trouble shoot. It was almost always operator error. We'd do some setup work and teach them how to use the equipment.
One trip was to a large kitchen cabinet factory. They had bought a quite expensive automated machine to make cabinet door parts. They were having lots of joint failures and blaming it on the machine. On the flight down we talked about what we might need to know. Nether of us had ever seen one of those machines. Every conceivable error had been made in the factory. Management had no idea, the operator just fed it blanks that kept coming out the other end ill fitting. The guy assembling the doors would put them in the clamp and then beat them with a mallet until the joints closed or broke. Those that didn't break were under so much stress they likely failed in the field.
After watchin the operation for a short time we shut down the machine and took the tooling off. The coped joint tooling was sharpened wrong and didn't match. Seems management had a friend that sharpened all their tooling. He had sharpened saw blades all his life. Didn't mean he knew how to sharpen matched sets of tooling!
The machine had been modified to "increase productivity." Those mods overloaded the feed system to the point it would slip and either run so slow that the parts would burn or they would jump ahead and have a ragged cut. We fixed that problem but had to wait for some additional parts. After all was done we watched the machine run good parts. It cost them quite a bit of $ that they shouldn't have had to spend. If they had just used the Japanese 5 questions solution they would have found the sources of the problem. It didn't take a genius. We just looked at each step in the operation even though we had no idea of what we were doing. If the parts don't fit, the BFH solution may not be the best.
Many of our trips were to remote high schools to show the teachers how to use & maintain the equipment.
I didn't have a license but would usually fly part of the time while he tried to figure out where we were in remote Kansas or Nebraska. Fly around the water tower and read the town name navigation (no GPS) Unfortunately Dwight was killed on a flight to western Nebraska. Likely due to icing. He wasn't found for three days, likely because the teacher on the other end never reported that he failed to show. We had always been careful to check weather before taking off. Maybe conditions changed?
- Joined
- Oct 29, 2012
- Messages
- 1,329
I'm calling an end to Operation "Good Enough" so I can get on with the task that demanded an extra workbench.
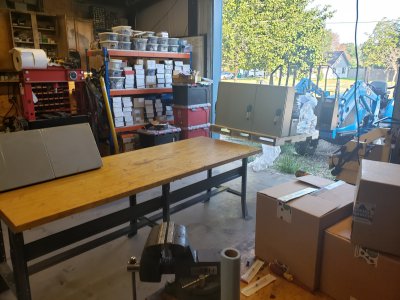
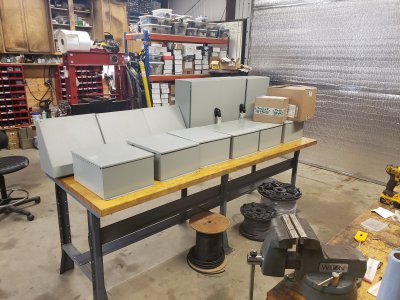
I drilled extra holes in the support leg assemblies on either side of all the major cracks and anchored the wood to the metal with lag screws to keep them from raising up. I figured that would be good enough so I wasn't even going to use any epoxy but at the last minute I decided to use this stuff:
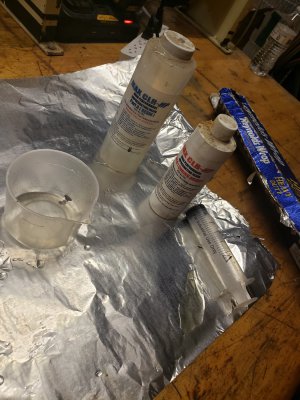
It's the "clear as glass" finish stuff for tabletops, so probably not the ideal choice of epoxy but it's what I had. I got it a few years ago for a project that I ended up lacquering instead. I paid a lot of money for it so I was saving it waiting for a "something special" to come up but that probably won't happen before it goes bad if it hasn't already. I injected it into the cracks with a syringe and then poured the remainder over the tops of the cracks.
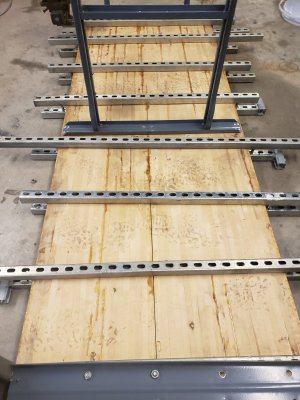
After removing the unistrut I was pleased to note that the tabletop did not "spring" or "pop" into any undesirable shape. It stayed just as flat-ish as it was with the unistrut. Here's what flat-ish looks like:
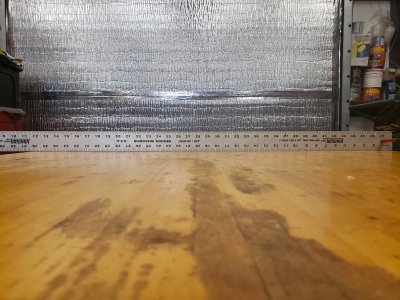
More than good enough to build panels on. If I ever want to use it as a surface plate I do the router skid and hand scrape (whittle) it.
Thanks for all the help!


I drilled extra holes in the support leg assemblies on either side of all the major cracks and anchored the wood to the metal with lag screws to keep them from raising up. I figured that would be good enough so I wasn't even going to use any epoxy but at the last minute I decided to use this stuff:

It's the "clear as glass" finish stuff for tabletops, so probably not the ideal choice of epoxy but it's what I had. I got it a few years ago for a project that I ended up lacquering instead. I paid a lot of money for it so I was saving it waiting for a "something special" to come up but that probably won't happen before it goes bad if it hasn't already. I injected it into the cracks with a syringe and then poured the remainder over the tops of the cracks.

After removing the unistrut I was pleased to note that the tabletop did not "spring" or "pop" into any undesirable shape. It stayed just as flat-ish as it was with the unistrut. Here's what flat-ish looks like:

More than good enough to build panels on. If I ever want to use it as a surface plate I do the router skid and hand scrape (whittle) it.
Thanks for all the help!
- Joined
- Oct 29, 2012
- Messages
- 1,329
The video below introduced me to a new idea regarding glue failures vs wood failures that might explain my history of observations. Time, or more importantly moisture/humidity over time, has an effect on the integrity of glue in a joint (according to the guy in the video). Since moisture/humidity was already mentioned several times as a probable cause for the table warping, it might also be the cause of the glue joints failing.
P.s. the table is still as flat-ish as it was when I reassembled it, holding up well.
P.s. the table is still as flat-ish as it was when I reassembled it, holding up well.

