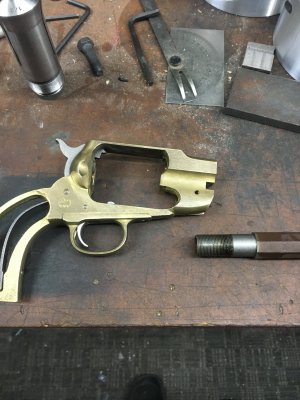
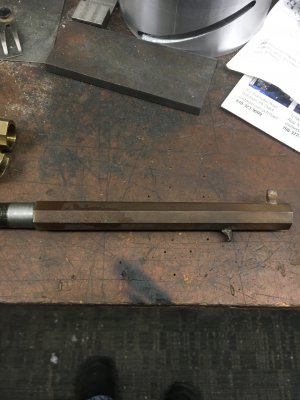
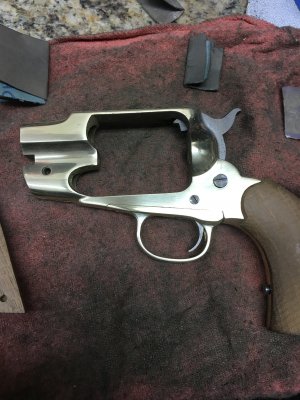
Anyone ever build a semi-finished percussion revolver kit?

Aaron_W

H-M Supporter - Sustaining Member
H-M Platinum Supporter
Joined
Nov 14, 2016
Messages
2,999
Just wondering what kind of a project one of these percussion revolver kits from Dixie Gun works or similar is. They don't give much information about the type of work or difficulty. Reading some on the comments it sounds like mostly hand finishing, but others suggest that a mill or lathe may be useful.

An example of one I was looking at

https://www.dixiegunworks.com/index...xie+Pietta+1851+Navy+Brass+Frame+Revolver+Kit

The price between finished and unfinished is not large $100-ish so it is mostly just to do it rather than for the cost savings. Just not sure what is involved.
 
I have looked at these and the kit for the price I think is a great deal . I would like to see a 45 long colt kit. Show us if you decide to build it how it goes together looks cool
 
for $100 get it finished, unless you want or need a project.
i had a achance when i was younger to help build one of the kits from Cabela's in the early 90's
the 1851 navy .44 Cal
it was fun to build and finish
it was a hoot to shoot!
 
I like this particular kit because it is a replica of a Confederate copy of the 1851 Navy, so leaving it in the white and possibly having a less than perfect finish is appropriate. As a first attempt it won't push my skills too hard.

For the price difference I agree the only reason to buy the kit is if I want a project, once you factor in your time, it isn't saving much. I'm just wondering how much of a project it is.
 
I don't recall any revolver, rifle or shotgun that fire fixed ammunition [cartridges]. I recommend having the first go at a 1858 Remington Army .44. The contours are very flat and straight. I used no machine tools, even for polishing prior to bluing. It takes considerable untold skill to retain sharp detail under a buffing wheel. After study of gunsmithing, it was fully disassembled, worked as individual components. Regulated trigger engagement, pull, timing of hand and pawl, the loading lever, all of it. The goal was rivaling what a purchaser might have seen on display in that era.
Next was a Walker-Colt. The lines are more 'artistic' than a Remington and much larger. The biggest portion was excess clearance and poor finish [toolmarks] of the action screws to hammer, trigger etc. So, I honed them properly straight and round, with new screws turned from O1, with a couple tenths of clearance, polished and heat treated. Has the best trigger pull imaginable. Not quite left in the white, it's finish is a careful oiled plum-rust.

One could treat a cartridge gun to the same work, but modern designs have a lot of machined in place features. I would dissuade playing with 1st or 2nd generation Colts, but a Ruger, Hawes, Dakota, EMF are ripe for it. I've completed two magnum Blackhawks, .357 & .44 that feel and look as if they came from the best custom shop. Again, no buffers!
Watch videos of moldmakers working inside cavities and core surfaces, and diemakers on punches and dies. Until recently, speaking historically, all of it was handwork.

I think any cartridge firearm kit would be more of the 80% variety as even if single action and black powder are considered "real guns". Most states including California treat percussion firearms as antiques with considerably looser regulation.
 
Seems like 80% would qualify in most states; but handguns being what they are and how they function, I'd suspect manufacturers/ distributors have liability concerns. Black powder + percussion ignition is low pressure. Only a very few open top frames withstand light smokeless powder charges and heavier [than ball] conical projectiles.
 
Seems like 80% would qualify in most states; but handguns being what they are and how they function, I'd suspect manufacturers/ distributors have liability concerns. Black powder + percussion ignition is low pressure. Only a very few open top frames withstand light smokeless powder charges and heavier [than ball] conical projectiles.

Good point, I didn't even think about the higher stresses of modern smokeless powder ammunition.
 
I have built several of them over the years a couple 1858's, a Walker, and a Spiller and Burr. The kits come to you in assembled, working condition. From there you need to disassemble, polish, tune, and finish the metal. The grips need to be sanded and finished as well.

I like them since you have the opportunity to finish them much better than what you get with a factory job, if you do it properly they will be much closer to the originals. You can also remove the Italian markings and replace with more authentic marks also. As someone who likes using historical finishes like charcoal blue, rust blue, and bone and charcoal color case hardening these provide a great canvas for that work.

One note, stay away from any buffing wheel for this job. Files, sanding blocks, and Scothbrite are all you need. Buffing in my opinion is not appropriate for 90% of the job and even in the case of the 10% the work can still be done by hand.
 
I’m in the process of restoring one right now. My father past away about a year ago and while going through his firearms found this old beauty rusting away in a drawer. I remember as a little guy him working on this gun. I decided to take it a restore/build to what it should be. I cleaned all the metal and buffed. Fitted all the pieces, filed and fitted the handle. Found the wood shrunk a touch but made the best of it. I’m thinking of bluing the barrel, cylinder, trigger and hammer with a hot solution I am just worried because the front site on barrel is silver soldered on and I don’t know if the hot blue will melt the solder? I don’t want two shades of a hot blue and a Casey’s blueing. I really want the “blueish” color not a black. All in all I think it turned out good so far.
48242279-A9C1-4848-B6C1-633AC04FBE66.jpeg
89E7C714-FFEA-4E6F-B639-BA737D40E30D.jpeg
F39C58D4-4B9B-44B7-8AAD-0FADE99962E5.jpeg
 
Back
Top