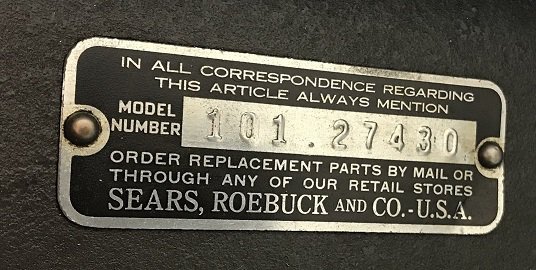
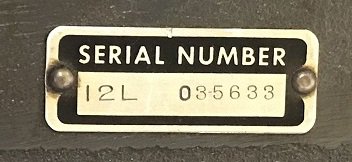
Atlas/Craftsman Serial Numbers and Bearing Dates (if applicable) For Database Entries

Tim,

Please confirm that the LOA of the bed ways is about 42".

That is the earliest 10" serial number so far reported. And the only 10C. Attached below is a catalog page with a photo showing what was probably originally shipped. Note no change gear guard, motor switch, back gears, or lead screw. The half nut operating lever is present but is in the DOWN position because there is nothing behind to hold it up. A PO, probably the OO, bought the lathe and then within less than a year, bought the back gears, change gear system, etc. to bring it up to what I think at the time would have just been called a 1042 but might have been a 1042D.

Your switch box is original, at least to the add-ons, but the switch mounting plate and switches are not original. There was only one switch, and it was the style commonly known as a wall switch (or light switch). I would guess that the second switch on your machine is probably a reversing switch.

I agree that it probably dates from 1934.

It is interesting to note that according to the catalog prices, the total cost with the added upgrades was $106.00. If he had bought it that way to begin with, the price would have been $105.50.
 

Attachments

  • Atlas Catalog 1934 No 8 Supplement 7.pdf
    872.1 KB · Views: 23
Last edited:
Thanks for the information! The length of bed is 42" The switch plate as you surmise has the forward and reverse switch.

Tim
 
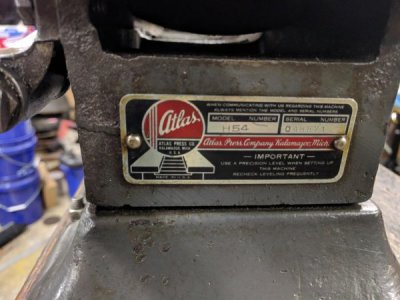
Best guess on this H54 s/n 048871?

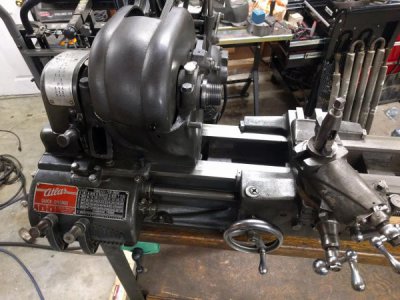
Has the QC gear box, babbits. The thing that throw me is it has the reversing tumbler like my 12" and not the lever like my TH's.

IMG_20181211_200828.jpg

IMG_20181211_190332.jpg
 
Your machine was originally bought as an H-54. Best guess is that it was made in 1943. "H54" means that it had has a Horizontal countershaft, babbit bearings (with Timken bearings it would have been a TH54), change gears, and a 54" bed, so it is a 10x36. We know that it was originally a change gear machine, as the first QCGB appeared in mid or late 1947, the model number would have been QC54, and production of babbit bearing machines ceased in about 1945.

All QCGB equipped machines had tumbler style reversing instead of the FWD-OFF-REV gearbox in front of the headstock.. The GB is a Model 1500. After about mid-1950, the Model sold was the 6800. The only significant difference between them is that the early tumbler positioner was a spring loaded pin that fit into one of three holes in a quadrant, like the pins on the GB setting levers. The 6800 for some reason has a cast one piece lever with a clamp bolt to hold it in one of the three positions. No one seems to know why they changed to a less desirable way of detenting the lever.

Had you acquired the old FWD-OFF-REV box and the old lead screw, they would bring good money today as they would have had little wear as the QCGB conversion would have occurred before 1950. So not much wear.
 
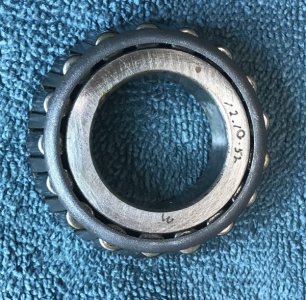
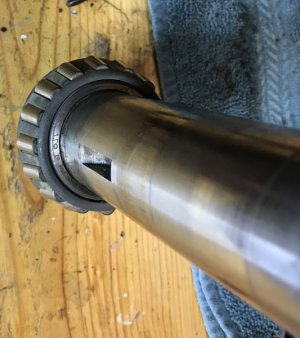
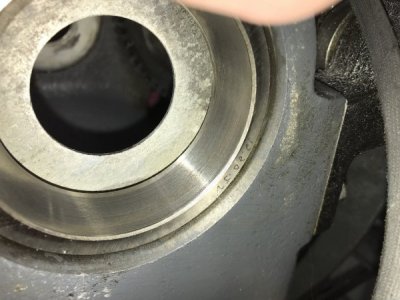
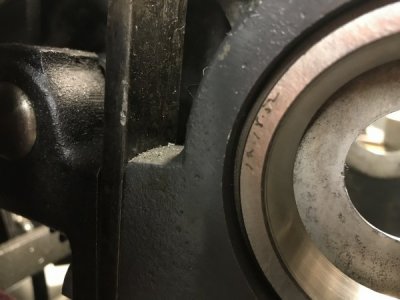
I have my lathe disassembled to replace the headstock belt, so I noted the bearing dates. One is 12-20-52, the other is 12-10-52. The bearing races are 12-18-52 and 12-20-52.
LeftBearing.JPGRightBearing.jpgModel Tag.jpgSerialNumberTag.JPGRightRace.jpgLeftRace.jpg
 
Thanks. I updated the DBF file on the local drive and will update the one in Downloads.

FYI, the more common terminology or names used for the two parts of a separable tapered roller bearing are Cup and Cone. "Race" or "Outer Race" and "Inner Race" are more commonly applied to ball bearings and self-aligning straight roller bearings.
 
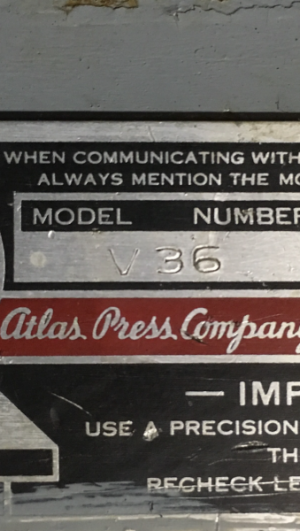
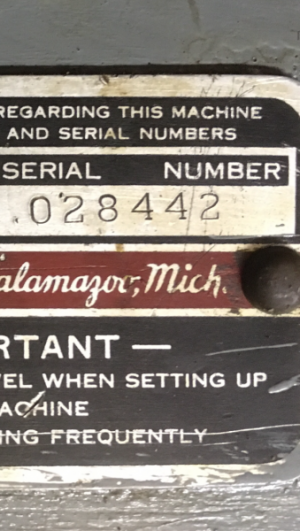
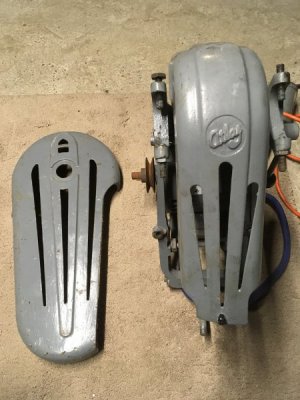
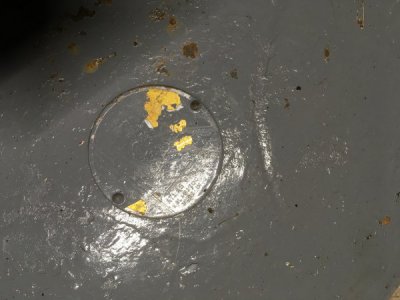
New acquisition: V36, 028442, fully guarded belts, babbitt bearings that I’ve been told are no good, and power cross feed. I couldn’t find any numbers on it, other than the data plate. Any idea how to get the paint off that emblem without ruining the logo? I already scratched it once.

C9DCA8C9-134B-49AB-8CA8-C4C2FEAD2257.png

97CAC0E3-FE0A-4F67-B80A-852E2F747403.png

8EAE9232-CE93-4260-8F7E-6C5F75D162F9.jpeg

CB19341F-E811-4C2F-B023-7C659BD3D766.jpeg
 
28442 (no leading zero) possibly preceded by V should be stamped into the top of the the front way near the right end in the narrow zone that neither the tailstock nor the carriage run on.

Is the data plate on the rear or the right end of the bed? I'm trying to determine when that change occurred.

To evaluate the bearings, first slack the spindle belt. Then set up a dial indicator touching the top of either the spindle flange or the register (unthreaded area between the front of the flange and the last thread). Obtain about a foot long or more piece of 3/4" diameter solid round bar (preferably steel but aluminum would work). De-bur one end and slide about 5" of the bar into the spindle. Zero the indicator and then lift the loose end of the bar firmly. Note and record the indicator reading. Reposition the indicator to the rear of the flange or register. Push the end of the bar firmly to the rear and zero the indicator. Pull the bar firmly toward you and note and record the indicator reading.

Repeat the procedure on the left bearing, with the indicator touching probably the knurled threaded collar that retains the spindle gear and sets the spindle end float.

Then loosen and remove the two hex head bearing cap bolts and remove the bearing caps (upper half of the bearings. Look for the remains of the two 10D-128 shim packs. They (or at least the originals) are each shaped like the flat machined faces of the bearing caps, including a hole for the bolt to go through. Originally, they each consisted of 5 pieces each 0.002" thick, somehow stuck together. So if you find something under the bearing caps, checking its thickness with a micrometer will reveal how many pieces are left. You should acquire a 1937 Version 4 of the Atlas Manual Of Lathe Operations (MOLO for short) and read the section on babbit bearings in it. In Downloads and also for non-donors in the sticky are at the top of this Forum is a MOLO History and a MOLO Version selection chart by lathe model number.

On removing the paint from the Logo tag, I don't know. Most likely, any paint remover will also remove the decal. However, if that does happen, you aren't any worse off than you are now. So I would find the holes in the back side of whatever that is that the tag is attached to, drift out the two round head drive screws and remove the tag from where it is. Then try a paint remover on just the tag and see what happens.
 
Last edited:
For paint removal in this type of situation I usually use simple green and paper towels. Soak a paper towel with simple green and lay it over the plate. Check it regularly, every 1/4 hour or so and wipe. Simple green will soften and remove the paint, but not like a real paint stripper. Leave it too long and it will remove everything, but taken slowly you can save the printing underneath. Success depends on the type of paint and patience.

Sent from my SM-G930T using Tapatalk
 
Back
Top