- Joined
- Sep 22, 2010
- Messages
- 7,223
Site is gone...
Powder Coating at Home
I've known about powder-coating since seeing it in the Hot Rod & 4x4 magazines I started reading back in the early 80's. It's always been appealing for it's durable finish that is so resistant to wear and fade. Coating offers a finish that conventional painting just can't match and it's ability to "fill in" and smooth out the rough surfaces of many of the small castings that I plan to work with. Small errors in the surface finish are easily hidden.
A while back I picked up a home powder-coating setup from the Eastwood Co. I've seen them for quite some time and finally the price came down enough that I was able to afford it. You don't need much to powder-coat your own parts at home. Everything needed is shown here except for the powder itself.
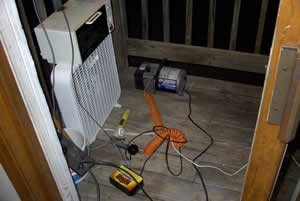
You'll need three things to get started. ONE: You need a powder-coating kit; this will include the spray gun, powder and electronics. TWO: You'll need a small compressor, as you can see I have a small Campbell_Hausfeld compressor that's portable and convenient for uses like this and airbrushing. When powder-coating you'll use no-more than 10psi, I usually use about 8psi when spraying the powder. THREE: You'll need an oven of some sort that's capable of going to 400*. An old kitchen stove would be ideal but I use a small toaster oven for right now. Whatever you use becomes a dedicated shop stove; you can't cook your French fries in it after powder-coating.
I found the kit on sale, bought the compressor used and was given the toaster oven so I have less than $125.00 into the whole affair. For a single Dad on a fixed budget, low cost is paramount.
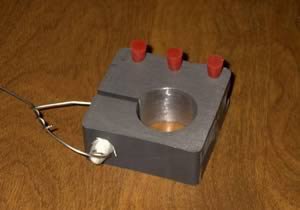
I'd been waiting for a suitable victim to come along when I happen to cross paths with the nifty little toolholder seen in many of my more recent pictures. I keep several colors of powder on the shelf for just such an emergency. The toolpost spends most of its time on the Homer lathe, which is a dark blue so I figured I'd give Ford Dark Blue a whirl. Here's a picture of the toolholder with the holes plugged to prevent powder from getting to the threads. The tape used in the cross-hole is a high temp fiberglass tape that I bought through Eastwood and the wire is stainless steel safety wire that came with the kit.
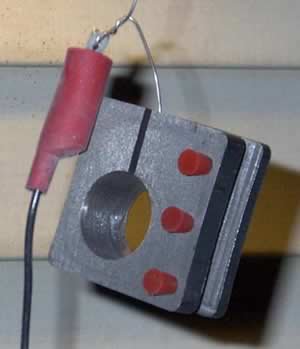
After getting it ready it was hung outside. A plastic jar containing the powder is attached to the gun and everything is plugged in. A ground wire is run to the workpiece, I use the stainless wire and attach the ground clip to that so that I don't have to ground to the work directly. To actually spray the powder is a two-handed job, you have to hold a switch and depress a trigger button with one hand (this sends an electrical charge thru the ground strap to the work piece) and use the other to trigger the powder and spray the workpiece (this sprays the powder which is electrically charged and draws it to the workpiece). When you're ready to go it looks like this.
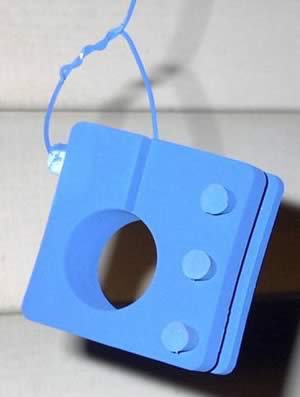
Once it's been coated with powder the piece is very fragile. The powder can be easily wiped or blown off.
After being powder-coated the part is carefully taken down and placed in a preheated oven at 450'. After a couple minutes the temp is turned down to 400* and the part will stay there at that temp for approx 30 minutes while the powder melts and flows across the surface. No drips or sags at all, multiple coats can give various effects but I haven't gotten fancy and tried any yet. To make hanging the parts easier I drilled a few small holes in the top and side of the toaster oven that allow me to just take the work off a hook and pass the wire thru the hole in the oven and secure it while the part bakes.
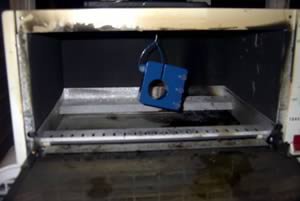
After a half-hour I took out my shiny new toolholder and here's what I had.
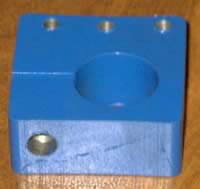
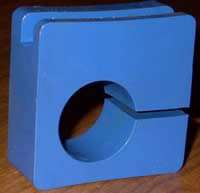
I was thrilled with my first try. The finish came out smooth and hard and almost all of the jaw-marks and surface flaws have been completely covered up.
I was so pleased with the results that I tried again with a larger project. This was where the shortcomings of the toaster oven became apparent. If you have the room to set up an old kitchen range then I would strongly advise you to do so, the added capacity will make many more projects possible. I explored the maximum capacity of my toaster oven with the drawtube for my 3C collet adapter for the 7" lathes. I had cut a section of steel tubing down, pressed in a threaded insert I made to fit the 3C collets and brazed on a handwheel salvaged from a broken lathe apron.
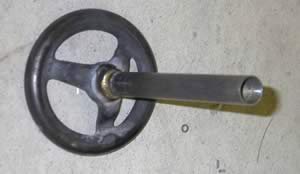
I wanted to try a different color and decided that a Hammertone Gray would suit this particular tool just fine. Unfortunately the 5" handwheel was just about the largest thing that would pass through the oven door. Hanging and powder-coating it presented no difficulties but transferring it unscathed into a 450* oven was no small task. Fortunately for me multiple layers of powder-coating can be laid down to build up tolerances or to repair mistakes. I bumped it a couple of times and rubbed some of the powder off. I'll probably do it again when I find a larger oven to use but it still came out very nice overall. You can see just how smoothly the powder flows and covers.
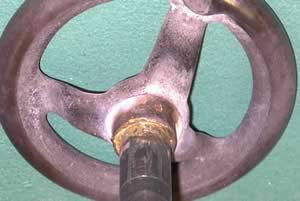
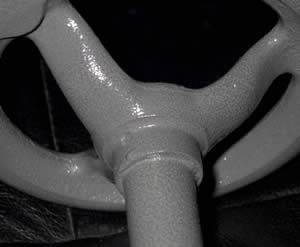
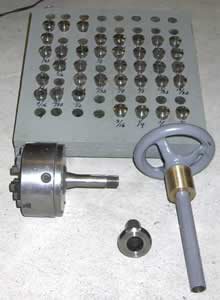
I really like the way the Hammertone came out. When I see powder on sale again I'm going to buy a lb. Or two to use on other shop tooling and accessories like this. I recently stumbled across some manganese Parkerizing solution that I'm eager to try out on some replacement lathe parts. Here's the whole set with the newly powder-coated drawtube.
Powder Coating at Home
I've known about powder-coating since seeing it in the Hot Rod & 4x4 magazines I started reading back in the early 80's. It's always been appealing for it's durable finish that is so resistant to wear and fade. Coating offers a finish that conventional painting just can't match and it's ability to "fill in" and smooth out the rough surfaces of many of the small castings that I plan to work with. Small errors in the surface finish are easily hidden.
A while back I picked up a home powder-coating setup from the Eastwood Co. I've seen them for quite some time and finally the price came down enough that I was able to afford it. You don't need much to powder-coat your own parts at home. Everything needed is shown here except for the powder itself.

You'll need three things to get started. ONE: You need a powder-coating kit; this will include the spray gun, powder and electronics. TWO: You'll need a small compressor, as you can see I have a small Campbell_Hausfeld compressor that's portable and convenient for uses like this and airbrushing. When powder-coating you'll use no-more than 10psi, I usually use about 8psi when spraying the powder. THREE: You'll need an oven of some sort that's capable of going to 400*. An old kitchen stove would be ideal but I use a small toaster oven for right now. Whatever you use becomes a dedicated shop stove; you can't cook your French fries in it after powder-coating.
I found the kit on sale, bought the compressor used and was given the toaster oven so I have less than $125.00 into the whole affair. For a single Dad on a fixed budget, low cost is paramount.
I'd been waiting for a suitable victim to come along when I happen to cross paths with the nifty little toolholder seen in many of my more recent pictures. I keep several colors of powder on the shelf for just such an emergency. The toolpost spends most of its time on the Homer lathe, which is a dark blue so I figured I'd give Ford Dark Blue a whirl. Here's a picture of the toolholder with the holes plugged to prevent powder from getting to the threads. The tape used in the cross-hole is a high temp fiberglass tape that I bought through Eastwood and the wire is stainless steel safety wire that came with the kit.

After getting it ready it was hung outside. A plastic jar containing the powder is attached to the gun and everything is plugged in. A ground wire is run to the workpiece, I use the stainless wire and attach the ground clip to that so that I don't have to ground to the work directly. To actually spray the powder is a two-handed job, you have to hold a switch and depress a trigger button with one hand (this sends an electrical charge thru the ground strap to the work piece) and use the other to trigger the powder and spray the workpiece (this sprays the powder which is electrically charged and draws it to the workpiece). When you're ready to go it looks like this.

Once it's been coated with powder the piece is very fragile. The powder can be easily wiped or blown off.

After being powder-coated the part is carefully taken down and placed in a preheated oven at 450'. After a couple minutes the temp is turned down to 400* and the part will stay there at that temp for approx 30 minutes while the powder melts and flows across the surface. No drips or sags at all, multiple coats can give various effects but I haven't gotten fancy and tried any yet. To make hanging the parts easier I drilled a few small holes in the top and side of the toaster oven that allow me to just take the work off a hook and pass the wire thru the hole in the oven and secure it while the part bakes.

After a half-hour I took out my shiny new toolholder and here's what I had.


I was thrilled with my first try. The finish came out smooth and hard and almost all of the jaw-marks and surface flaws have been completely covered up.
I was so pleased with the results that I tried again with a larger project. This was where the shortcomings of the toaster oven became apparent. If you have the room to set up an old kitchen range then I would strongly advise you to do so, the added capacity will make many more projects possible. I explored the maximum capacity of my toaster oven with the drawtube for my 3C collet adapter for the 7" lathes. I had cut a section of steel tubing down, pressed in a threaded insert I made to fit the 3C collets and brazed on a handwheel salvaged from a broken lathe apron.

I wanted to try a different color and decided that a Hammertone Gray would suit this particular tool just fine. Unfortunately the 5" handwheel was just about the largest thing that would pass through the oven door. Hanging and powder-coating it presented no difficulties but transferring it unscathed into a 450* oven was no small task. Fortunately for me multiple layers of powder-coating can be laid down to build up tolerances or to repair mistakes. I bumped it a couple of times and rubbed some of the powder off. I'll probably do it again when I find a larger oven to use but it still came out very nice overall. You can see just how smoothly the powder flows and covers.


I really like the way the Hammertone came out. When I see powder on sale again I'm going to buy a lb. Or two to use on other shop tooling and accessories like this. I recently stumbled across some manganese Parkerizing solution that I'm eager to try out on some replacement lathe parts. Here's the whole set with the newly powder-coated drawtube.


