Back Plate

Interesting. Thanks Bob
I just took a facing cut on a Ø 6".
Up to the center there was .0008" and past that an additional .001".
I'm going to go back out monkey around some. I might change to my 3J and try again.
I tried the cut first with my modified 1.25" tool holder. It cut nice until about one third in then got bad, rough.
Not sure what was going on there but maybe the piece moved a little.
Remember that the surface feet per minute cutting speed decreases as the diameter of the work decreases. It is very common for what you are experiencing to happen. Try a faster spindle speed as the tool gets closer to the center of the work. Going beyond center is a good way to damage the tool, don't go there...
 
Remember that the surface feet per minute cutting speed decreases as the diameter of the work decreases. It is very common for what you are experiencing to happen. Try a faster spindle speed as the tool gets closer to the center of the work. Going beyond center is a good way to damage the tool, don't go there...
Yes, very true! too slow a cutting speed will adversely effect carbide tools so far as pressure on the tool and surface finish attained. It has been proven that the higher cutting speed (within the capability of the cutting tool, the better the surface finish attained; true with carbon steel, HSS tools, carbide, ceramics, and diamond tools.
 
Only problem with facing with the compound is that

The problem with facing with the compound is that the surface finish will likely suffer, as it is difficult to maintain a regular feed by hand and there is a tendency for hand feeding to slightly move the compound from side to side, causing the tool to alternately dig into the work and pull away; there is a fine line between ease of feeding and a tight slide, stable but difficult to feed.
A hand held variable speed portable drill, with a shaft ending with two forked prongs chucked up (to drive the compound handle), can turn the compound at a constant speed, and gives a nice finish.
 
I had a similar problem (http://www.hobby-machinist.com/threads/cross-slide-facing-adjustment.44572/) and when I took the carriage off it became obvious that it had worn at the guiding surface and the cross slide was no longer at 90deg to the bed. I machined the carriage back to perpendicular and fixed the problem.
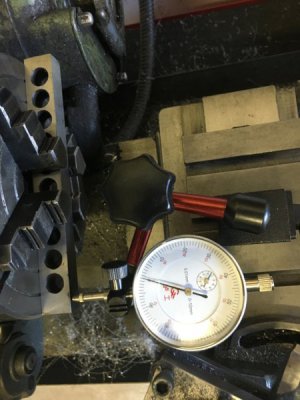
The test is to fix a parrallel across the chuck, indicate it and then turn the chuck 180deg and adjust the parallel till you get the the same reading without moving the crossslide. Then feed the crossslide in and see if the parallel is ... parallel to the crossslide travel.
IMG_3696.JPG
 
Last edited:
Mozampete I will look into that more later.
I took another cut with my big arse carbide holder. Same feed .oo37"/rev at about 700rpm with a larger DOC. Turned out better. Just before the center turned south again. Anyway I got a better reading this time. Virtually zero until center then about a thou after that. Getting towards the end measurement varies.
Also I noticed my cross slide handle was a little tight (thrust bearing) and every time it tightened (every half revolution) the indication would move significantly. The problem with this handle adjustment will not stay. It always loosens up.
Okay sorry for that. I'll try to keep on track lol
 
The problem with this handle adjustment will not stay. It always loosens up.
Depending on the lathe, there is sometimes a small socket head cap screw in the center of the cross slide dial. It will be a bit deep in a small hole. It is used to lock the setting. It also needs to be loosened to get a good setting, then screwed in to lock the setting. If your lathe is made like that...
 
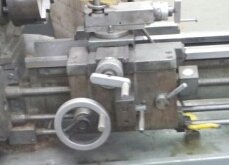
Does your cross slide handle look like this or is it round?

20170527_223722.jpg
 
Back
Top