Beauty in The Beast: Webb 5BVK Barn Find/Conversion

Tried Webb - no luck there.
They still support the machine with some mechanical parts - but had little information on the CNC side of it.
I found some links - ironically from a past post on this site.
Helped me find a third link as well.
Different manuals - that appear to be for the type of Funac controller I have.

https://www.cnccenter.com/pdfs/61404e.pdf

http://cncmanual.com/fanuc-0-0-mate-machining-center-parameter-manual-61410e/108/

Little more web(b) searching turned up this "connections manual" - which has some basic schematics in it.

http://dermako.com/Fanuc_Web_Manuals/CNCs_Legacy/61393e.pdf

Posting here so I can easily find.
Not sure if helpful...

@ sdelivery did your machine come with any schematic info or manuals?
 
Sorry, zero manuals. No schematic but mine was Allen Bradley 8400... nothing would be the same.
 
Yup - that was the other brand that Webb also used.
Mine was the General Numeric...
Thanks for letting me know tho.
 
Some weekend entertainment with plenty of pictures:

As previously noted - working on manual upgrades in parallel.
Having put some milage on this past year - gained better sense of needs.
I am a tinkerer - so this is phase I.
If I don't like it - I'll take what I learn and change it.

Current conditions:
- Turning cogs with belts by hand is... ok.
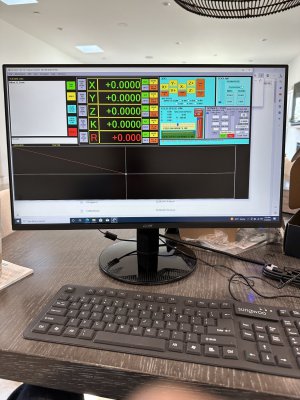
- My fly by wire control panel does the big moving - and I adjust the fine amount by hand.
- The X and Y are fairly willing to hover where I place them
- The quill will wander ever deeper into what I am cutting - unless I hold it.

Upgrades:
- Handles for X and Y.
- Ideally easy to reach without the machinist yoga I'm currently performing to fine tune and watch the DRO
- Quill lock - need to be able to keep it in one place
- Quill fine tune wheel.

Started with X & Y.
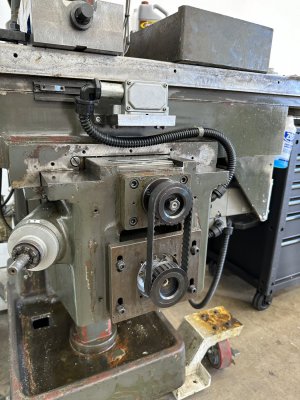
Here is what I have been adjusting by hand:
IMG_2379 2.JPG
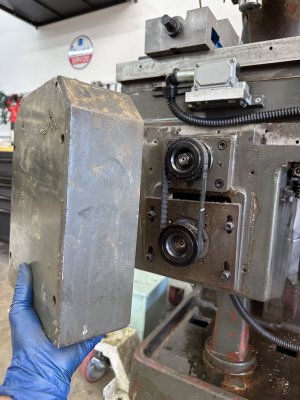
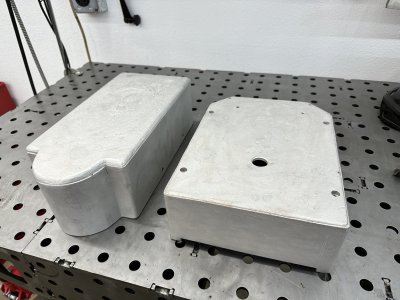
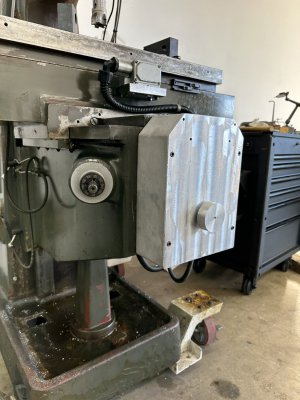
Had the original covers on the shelf (had to be off so I could access cogs with my hands).
IMG_2380 2.JPG

The covers are cast aluminum - and likely porous - but I like the look of polished aluminum - so gave it a go.
First - I stripped by leaving in a hot tank of I don't know what - that my neighbor's shop has.IMG_2414 3.JPG

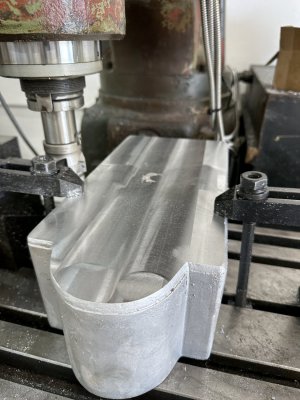
From here - I got out my face mill - to see what kind of finish I could put on them.
If honest - I have never been able to get the mirror finish I imagined I would with this face mill - and my suspicion is the insert qualtity - but it's not awful.

IMG_2433.JPG

Now came the adapter.
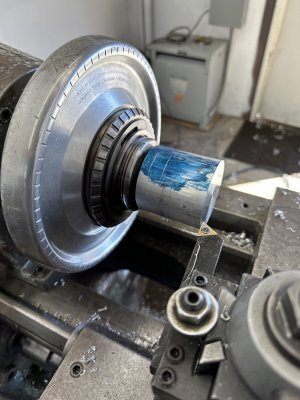
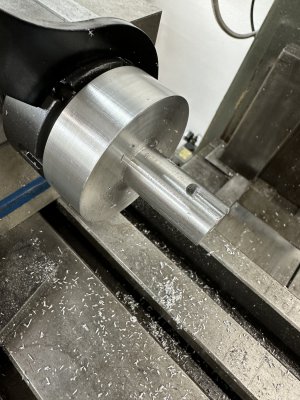
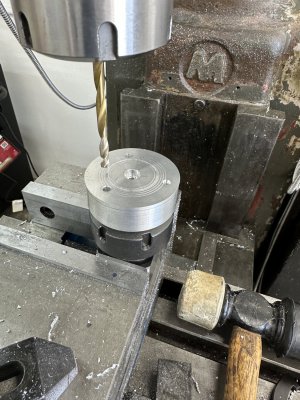
Here I wanted to turn a part and add a keyway.
Tried out a Jacobs chuck I had secreted away but never installed.
Concentricity when removing/replacing/flipping parts around - was remarkable.
IMG_2384 2.JPG
Threw that part in the cheep collet block I bought - and managed to cut a keyway of reasonable precision.

IMG_2404.JPG
Then flipped the part 90° and tested out the DRO hole circle feature. Kinda remarkable!
IMG_2441 2.JPG
On went the cover (machined but not polished) and the adapter (pic shot before I hole drilled)
IMG_2437 2.JPG
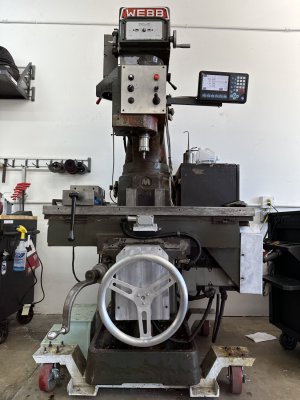
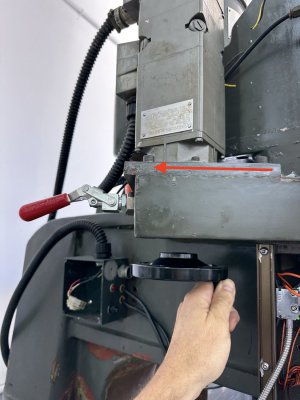
And finally the giant, though light weight, wheel.
IMG_2446.JPG

Is it ridiculously large?
Well - I suppose that depends on your definition of ridiculous.
My goal here - was to end up with a hand wheel I could access easily - that didn't interfere with the table sliding out.
I'll have to work with it a bit and see if I like it.
Of course - if I don't - I can downsize to something more traditional - but my hunch is - I am on the right path here.
Time will tell.
 
Creeping along - with some more manual upgrades for the time being.
Trying to stay cognizant of not adding detrimental features to the CNC capabilities.
Which is to say - focused on making sure the handles are nicely centered, balanced, and light.

One of the challenges of manual work, is the quill wanting to wander under the forces of gravity.
I normally rest my hand on its servo motor cog - to steady it - which is fine to an extent.
But when surfacing - that's less than ideal for super nice finish.

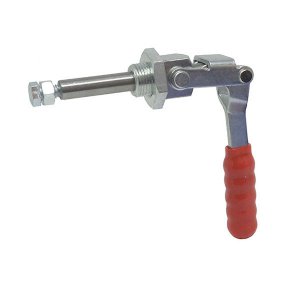
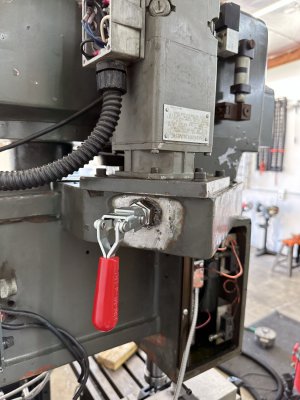
Concept was to use a plunger type clamp like this:
pp-36204-push-pull-toggle-clamp-cross-referenced-604-23_1200x.jpg
Additionally - I want to add a handle.
Keep in mind - there is no way to manually move my quill up and down - no wheel, except if I painstakingly reach inside the casting and turn the small cog.
The challenge: there was little to no room for anything larger than a 3" wheel for turning.
Seemed less than ideal.
So I needed to shift servo motor farther from the machine - and order a longer drive belt.
IMG_2455.JPG

You can see the plunger mounted in the picture above.
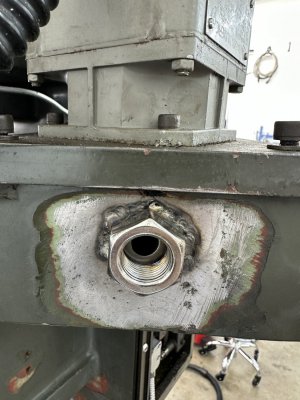
In order to put it on - I decided to try and weld on a bolt - rather than drill and tap a hole.
I wanted to put it directly in line with the axis, so that as I tensioned my belt - it would bring it closer or further from the plunger head - but never take it off center.

The advantage of a welded on bolt was: I could overbore the hole on the machine to allow me to center the bolt.
The challenge was: this meant successfully welding cast iron.

Not sure what everyone's experience is with that - but this was a bit experimental for me.
I had sourced some nickel welding rod that is reputed as usable.
Unfortunately - it was above my head, and around the back - so full welding yoga ensued.
I probably should have heated the casting with a torch first - but I managed to get decent results in any event.

IMG_2424 3.JPG
It's far from perfect - but it is plenty strong - and I managed to get the plunger dead nuts center on the cog.

IMG_2426 3.JPG
From a usability standpoint - this is a HUGE upgrade for manual.
When surfacing - I can hold it dead nuts on my DRO.
I have a rubber stopper on it - and keep the tension low - so that I am not putting a great deal of strain on the motor axle.

Next up: mount a 5" aluminum wheel with speed handle.
Will likely go with a folding one - so that it is less of a detriment to unbalanced spinning.
Conversely - I have a balancing device that could allow me to balance a non folding unit.
Will keep it light no matter.
 
Update.
The conversion has commenced.
Jim is sorting out a plan - and I am doing my best to keep up...

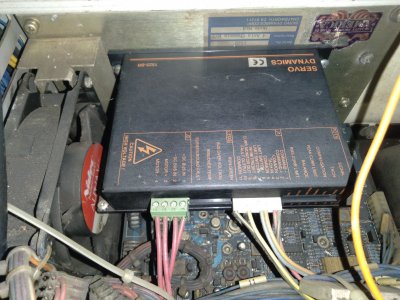
Will post some pics and explanations after we test a first action of the axis through the existing servo control boards.
First - I have a question for the electrically savvy.

Situation:

I have a row of SINGLE phase 208 outlets down my wall.
I use them for plugging in my welder.
I also used it to plug the mill's VFD in.
Not a lot of room in breaker box, but I could install a 3 pole breaker with a little rearranging of the other breakers.

Goal:
I need ONE of the outlets to be 3 phase - for the mill.
I would like the others to remain 1 phase.

Question
Can I run both my single phase outlets and my (one) 3 phase outlet off the same breaker?
I would do this by running one additional wire through conduit to the breaker I want to make 3 phase.
This breaker would then get 3 legs feeding it.
The other breakers would use existing 2 wires running back to two of this 3 leg breaker.
Thus a single 3 pole breaker would be feeding both a 3P plug and a few 1P plugs.

Thoughts?
 
No, no, no.
It might technically work BUT it is not safe or correct.
First break up circuits don't combine more load, either 1 phase or 3
second, you would have 2 breakers so one could trip and one might not.
A dedicated 3 phase circuit with its own 3 phase circuit breaker in its own conduit is proper and current code requirement.
Remember someone else might not realize what you have done and go to work on a circuit and be injured.
I know your excitement to build and try out this new machine BUT stand back and
Double check everything.
The time spent stepping back and looking at it should make you think about each step and will lead to less mistakes or do overs.
Get in to much of a hurry and someone or something will probably get hurt.
There is NO time line to get it done.
Stay Safe
 
Back
Top