Brass Gas Lamp Restomod

Firstram

Registered
Registered
Joined
May 26, 2018
Messages
1,473
I have had these lamps squirreled away for 25 years or so, my Great Uncle saved them from a teardown sometime in the 60's. I think it's time to either fish or cut bait!

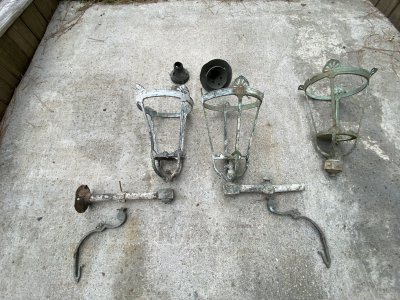
There are 3 partial fixtures so, I have most of what I need to make 2 front porch lights. The amazing thing is that I have FOUR of the hand blown glass globes! I'd like to identify the alloy so I can make some repair parts that will take a patina at the same rate as the original parts. There's quite a bit of damage as well as broken solder joints. I plan to get down to cleanish brass and use some undetermined commercial aging. This stuff is as soft and malleable as copper but, scraping through the corrosion you can tell it's definitely brass. How do I find out what alloy to use or, could I just go with copper and tie them together with the aging?

Anyway, some pictures that don't really provide a sense of scale. Assembled these will be 36" tall!
IMG_8505.jpeg

IMG_8507.jpeg
 
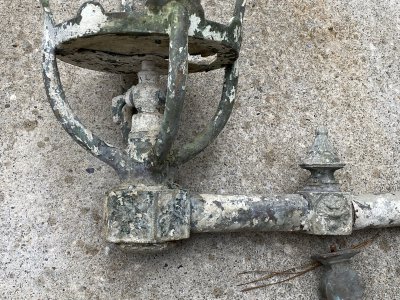
These are the parts I need to duplicate

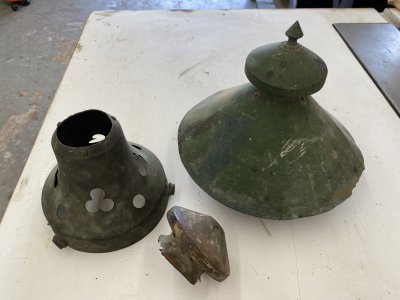
The "roof" on one of the caps is missing, it's 0.090" thick. The middle section was originally spun from one piece with the small cupola and finial soldered on. This assembly is riveted to the lower section. I plan to roll a cone, flare the top out to accept the existing cupola and turn the seam toward the wall.

IMG_8515.jpeg

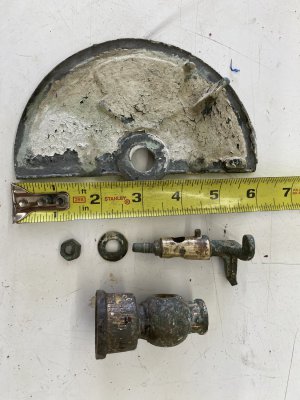
I have two valve bodies so faking the guts to finish the 2nd one is easy. The rotating cover is about 1/8th thick but could be the same 0.090" as the new roof, you can't see the thickness when it's in place. Pressing the details and having the handle in the right spot should be convincing enough.

IMG_8519.jpeg


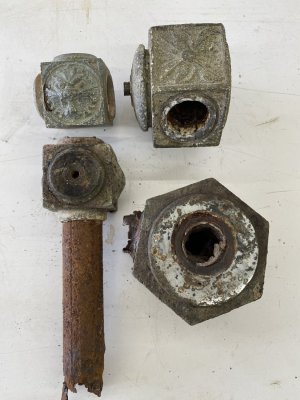
The castings under the fixture are unfortunately aluminum and very corroded. I have ordered some Potassium Alum to try and dissolve the remnants of the iron pipes. Hopefully I will be able to retap the 3/4 pipe threads well enough to hold the fixture together! I won't be reusing the smaller pieces so, I will test with those before I ruin the ones I need.

The flange (no picture) that mounts the fixture to the wall is cast iron. I plan to heat it and hit it with a brass wire brush on a grinder, we'll see how much I can build up! I'm not sure how to deal with the aluminum castings yet, certainly open to suggestions!

IMG_8520.jpeg
 
Last edited:
My great grandfather was somehow involved in the project to bring gas lamps to Cleveland prior to the turn of the century, before working for Edison and their first Cleveland power plant. He wrote a little about it in his late years as a rough memoir and drew diagrams about how they were built and operated. The examples of post and wall mount gas lamps he drew looked exactly like those.

There are a number of exotic chemical patinas out there. There used to be a specialty outfit in Oakland or Berkeley, CA that manufactured and distributed chemicals just for metal and antique patination. It's mostly simple salts or acids. Would be interesting to see, if you go that route.
Interesting info about your grandfather! Chemicals are the plan for now, we do like the patina and I have no plans to POLISH anything, ever!
 
Just a heads up, that white paint is unquestionably lead oxide. Maybe chem strip it before wire brushing or sanding to minimize your exposure.
 
Just a heads up, that white paint is unquestionably lead oxide. Maybe chem strip it before wire brushing or sanding to minimize your exposure.
Count on it.
Paint, stripper, and gloves all the way!

Years ago I was working on the movie virus. We fabricated all kinds of breakaway metal components. Everything was made out of lead and gas welded with jewelers torches. I am so sensitized to lead if I walk into a contaminated area I can taste it within five minutes! The good old days, right?


Any input on how to determine what alloy brass this could be? I’ve never seen anything quite this soft that wasn’t pure copper.
 
I have a harbor freight blast cabinet that I will probably convert to vapor blasting. It’s something I’ve been planning on doing for a while and I think it will be gentle enough to use on a project like this.
 
When it comes to brasses, I don't know anything outside of the lab or an x-ray fluorescence analyzer that can tell you. Testing for the presence of lead (if it matters) in your brass can easily be done with a Lead-Chek swab kit from the hardware store, but that does nothing for determining concentration. Those lamps may have been cast from recycled material to begin with. Copper and tin are a given, but zinc, aluminum, magnesium, and lead are all fair game. Some marine brasses even have arsenic added. Arsenic machines nice and keeps the barnacles and algae off.

I think you're fine to clean, repair, assemble, even solder or braze as needed, and display them in your house without poisioning anyone simply by using good precautions to avoid ingesting or inhaling dust.

I did a deep dive in a professional capacity on so-called vapor blasters. I am very impressed, and am thinking about replacing my dirty HF cabinet with one. They're not that expensive, and as you say, can be made in the shop. The biggest benefit is health, but they leave a nice profile too.
 
Back
Top