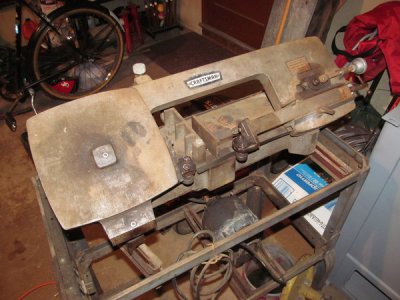
Craftsman Power Hacksaw Rebuild

Here is a switch from A Sawmaster posted by AR1911. The whole picture is the top group of the forum. I zoomed in to see how it was actually made. This appears simple and functional. Not sure of any down-side features but a lot more simple to include then the larger slant block and rod. I haven't looked at the back side curve for the clearance of the switch but another feature to consider.

The only downside I see to that setup is that if you want to turn the machine off manually, you have to be real quick so as not to get your fingers smashed.
 
If you have a master switch somewhere on the stand and feed the shutoff switch from that, it will be a lot safer.

I noticed the detail in your photos of the vise on your saw. When I got mine, the movable parts of the vise were missing. I've been drawing up a new vise from your pictures.
 
I agree with the master switch idea. There are a number of "You Tube" videos of these saws which include at least one that shows the toggle switch/rod assembly being manual turned on by hand. These show the toggle being pushed to start but none seem to show turning the machine off by hand which might indicate that's a problem for the fingers if not careful as mentioned. A Master Switch....good idea.
 
Good work so far! Does the power hacksaw do anything "better" than a small horizontal band saw? They seem to have become obsolete and just wondering why.
 
Good work so far! Does the power hacksaw do anything "better" than a small horizontal band saw? They seem to have become obsolete and just wondering why.

I don't have much experience with either type, so I'm not the best person to ask. From what I've read, the power hacksaw is slower, but takes less expensive blades and is maybe a little less fussy to keep aligned and working properly.
 
The main reason to restore a power hacksaw is the same as for a shaper. There are other and probably better ways to do the job, but this one is just plain cool. Like a campfire, you can't help but stare at it when it is running.
 
The bandsaw is simpler mechanically, and can be made available in both vertical, horizontal and combination. Plus it is quicker as it loses no time on the return stroke. Once it became commercially practical to make the continuous blades in any circumference, the power hacksaws fell into disuse. But either type is capable of doing the same quality work. And as was said above, they are more interesting to watch work.
 
Ironically, the same week that I acquired the power hacksaw, this popped up on Craigslist for a reasonable price:

IMG_1577_zpsbxvcdrwr.jpg

I was debating on which one to start working on first. As others have said, the power hacksaw is just more fun to watch so that made the decision for me. The horizontal band saw will have to wait awhile.
 
That crack , It may not be as difficult as you think to get a good repair on it without using stitching plates & making more holes

I've just had a large cast iron casting with a smashed bearing clamp repaired .
|The owner decided he would service his 50 year old wood turning lathe .
He hadn't a clue as to what he was doing and as a result broke the 1x 2 .5 " high speed ball bearing races clamp by using a 4 pound hammer to try and bray things apart . As a result he managed to actually break the clamp off at the main casting body part . It runs at 1500 rpm turning a 18 inch saw blade or a big polishing wheel at the opposite end

I took it 30 miles away to my friend " Glan " who is a 69 year old highly skilled welder & asked if he had any cast iron arc welding rods . Depends on what you want to weld was his typical reply . " Spherical cast iron casting , reasonable quality, medium carbon content " I told him . Yes he had several different rods ( prices are about USD 7 each for a 3.2 mm rod )

He had a good look at things .
I made a thin packing piece so that when it was inserted in the pinch bolt gap the bearing cap was just touching the bearing casing & gently tightened it up in the best alignment I could do . The break was then modified to a clean cut " Vee " that went almost right through the whole cap . Glan used a thin 1 mm blade on a 4 " angle grinder to cut the crystallized broken cast out ., evidently you are wasting your time if you don't cut out the crystallization of the break back to quality solid clean cast
.

Once everything was checked /realigned He use his inverter arc welder at 148 amps to weld the casting with this rod . The Ausinite weld was fantastic , he'd built it up slightly proud of the cast iron body , ready for me to grind it off to the contours of the casting once it had cooled naturally .
I also had to give the bearing mating faces an angels kiss with my Dremel to de rust & clean up a few score marks .

Next time I have a broken cast iron job come in I'm going to see if I can buy the repair welding rod/s off eBay and do it myself
 
If I had any welding skills or knew someone who I trusted, I would have it brazed I've seen enough botched brazing jobs to make me a little wary of taking it to just anyone, so for now I will just leave with the mending plate.

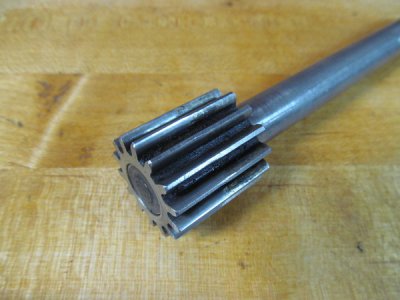
I had the day off, so I spent a little more time on the hacksaw. After making the new shaft for the pinion gear, I took a closer look at the gear itself:

IMG_1533_zpsddalp4ki.jpg

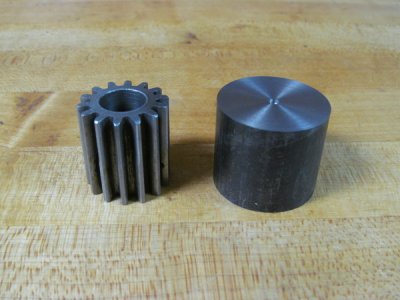
I don't know how well it shows up in this photo, but there is a fair amount of wear on the teeth of the pinion gear. The gear is twice as long as it needs to be, so I could probably just flip it end for end and use the unworn half. But since I've never cut a gear before, I thought I'd give it a try. I bought a cut-off of Stressproof steel for the gear blank and faced off the ends to length. Here is the blank next to the original gear:

IMG_1535_zpsfkpr9ny5.jpg

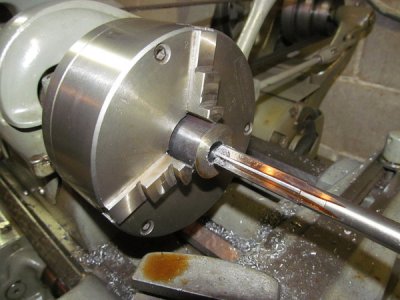
Then I chucked it up in my lathe and drilled and reamed a 1/2" hole in the center:

IMG_1537_zpsn9mhbs3g.jpg

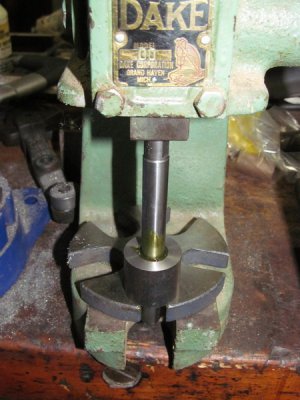
Next, I pressed the blank onto a 1/2" arbor:

IMG_1538_zpsmkn5oncf.jpg

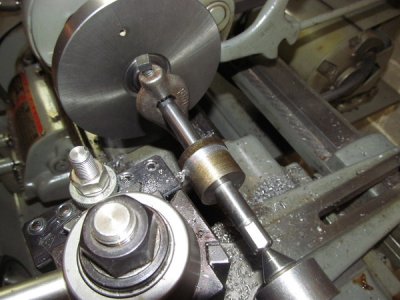
With the blank mounted on the arbor, I was able to mount it on my lathe between centers and turn it down to finished diameter of 1". I've never worked with Stressproof steel before. It turns really nice:

IMG_1539_zps17mmp1dv.jpg
 
Last edited:
Back
Top