First scraping attempt: a Denis Foster 8” Featherweight straightedge

jeremysf

Registered
Registered
Joined
Mar 2, 2021
Messages
84
Hello all!

I thought I would share the experience of scraping my first straightedge. I am just getting going on it in earnest so I’ll share progress posts here as I go.

Over the past few months. I have been watching many YouTube videos, purchased and watched Richard King’s scraping videos, reading books like Machine Tool Reconditioning and collecting hand scraping supplies.

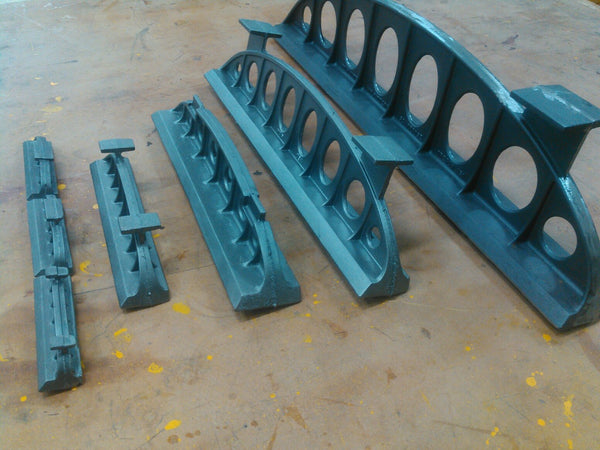
I bought a few different straightedge castings and decided to start with Denis Foster’s 8” Featherweight casting. I am glad I did because it’s both a beautiful casting and also because Denis is awesome and has been a great source of advice and recommendations about machining the casting.

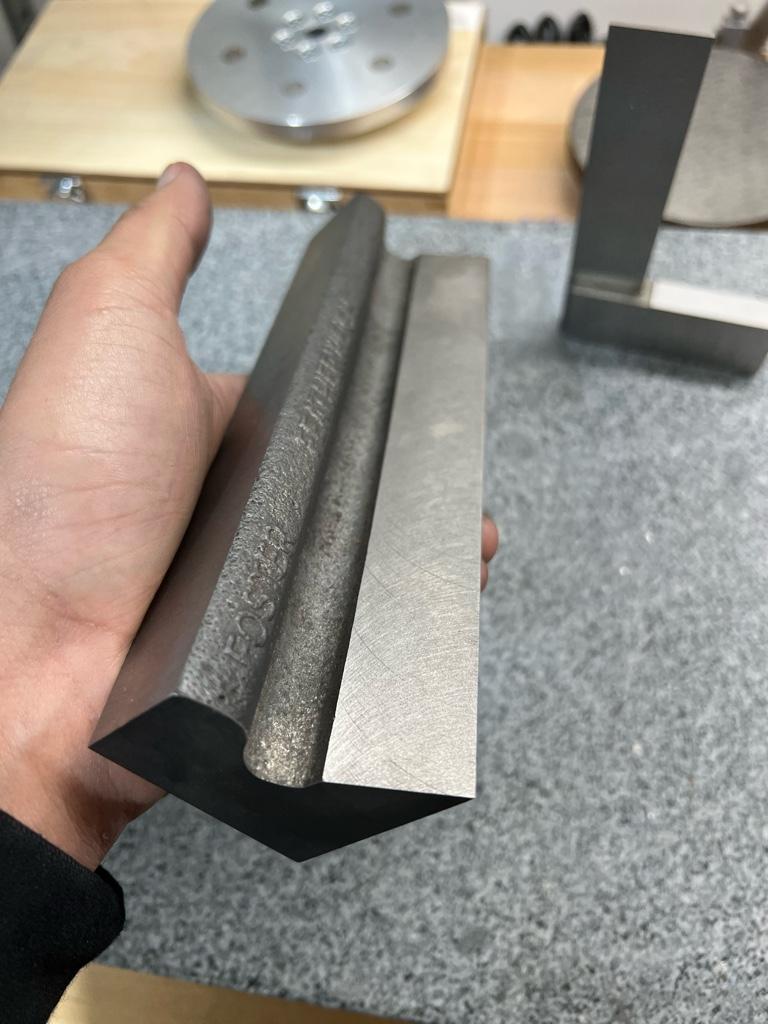
Here is what the casting supplied by Denis looked like:

d4d05d881ceeff4c924fea020475c6d2.jpg


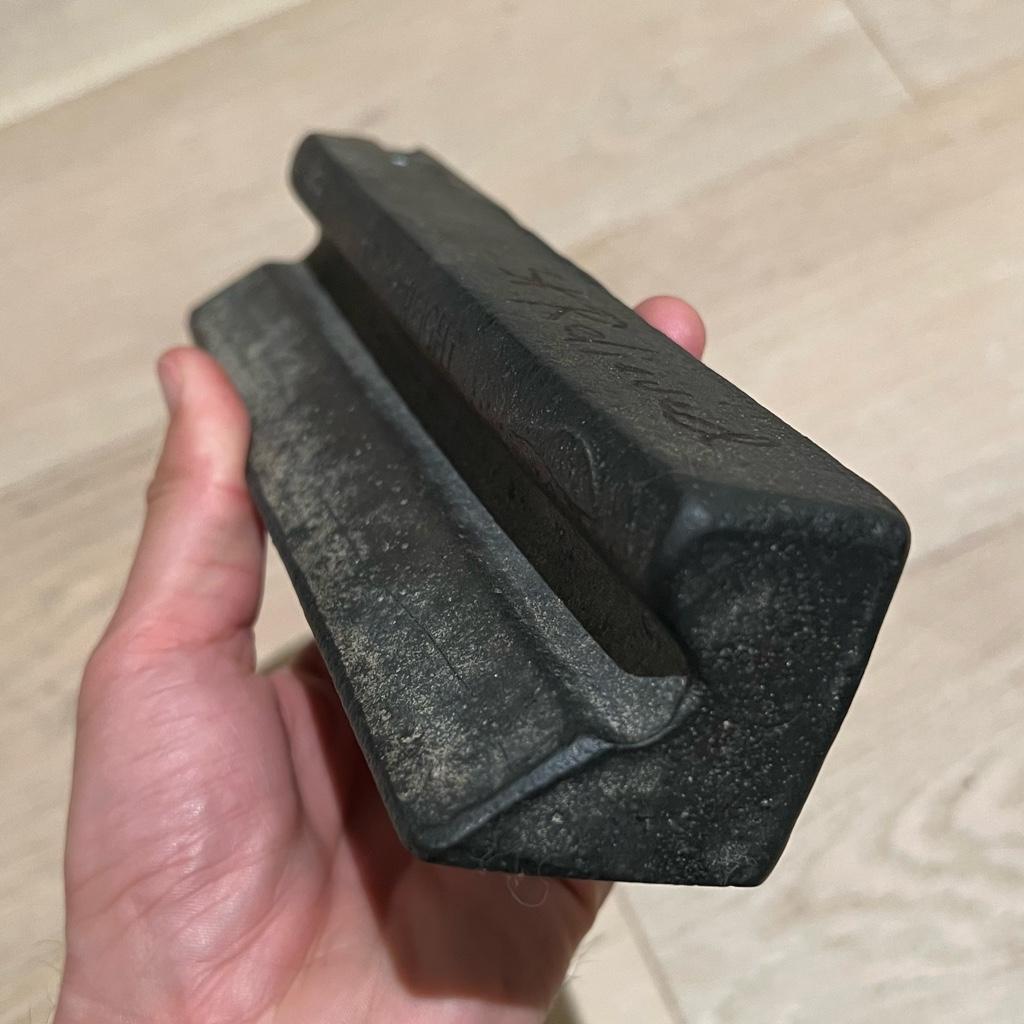
Denis offers them machined, but I opted for a raw casting to maximize the learning. Despite being unmachined, Denis does a nice job cleaning up the gate and any flashing and egregious uneven high spots.

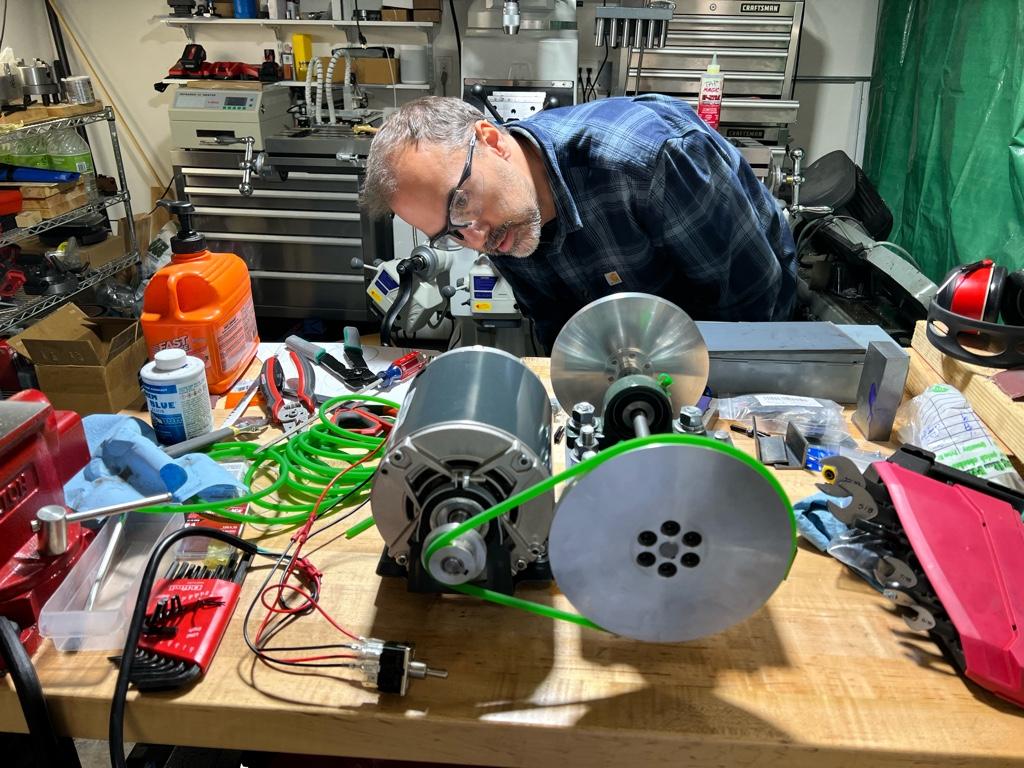
After explaining the machines in my shop to Denis (a PM-1054 mill with a 6” Kurt vise), Denis suggested I could mount the vise parallel to the bed, remove the vise jaw plates, and clamp up the casting with some thin pieces of plywood for both friction and to take up some of the irregularity of the sides of the casting.

261fef4b15f8b55e094c5c17a3a7827f.jpg


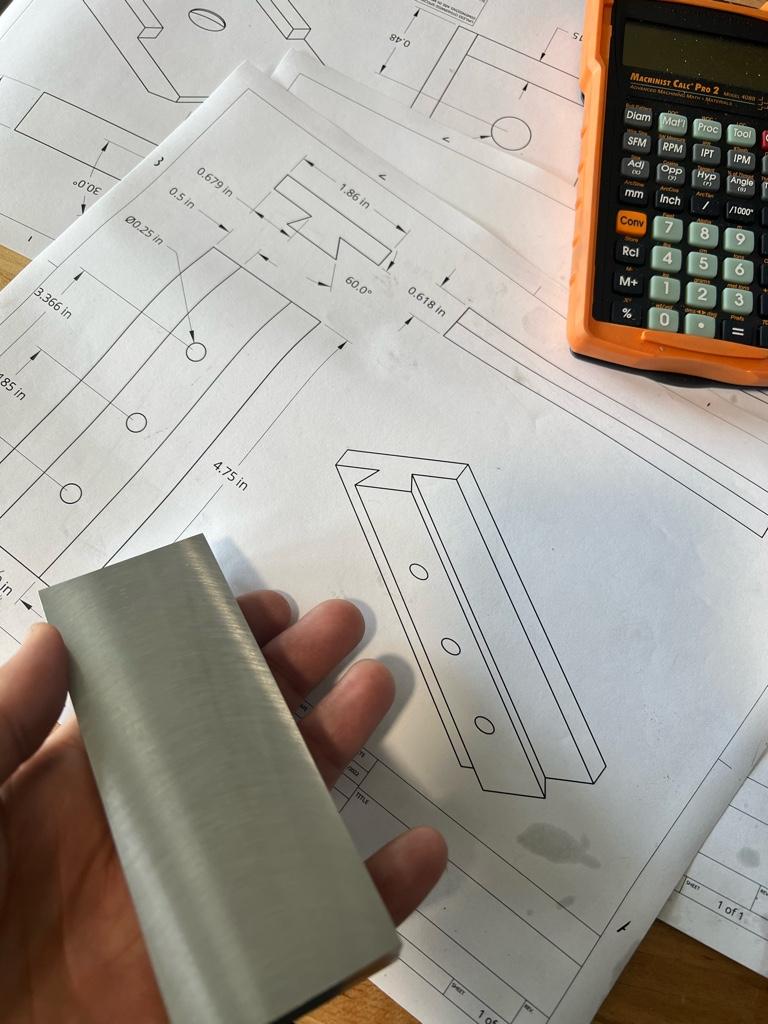
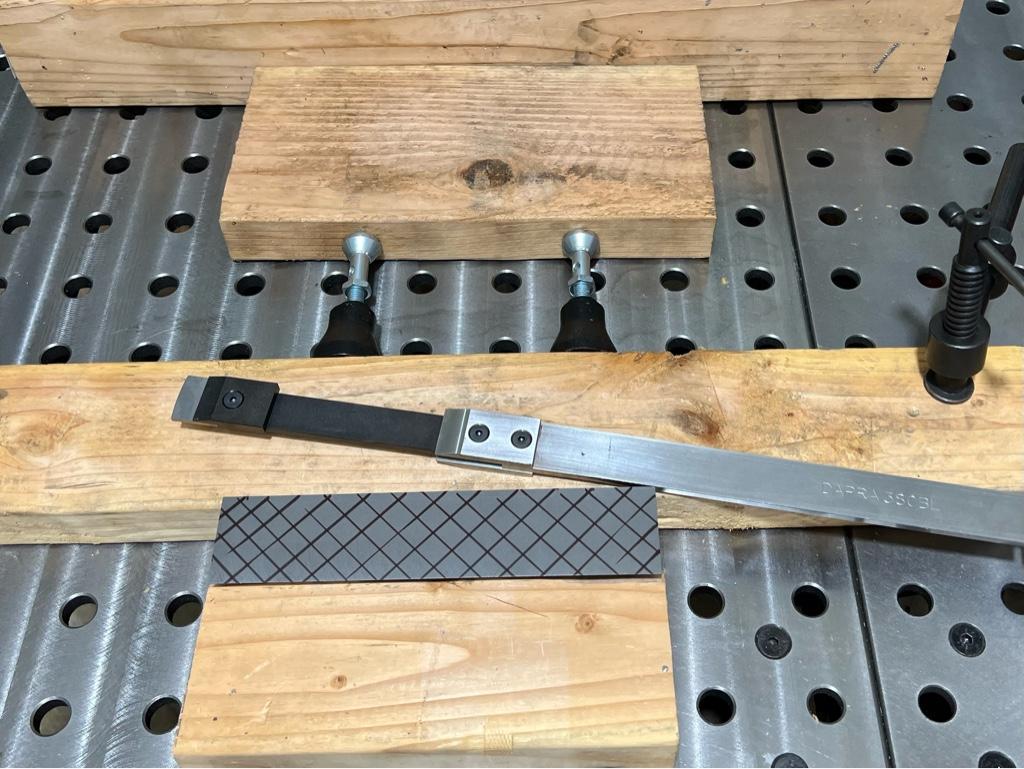
I started by machining the back of the casting using a cheap 3” shell mill with carbide inserts that I had lying around.

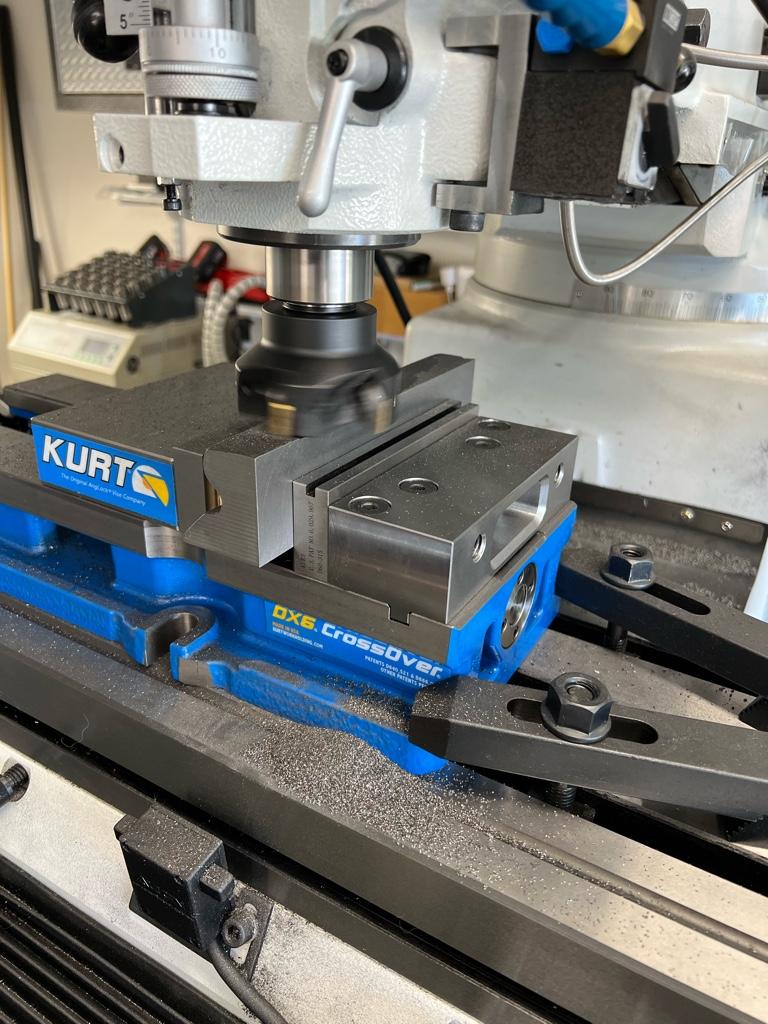
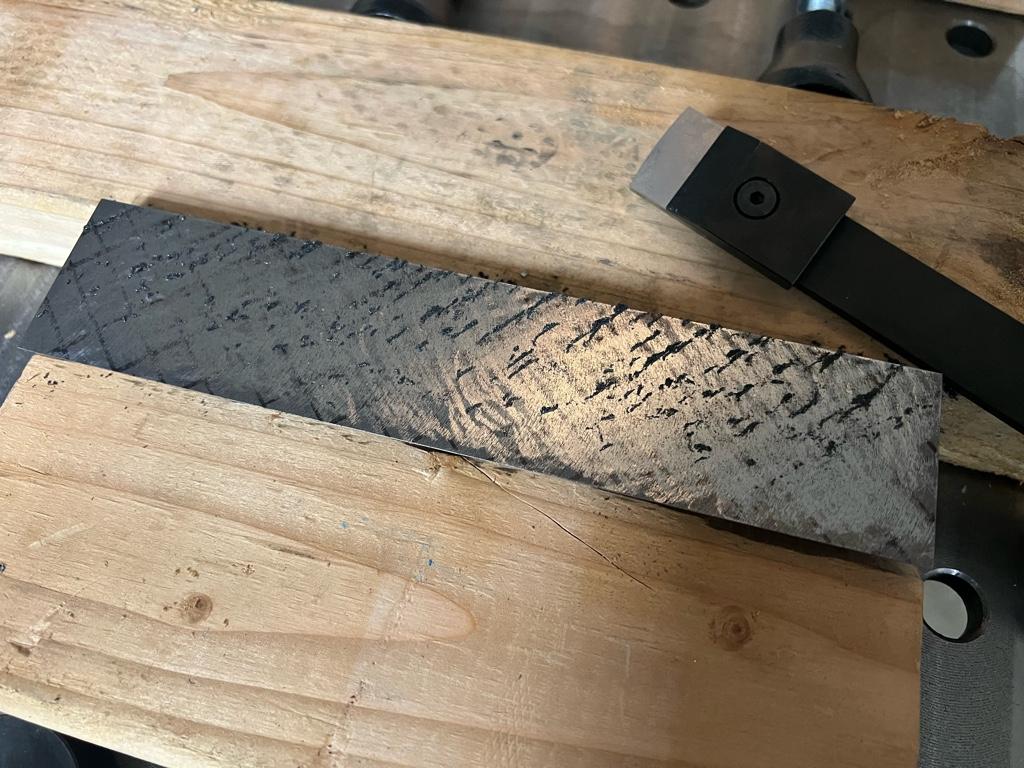
After machining the back, I rotated the casting and indicated it in with light taps using the back as a reference to machine the sole of the straightedge.

1ce6b51fb6d43e3ecd5b14d934a5d200.jpg


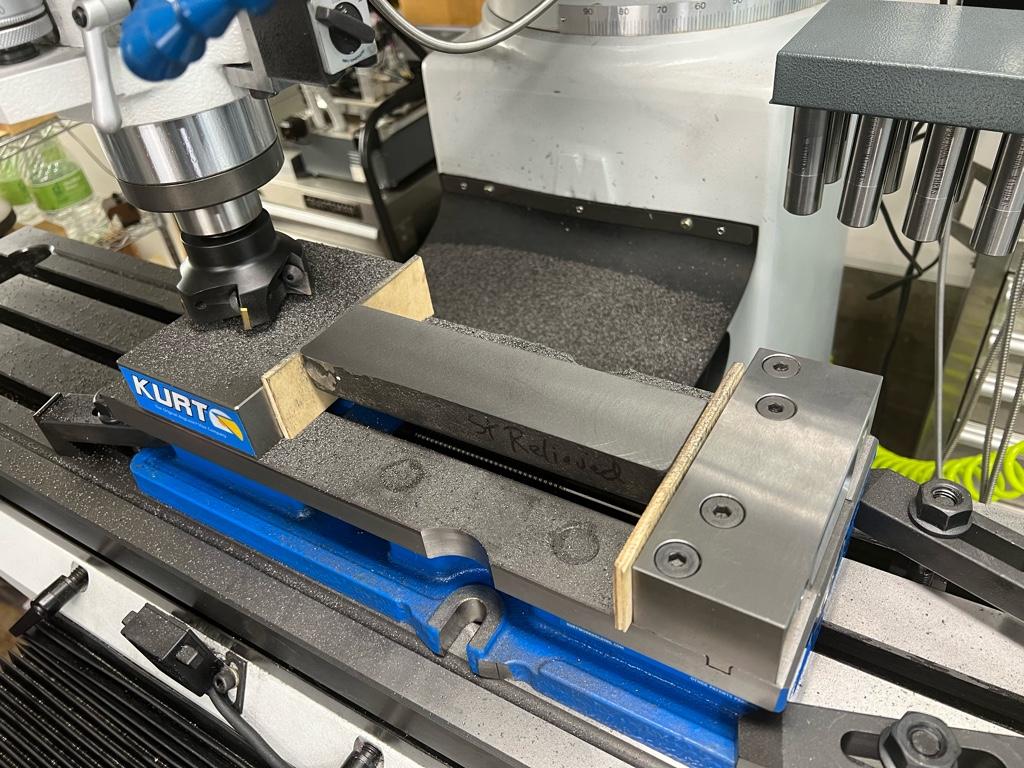
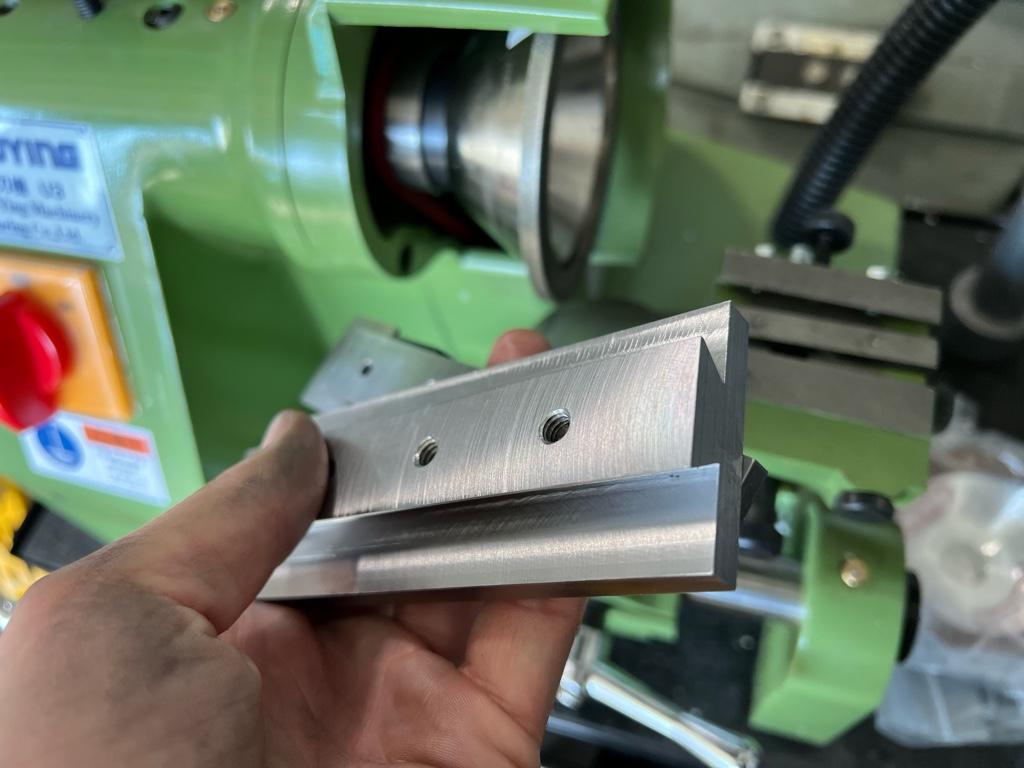
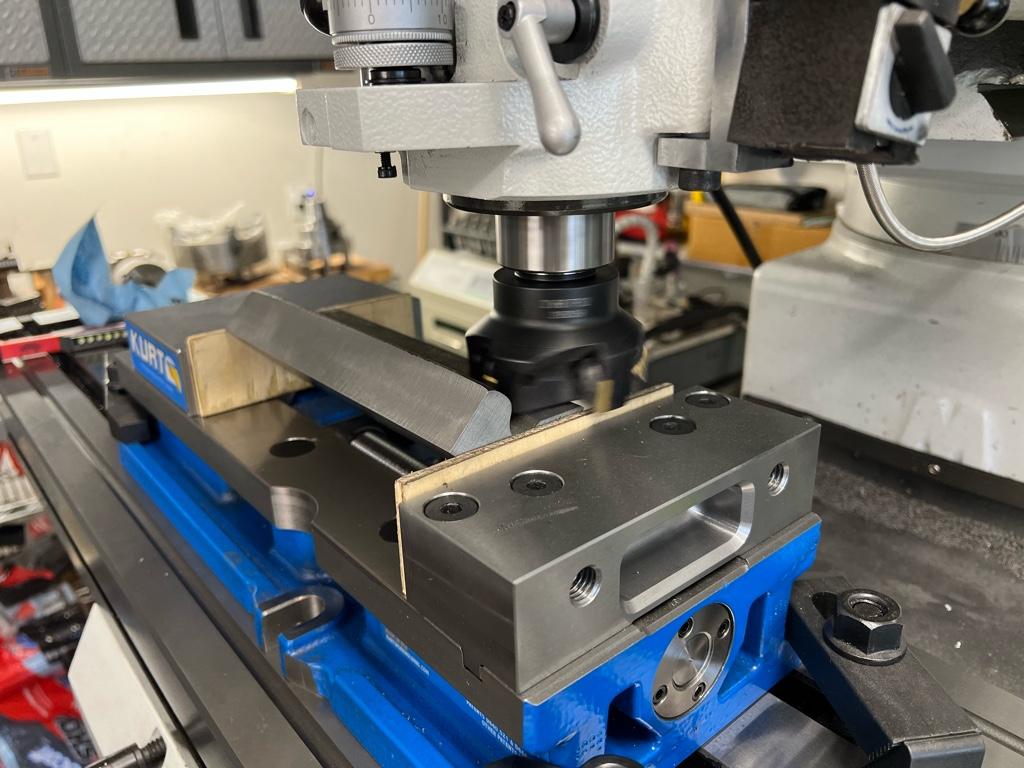
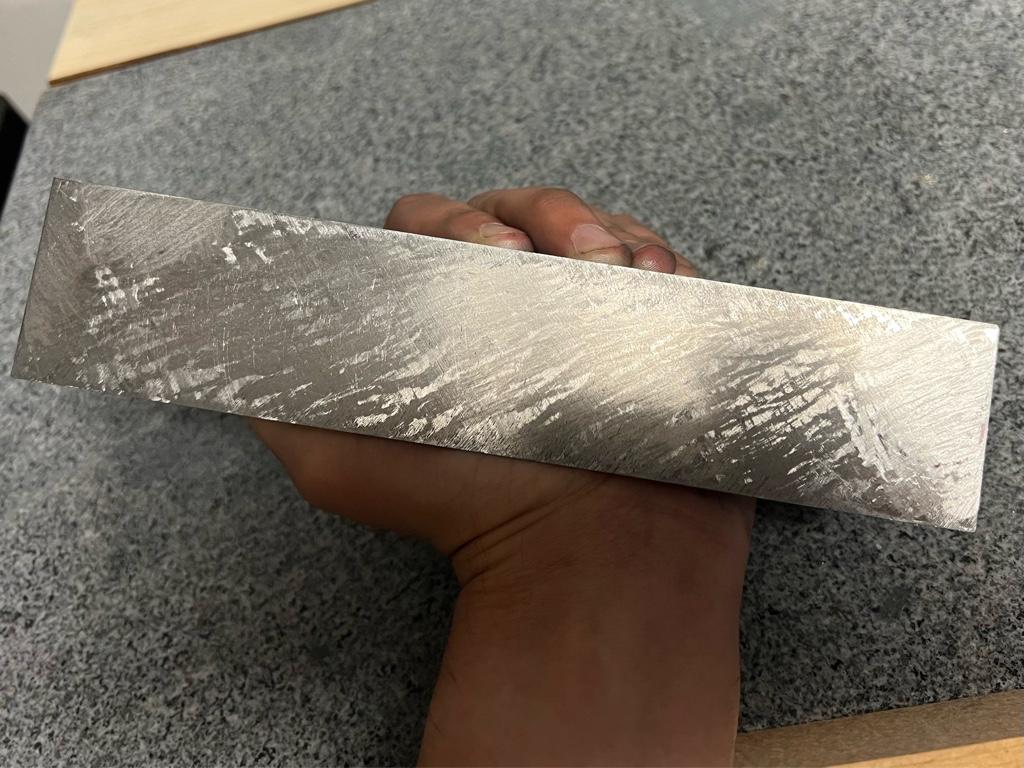
After checking squareness on the surface plate, and finding it was pretty darn square, rather than indicate and tap in the top, I just clamped it in the Kurt using the back and sole as a reference against the fixed jaw and throat of the vise. I used the thin plywood to take up the irregularity of the unmachined thin edge of the 45 degree face and cut the top flat.

9d9ef800f431f24df36c979253d42241.jpg


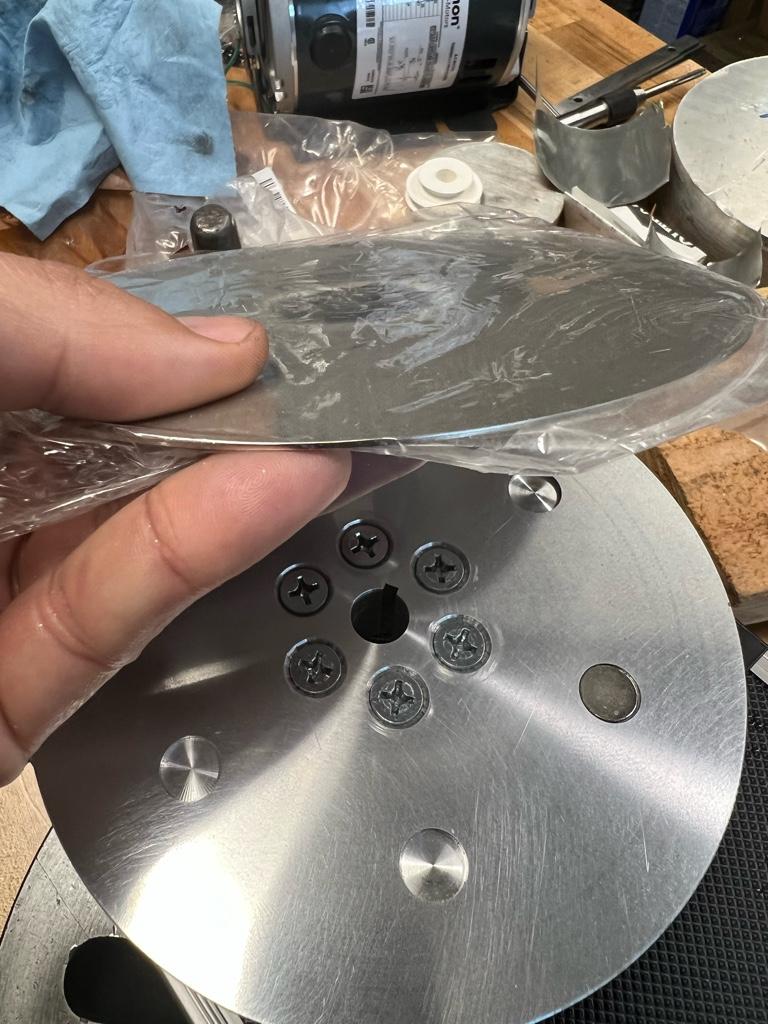
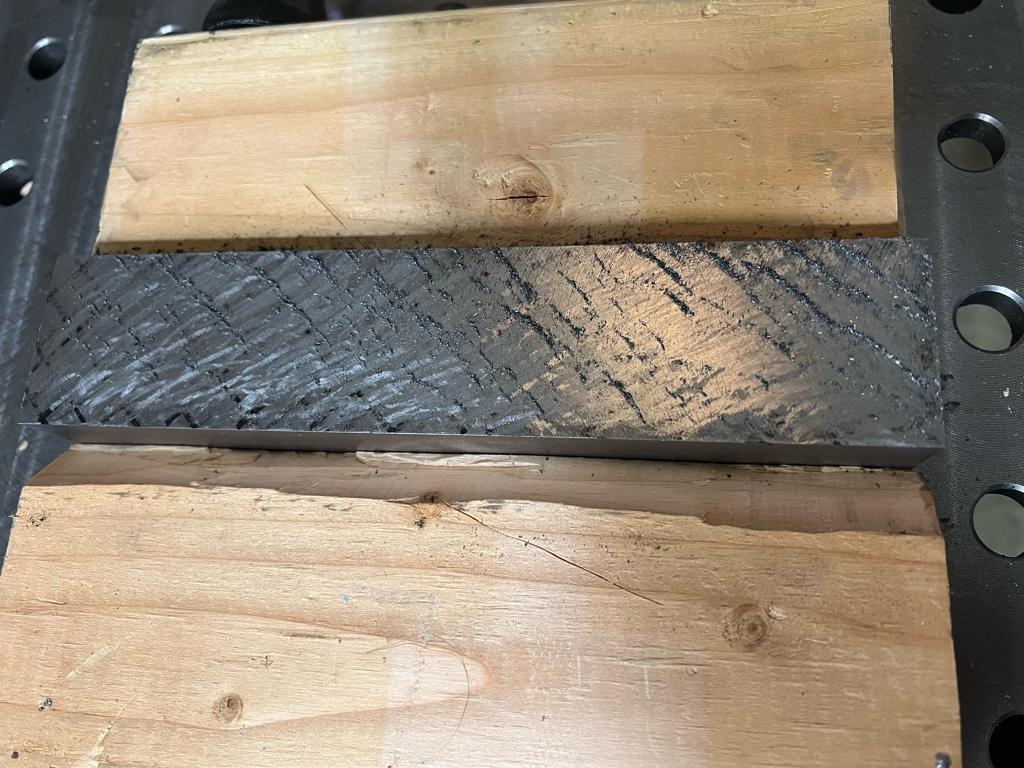
In that same setup, I side milled the ends for aesthetics.

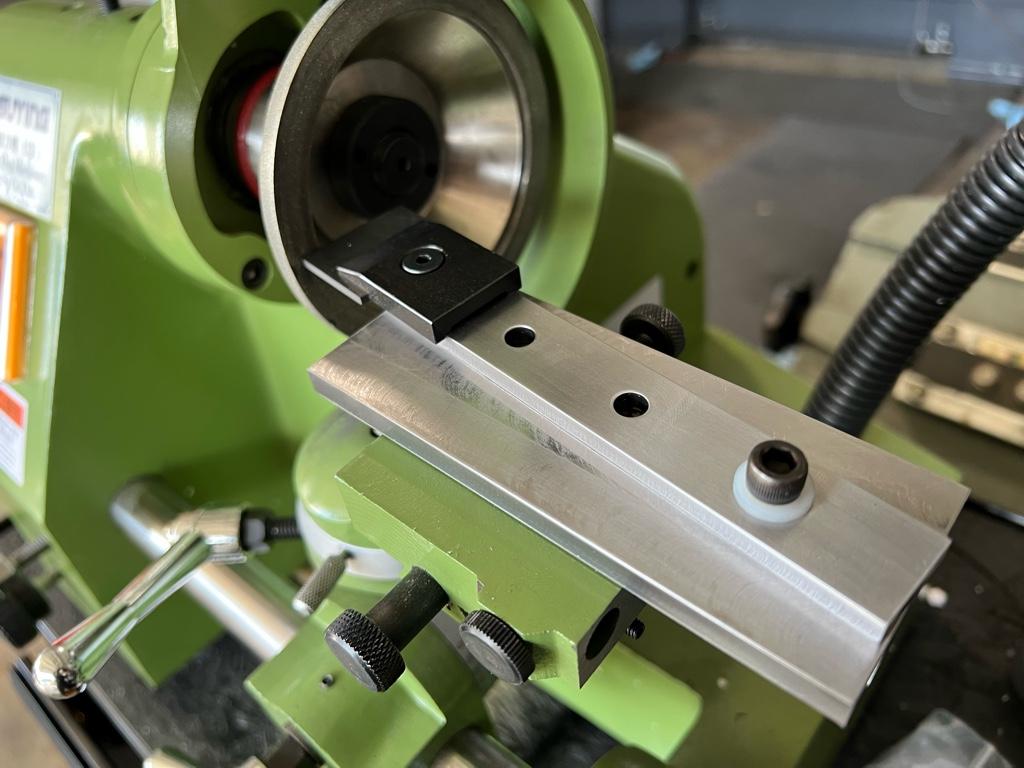
Finally, I used a small high quality rafter square to set up the 45 degree face Yes, that is far from a precision setup, but in discussion with Denis he suggested the 45 degree is not intended to be a precision angle, to not give myself fits trying to make that perfect and it greatly simplified an already fussy setup. I did use an indicator to double check squareness to the sole and back faces.

3620aea5063b5a2c5d6a7b6df0a1d6ef.jpg


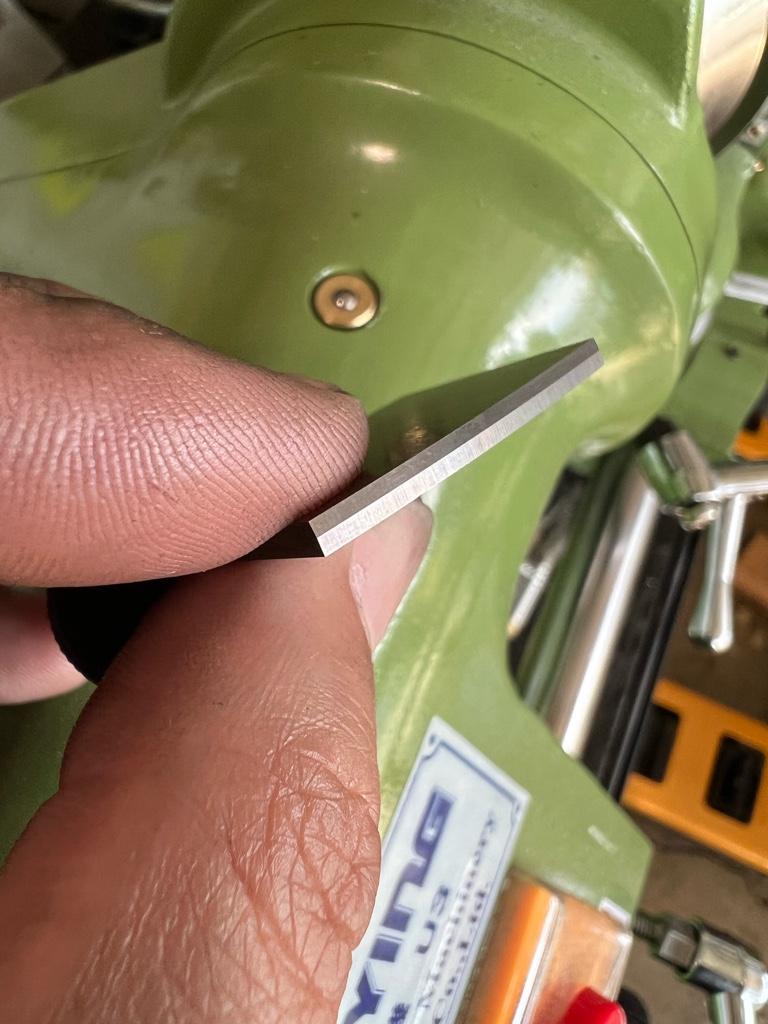
Checking my work on the surface plate with my steel Starrett master square, and despite my nascent machining skills, the cuts all came out surprisingly parallel and square! Even the 45 degree angle ended up as dead nuts as I could measure with my Mitutoyo precision bevel protractor. Score one for the rafter square!

e0507bd2d1205cfffe1dc26138b2b3fa.jpg


Next up: my first attempt at scraping!
 
Before getting going on any scraping, I hinged the part on the surface plate. It hinges on corners and/or the extreme edges which is about what I expected as any subtle out of tram on the mill and the 3” shell mill shows up as ever so slight dishing on the work.

Better than being high in the middle to start!

View attachment trim.A5885BC8-BB1F-4BEF-B224-F9E17D33B1FE.MOV

For scraping, I’m using a Dapra hand scraper. I bought it along with a selection of carbide blades from dapra.com. Not cheap, but super nice stuff.

I was worried the Dapra scraper would be too stiff, but with the extension on it, it has a bit of flex to it which is cool.

I set up a little clamping jig out of 2x4s and machinist jacks to hold the straightedge securely on my welding table. I might switch to a form fitting wood “vee” jig rather than this clamping jig. The clamping holds the straightedge super securely, and with the wood involved, I doubt the clamping is introducing much stress into the straightedge, but hey, what do I know! The main reason to switch jigs is the time it takes to clamp and unclamp during the scraping cycle using the machinist jacks.

7df829ceb6972322591e8d7c0d7249c2.jpg


Before scraping. I drew out a set of cross hatch guide lines, took a deep breath, and dove in!

I managed not to dig the corners of the scraper into the work, and did a few practice / roughing passes, alternating 90 degrees after each pass. Not great, but not terrible!

805c9835cdd5995d444f0ab1ddcbb710.jpg


2a05cc5ca5abe47cc8a8cd26643f9c9a.jpg


I am trying hard to use my body to
work the scraper rather than my arms. I have more control with my arms, but as I found out using them to scrape near the edges of the work, using one’s arms to scrape gets old fast!

The initial few roughing passes didn’t change the hinging, which was expected. I then concentrated my scraping on the hinge points at the ends, leaving the rest of the sole alone and…success!

I managed to move the hinge points closer to the ideal 1/3rd marks. I am not even going to bother bluing until I get the hinge points closer to the ideal 1/3rd marks.

View attachment trim.3C016794-1A7F-4A63-870D-1665C60D13C2.MOV

I didn’t expect to have so much trouble gaging which part of the scraper blade was in contact with the work. In other words, I’m not yet consistent with the left/right spacing of a stroke relative to the previous stroke.

I am also much better at controlling the end of my stroke near edges than controlling the location of the start of my stroke near edges.

My stroke length is also all over the map.

After a few rounds of concentrating on the hinge points to move them closer to center, here’s what the sole is looking like:

d6e1cebe06538839caafd236b8154a4f.jpg


A long way to go get on this project and so much room for improvement, but very pleased with my first evening’s attempt at scraping!
 
Last edited:
Yay! This is pretty good.
In between adventures with electronics (in the cause of machine hobby), I also have started out on some little scraping adventures.
To get an idea of where to scrape when roughing, you can use an indicator on a stand, even a magnetic one stuck on a bit of a metal base, and get an idea of the pre-scrape parallelism by approximate mapping with a sharpie. It's a bit of a downer to scrape one side flat, and discover it forces a re-cut on the other side because it started out as a bit of a wedge. That would not be likely with your machine, and the big Kurt.

Even for roughing, a few quick tests with some spotting does help. I discovered some artist's oil paint in ochre rouge (rusty colour) shows up nice, wipes away, and does not leave you looking like a smurf, (borrowing Stefan's phrase). The piece I had was allegedly already cut, but I found the fastest initial flattening was with a file, and I even resorted to a Dremel-type grinder to lower the high spots at the ends.

I can't start a cut at the edges without digging in. I make any cuts at the edges start somewhere on the material, and cut to go off the edge, keeping the same general strokes direction matching the rest. Either I turn the piece around, or I go to the other side.

BTW - you do great pictures! We like that here. :)
 
Very interesting project. Good on you for diving right in!

And a 2nd on the excellent quality of your images.
 
Making progress! I’m now hinging at thirds and am printing high spots using canode blue on the surface plate:

View attachment trim.BC1DCCAD-4BE9-4F27-A380-26187F721116.MOV

I started using a base contrast layer of canode yellow after deburring and before hinging and printing on the surface plate. Definitely making things easier to see, but a little nervous my inexperienced application may interfere with the printing. Continuing on using the yellow for now.

5A0A975F-A118-432F-8A18-6BE67449864E.jpeg

I’m finding the canode paint very “sticky”. I wasn’t expecting that. A little bit of worry that I’m adequately removing dust from the surface plate and the part; it’s hard to tell using my hand to wipe the plate with the thin layer of sticky blue on it. The part also sticks more when rubbing than I expected. I’m trying to rub by only touching the ends of the part and gently moving just an inch back and forth to avoid smudges and/or false prints.

My biggest issue right now is my total inability to re-sharpen the carbide. It’s definitely dulling after a few passes and swapping to a fresh edge is *magical* for the feel and result of the scraping.

I have tried using a 1200 grit diamond stone and also semi free-handing on my deckel clone with a 400 grit diamond cup wheel. With the deckel I can set the rake angle but am free-handing the radius, following the existing radius.

The result though is just not sharp. I have always been **** at sharpening / stoning cutting edges. I guess now is the time to learn, but it’s an extra variable I don’t love having to figure out at the same time as scraping.

Here’s a fresh “factory” edge:

992AA1CD-6B6E-47BD-B6E4-DDA483125F79.jpeg

and then a failed attempt of mine:

1BE8A3C5-79D5-4A96-8D42-7992D728C839.jpeg

Will need a bit more research and practice, so may pause the scraping for a bit until I can figure out how to effectively sharpen and hone the carbide blades.
 
Making progress! I’m now hinging at thirds and am printing high spots using canode blue on the surface plate:

View attachment 399796

I started using a base contrast layer of canode yellow after deburring and before hinging and printing on the surface plate. Definitely making things easier to see, but a little nervous my inexperienced application may interfere with the printing. Continuing on using the yellow for now.

View attachment 399797

I’m finding the canode paint very “sticky”. I wasn’t expecting that. A little bit of worry that I’m adequately removing dust from the surface plate and the part; it’s hard to tell using my hand to wipe the plate with the thin layer of sticky blue on it. The part also sticks more when rubbing than I expected. I’m trying to rub by only touching the ends of the part and gently moving just an inch back and forth to avoid smudges and/or false prints.

My biggest issue right now is my total inability to re-sharpen the carbide. It’s definitely dulling after a few passes and swapping to a fresh edge is *magical* for the feel and result of the scraping.

I have tried using a 1200 grit diamond stone and also semi free-handing on my deckel clone with a 400 grit diamond cup wheel. With the deckel I can set the rake angle but am free-handing the radius, following the existing radius.

The result though is just not sharp. I have always been **** at sharpening / stoning cutting edges. I guess now is the time to learn, but it’s an extra variable I don’t love having to figure out at the same time as scraping.

Here’s a fresh “factory” edge:

View attachment 399798

and then a failed attempt of mine:

View attachment 399799

Will need a bit more research and practice, so may pause the scraping for a bit until I can figure out how to effectively sharpen and hone the carbide blades.,

Is this HSS? It must be as Carbide would not do that? The other picture is Carbide blade. I would just use that. As far as a Carbide Lapper goes. https://www.hobby-machinist.com/threads/glendo-lapper-clone.11032/ just Google Glendo Lapper alternative.
 
Dennis makes some nice straight edges as many of us do. I like his straight-edges but he and I have some issues...lol Gary Martin up in Portland makes some nice ones too. He sells his for less then I can have my cast. He is a pattern Maker and works at a foundry. That's why I bet...lol I have been telling folks lately to check out his.
 
Is this HSS? It must be as Carbide would not do that? The other picture is Carbide blade. I would just use that. As far as a Carbide Lapper goes. https://www.hobby-machinist.com/threads/glendo-lapper-clone.11032/ just Google Glendo Lapper alternative.

The photo is actually carbide as mis-shaped freehand by me on my Deckel grinder clone with diamond cup wheels.

I have paused on scraping while building two things:

1. An attachment for the Deckel to allow me to use it to grind carbide blanks with the 5 degree bevels and a series of radius’ without having to freehand.

2. A slow speed lap that uses 6” steel discs coated with diamond dust. I’m using a 1/4hp motor and pulley and, taking inspiration from Stefan, am holding the discs using magnets and a pin.

ed9412e0a83d1694364be3bebea88511.jpg


5bb845de7c15132e7bee855fa50d5dfd.jpg


062a5e4e94f5ea2de6c25c38efdb91c9.jpg
 
Here’s some pictures of the custom little table / jig I made for my Deckel clone to grind and dress carbide scraping blades.

I’m using 400 grit diamond cup wheels for shaping the radius initially, and a 1000 grit diamond cup wheel for dressing / touching up blades once they get dull during scraping.

The jig supports 120mm, 90mm and 60mm radius scraper blades by moving the pivot screw between the three positions.

To use it, I infeed with the precision knob on top and sweep the arm on the jig, rather than sweeping the entire knuckle like one would when grinding a single lip cutter.

Now with a reliable way to grind and touch up my scraper blades, I’m back in business on scraping my first straightedge.

4a5ee199685b8e1842cc17efae734ce3.jpg


12cf291a8a18e8708d28ef687552d611.jpg


cc327a43abdf0e5101b90b8d6d5df902.jpg


62de01e9a409d6d26eb3b19247866335.jpg
 
Back
Top