Fixing an acme lead screw

Ebel440

Active User
Registered
Joined
May 24, 2014
Messages
550
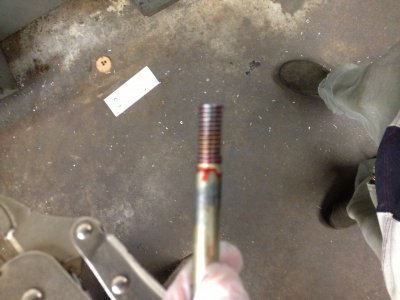
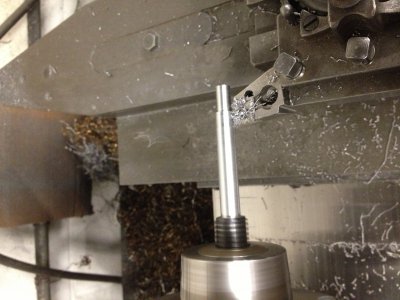
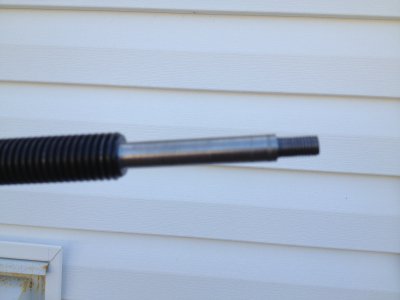
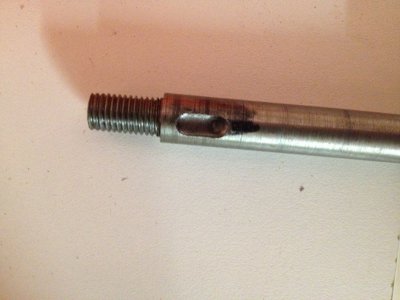
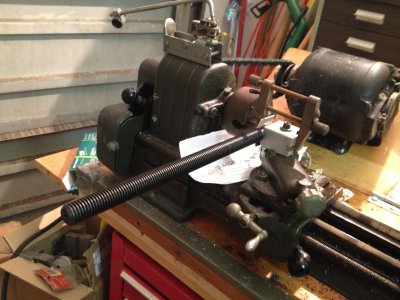
I got an almost new palmgren compound table for about 25% of the new price. I bought it knowing it had something wrong with the Y axis feed. From the pictures it looked like the screw was bent. I figured it would be an easy enough fix so I bought it I'm not sure what ill use it for yet. I've considered using it to build a mini mill or Cnc it just to play with. Anyway I got the table and it was shipped pretty carefully and still in its original packaging never used. The screw was bent where the hand wheel was attached. It looked like it was damaged in shipping previously. I tried bending it straight but it just wouldn't get perfectly straight. The threaded portion of the screw was still perfectly straight so I decided to cut off the bent part and make a new end for it. So I measured the end of the shaft before I cut it off. Then I bandsawed it off and put it in the lathe at my work as it wouldn't fit in my tiny lathe. I cut the rest of the old shaft off the screw to get it square. Then drilled it and tapped it for a 7/16 thread. I found a grade 8 bolt that had enough length to make the new shaft. Cleaned the hole out locktited it and screwed the bolt in. Then I turned the shaft to finish size. I changed the thread that holds the hand wheel on from 8 mm to 5/16 just because I didn't have a metric die available. I still need to cut the keyway but besides that its done.
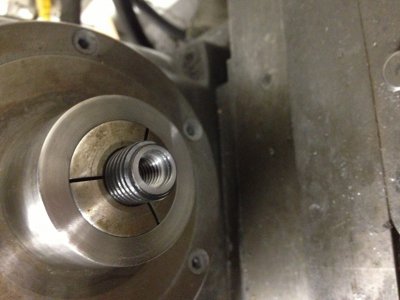
image.jpg
 
Nice fix there! That grade 8 bolt material is probably double the strength of original material used. We maybe closer to 1-1/2 times... Regardless, it'll last for generations to come.
 
I was originally worried the leadscrew would be hardened or something but it was really soft, most likely softer then a leadscrew should be. The grade 8 was the only 7/16 I had on hand so it got used. It should last a long time as I don't even have a use for it right now I just didn't like it sitting there broken.
 
Re: Fixing an acme lead screw or making one!

Very nice job, indeed!

To the machinists' brain trust: how difficult is it (on a scale of 1 to 10?) to fabricate a lead screw, anyway? I am not a machinist (wish I were!), but have a "lathe" for cutting phonograph records that has three different lead screws and halfnuts to give various groove pitches for records. Here is a shot of one of the lead screws and halfnut sets:
leadscrew.jpg
The screw is about 10 inches long and a half-an-inch in diameter. The brass halfnut looks like it would be a bear to make. The gear on the end has a clutch arrangement using a spring-steel coil, so the screw can slip in the forward direction but is normally driven by the gear in the same rotation. That gear comes off easily and could be used on another screw.

I would dearly love to have a lead screw and halfnut set that had a finer thread than this, by about 150%. The threads here are about 18 to the inch, so 26 to the inch would be ideal.

Could anyone speculate on what might be involved, and a cost to accomplish this? Within the record-making community there is always a need for this type of work, although not all recording lathes are the same. Many thanks.

leadscrew.jpg
 
Thanks. Working on the keyway now. As far as the record lathe it looks like a fairly simple part to make, the half nut would be the hardest part but not really difficult it also depends on the machines you have. I did everything in the pictures in less then 2 hours. Im cutting the keyway now at home and its taking almost 2 hours. It would have taken 5 minutes had i done it on a milling machine yesterday. No idea what the cost would be. I would guess you would get quotes from 300-600 for a screw And nut but thAt depends who quotes it large shops would charge more a hobbiest less I would think.
 
image.jpg
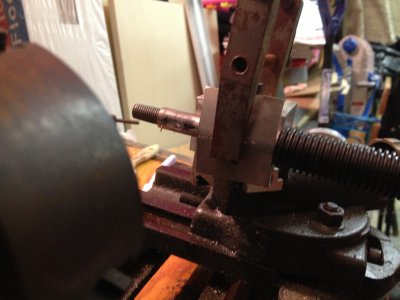
I had to set up my lathe to cut the keyway I wasn't sure how I was going to mount it exactly on center. I decided I'd turn my toolpost around and mill a slot that would ensure it was centered perfectly. So after I did that i mounted the screw using a single clamp and an aluminum scrap to pad the screw. Then it was a quick few cuts to depth and I was done.

image.jpg image.jpg image.jpg
 
Back
Top