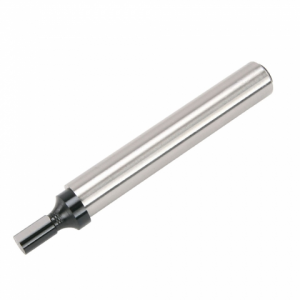
Goofy edge-finder, or is it me?

I have an edge finder and know how to use it, one with a 0.200" cylinder at its end where you move into the work until the magnetic piece shifts. No problem.

I was talking to a neighbor who has a Sherline setup and saw that he had an edge-finder that I couldn't figure out how it's supposed to be used. Instead of a small cylinder portion at the bottom end, it's cone shaped. Depending where on the cone you contact the work, how does he know how much offset to subtract off? Even more puzzling is that the whole thing is maybe 2" long, and the center 1.5" portion of it, located above the cone-shaped magnetic end, is connected to the upper part (that goes into a spindle) by another magnetic connection. So, the entire edge finder assembly has two magnetic couplers, one for the top and one for the bottom. Please enlighten me on how this is supposed to be used.

(BTW, he unhappily related that he'd made the connecting rod for his Sterling engine the wrong length. I asked how far off it was, figuring something on the order of maybe 0.008". Nope, he said it was off by 5/16" of an inch! I can't help but wonder if he doesn't know how to use that edge finder either.)


I have one like this & have VERY HAPPY with the results. https://www.shars.com/products/measuring/edge-center-finders/edge-center-finder-set
 
Buy this one. I have Starrett, Brown & Sharpe and Mitutoyo versions. All three work the same but the price on this Mit is ridiculous.

Too good to be true?
First reviewer says it's a counterfeit. At that price I would also think that.
I started with a cheap edge finder and it worked for awhile. Then I got a Brown & Sharpe and it works much better.
 
In my experience, the edge finder with the point on one end and the .200" on the other get stuck in my ER40 collett.
When I go to remove the EF, the friction of the collett fingers want to pull at the spring and tip.
Because of this, I rarely use this style in a collett. When used in my keyless chuck for locating punch marks, no problem.
 
I started with one of the cheap double ended models and found the pointed end, which I have never used, to be a PITA to insert in an R8 collet. It always seemed to manage to get itself off center just enough to hang up on the lip of the collet. I have since bought a Fisher single ended edge finder like the one pictured. Much less hassle inserting in a collet. It’s no big deal in the overall scheme of things, but one less little annoyance to detract from the fun. I don't like things that detract from my fun. I'm old and ran out of patience with little annoyances a long time ago.

Tom
1581953019558.png
 
The edge finder is my go-to instrument for locating the edge of my work. I am still using the Enco set that I bought more than 40 years ago. With practice, you can repeatably locate an edge to .0001". It is also great for finding the center of holes. The beauty of an edge finder is that it is independent of any runout so it can be used in a chuck with no loss of accuracy. My favorite is the .5" cylinder. It seems to be more sensitive than the .2" cylinder. I use the .2" cylinder for finding the center of smaller holes.

How well it works depends on the state of the lapped surfaces. The SPI set that I bought later didn't seem as sensitive. I put a drop oil of light oil on the mating surfaces and then wipe most of it off which seems to improve the sensitivity. I also keep a consistent length of engagement, usually around .1". Especially when finding the center of the work. My DRO's have a center set feature which zeros the DRO at the average between the two opposing edges.

For finding the center of a hole, I set the edge finder inside the hole at approximately the center. The I find the edge on one axis and zero the DRO. Next, without changing the other axis, I find the opposite edge. Without moving the edge finder, I hit the "1/2" button which sets zero on that axis at the center and move to the center point. Then I repeat for the other axis. I will recheck the first axis although it is seldom necessary.
 
I use the cone shaped end on holes also. Just use a depth stop or raise the table to the same dimension when moving to another location.
 
Don't mean to hijack this thread but I need an edge finder. Birthday is next month so guess what I intend to get for my birthday. An edge finder. Been looking at these two at Shars I like this one the best. https://www.shars.com/products/measuring/edge-center-finders/edge-center-finder-set.
This one seems to be harder to use from what I have seen in the videos online. https://www.shars.com/products/measuring/edge-center-finders/wiggler-edge-center-finder-set

Help me spend my money. Which one should I get?
I have a Shars set at work and they are not nearly as sensitive as the Starrett edge finders that I have in my home shop. They might just need to be cleaned though, not sure.
 
Too good to be true?
First reviewer says it's a counterfeit. At that price I would also think that.
I started with a cheap edge finder and it worked for awhile. Then I got a Brown & Sharpe and it works much better.

I own one. Fit and finish is excellent and it as sensitive and accurate as my Starrett and B&S edge finders; I checked them against each other. If it is a counterfeit, I cannot tell.
 
I use the "pointed" end to locate layout lines. You can make the end piece run true even in a chuck that runs out. By the way, there are no magnets involved, just a spring. Back in "the day" (pre wire EDM and CNC days) we would use a copper sulphate solution to put a very thin coat of copper on a tool steel work piece this allowed us to very accurately layout our job on the piece of tool steel. We would then use the pointed end of the edge finder to locate the cross lines for hole locations. Don't forget, back then we didn't have readouts on our mills either! Doesn't sound very accurate but we would also use a magnifying glass on the bandsaw and "split" our layout lines saw filing contours. It was possible to achieve .001" to .002" accuracy!
 
Back
Top