- Joined
- Apr 21, 2015
- Messages
- 582
My friend @jimsehr showed me something a while back that rocked my world. Jim's got a few years on me, and I've learned to pay attention when old-timers take the time to show you something.
How many parts have you made that looked something like this:
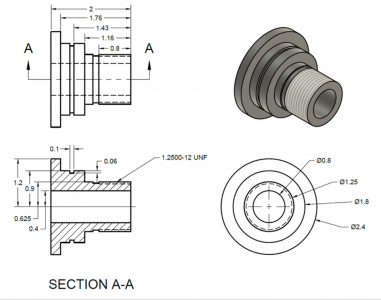
Now, how many parts have you made that are the exact opposite: a single OD and multiple IDs? Any at all?
If you're anything like me, about 90% of the parts I make on the lathe look something like the above with lots of OD features and fairly simple ID (most often just a single bore). I almost always want to face the left and right sides of the part so they are exactly parallel, too.
So why do we almost exclusively use a 3-jaw chuck to hang onto the OD of our parts?!
A scroll chuck is certainly convenient, but I suspect many of us hardly ever take it off our spindle, which is a shame. I strongly encourage even hobbyists to spend some time getting acquainted with other forms of work holding. We all need to use the 4-jaw more often. Turning between centers is still the most accurate way to use a lathe, and can be surprisingly convenient sometimes. Soft jaws are great for some tasks. 5C and other OD collets are terrific for accurate work.
But this post is about hanging onto the ID of the work.
If the bore is big enough, you can use the outside of the jaws on your scroll-chuck to hang onto the part, but you'll have to put up with al the scroll-chuck limitations. As we all learn soon enough, it's hard to hold concentricity to less than a few thou any time you remove a part from the chuck. If you hold it on the OD to bore the hole, then you'll have to indicate it in on the 4-jaw to hold it accurately on the ID for subsequent machining.
And what if the bore is smaller than the 1" or so minimum diameter your chuck jaws can hold on the ID?
The options most of us think of include:
Guys with some experience might think of using expanding or tapered arbors of some sort and turning between centers. That's a great option if you've got the right sized arbor (or are willing to spend the time to make one).
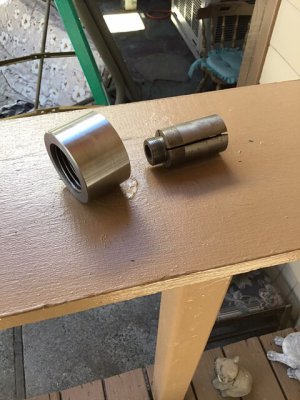
The smarter pros would use commercial expanding collets like these. Those things are the fershizzle, but they don't give them away!
This post is about how to make a "ghetto" version of your own expanding or ID collets.
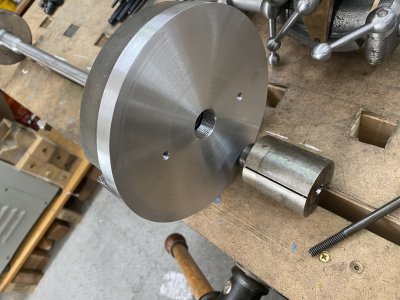
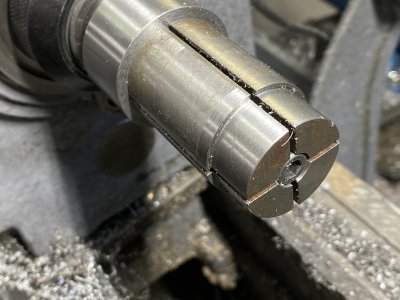
Here's an arbor in the holder prior to loading the part:
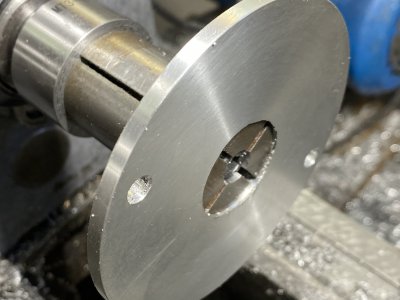
And here it is with the part loaded:
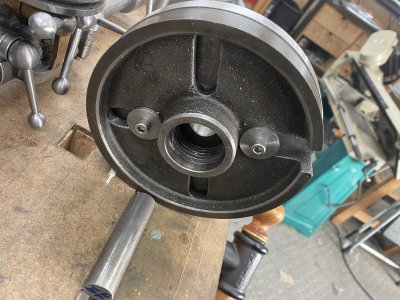
Here's the holder:
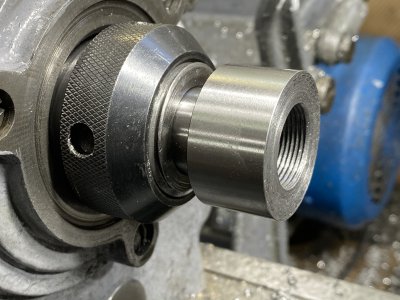
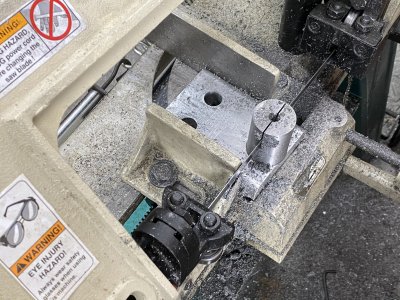
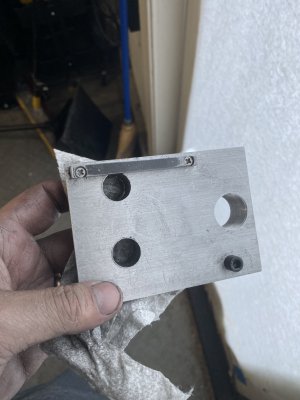
And finally, here's a sample sacrificial arbor (you make these a half dozen or so at a time):
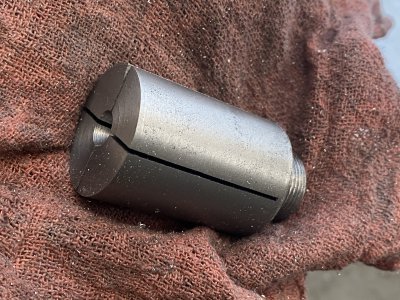
Jim's system comprises at least three parts:
Holding parts this way has some wonderful benefits:
How many parts have you made that looked something like this:

Now, how many parts have you made that are the exact opposite: a single OD and multiple IDs? Any at all?
If you're anything like me, about 90% of the parts I make on the lathe look something like the above with lots of OD features and fairly simple ID (most often just a single bore). I almost always want to face the left and right sides of the part so they are exactly parallel, too.
So why do we almost exclusively use a 3-jaw chuck to hang onto the OD of our parts?!
A scroll chuck is certainly convenient, but I suspect many of us hardly ever take it off our spindle, which is a shame. I strongly encourage even hobbyists to spend some time getting acquainted with other forms of work holding. We all need to use the 4-jaw more often. Turning between centers is still the most accurate way to use a lathe, and can be surprisingly convenient sometimes. Soft jaws are great for some tasks. 5C and other OD collets are terrific for accurate work.
But this post is about hanging onto the ID of the work.
If the bore is big enough, you can use the outside of the jaws on your scroll-chuck to hang onto the part, but you'll have to put up with al the scroll-chuck limitations. As we all learn soon enough, it's hard to hold concentricity to less than a few thou any time you remove a part from the chuck. If you hold it on the OD to bore the hole, then you'll have to indicate it in on the 4-jaw to hold it accurately on the ID for subsequent machining.
And what if the bore is smaller than the 1" or so minimum diameter your chuck jaws can hold on the ID?
The options most of us think of include:
- Leaving some extra material on the left side to hold it on the chuck, then do all machining without removing the part from the chuck, parting it off at the end. [This works for the part above, but you'll probably still want to face the side you parted off to clean it up, which requires flipping the part and holding it accurately. And sometimes you want to use a die to thread both ends.]
- Turning a stub arbor out of a piece of scrap, and then either clamping or super-gluing the part to the arbor. [This also works, but making the arbor and tapping a hole for the clamp is a pain. You often need to make another part to use as the washer or clamp to hold it, and superglue is messy and a pain to clean up after you remove the part.]
Guys with some experience might think of using expanding or tapered arbors of some sort and turning between centers. That's a great option if you've got the right sized arbor (or are willing to spend the time to make one).
The smarter pros would use commercial expanding collets like these. Those things are the fershizzle, but they don't give them away!
This post is about how to make a "ghetto" version of your own expanding or ID collets.
Here's an arbor in the holder prior to loading the part:

And here it is with the part loaded:

Here's the holder:

And finally, here's a sample sacrificial arbor (you make these a half dozen or so at a time):

Jim's system comprises at least three parts:
- A holder of some sort that you make once. I'll describe other options later, but above I used a 3MT arbor blank with a soft head ready for machining since my spindle arbor is a #3 morse taper. I also made one out of a 2MT arbor blank so I can move parts between the lathe (using a 3MT to 2MT sleeve) and my rotary table without removing it from the arbor.
- Sacrificial expanding arbors, made in batches in whatever sizes and materials are convenient (I like using leaded steel in various diameters, but aluminum or even 1018 also works).
- 1/4"-20TPI socket-head cap screws with the heads turned down at a taper (30 degree included angle). These provide the force to expand the arbor (just a quarter or half turn provide all the force you'll need to hold parts securely).
- Bore the central hole in the part using the 3-jaw chuck or whatever to hold it.
- Remove the chuck and replace it with your expanding/ID collet holder.
- Find a sacrificial arbor that's a slightly larger diameter than you need and screw it into the holder.
- Tighten the SHCS until you get a small amount of expansion, about 0.005" radially. You can either use an indicator or do what I do and just squeeze the arbor with your fingers and tighten the screw until you feel the sides expand slightly.
- Now put a LH turning tool in your tool post and turn down the diameter until you get a very close fit to your part. Take care to face the shoulder accurately. If your part has a square shoulder on the ID, make sure you undercut the shoulder on your arbor slightly else the nose radius on your turning tool can prevent your part from registering accurately.
- Unscrew the SHCS a half-turn.
- Place the part on the arbor, and tighten the SHCS until the part is secure.
Holding parts this way has some wonderful benefits:
- You can remove and return the part as often as you want and still hold tenths accuracy.
- Unlike 5C OD collets, you can maintain axial location between parts — the shoulder you cut does not move. 5C collets will pull parts into the spindle a different amount if the diameters vary even slightly.
- You can access the entire OD of the part without needing to remove or flip the part.
- But you can easily flip the part without losing concentricity if it's convenient for some reason.
- If you want to ensure both faces are perfectly parallel, you don't need to locate to a shoulder, just turn a section of the arbor long enough to hold the part, and you can now face both ends without removing the part.
- It's cheap! The sacrificial parts can be made a half dozen or so at a time, and can be reused.
- The arbors are sacrificial, there is never a concern about cutting too far (you can even part narrow rings/washers without the parts going flying.


