Greg's French 75 Mm Field Artillery Model

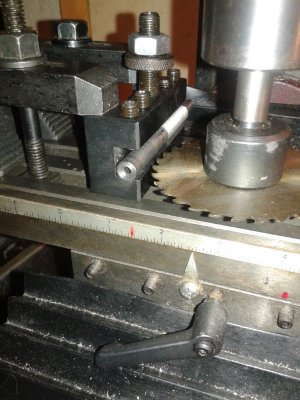
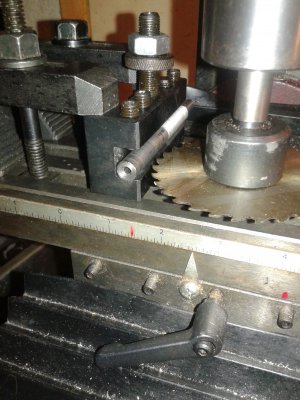
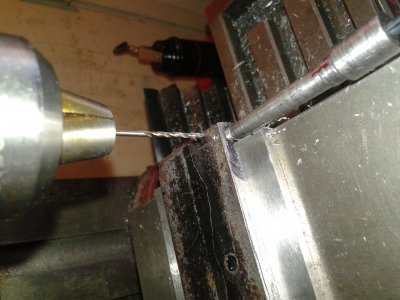
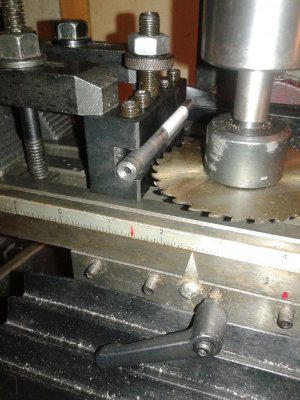
Workholding with AXA Toolholder.jpg Workholding with AXA Toolholder.jpg Workholding with AXA Toolholder.jpg Axle needs a keyway
Yesterday afternoon's shop session was an exercise in frustration as I tried many ways to hold the axle in the mini-mill. My little Sherline vise can sit on its back face, but I was unable to get it clamped down adequately despite two hours of experimenting. Figured that I'd need to make a custom fixture, to hold the axle by split pins in it's ends.
But as I cleaned up my shop, I had the brainstorm to use one of my lathe's AXA toolholders to hold the 3/8" x 4" piece on the mill. Today I did it, and it worked very nicely. I used a 1/32" slitting saw for a 1/32" deep keyway.
This slot goes through both the plain and threaded portion of the axle. The keyway and key are used to keep the axle from turning when the traversing mechanism is operated. Instead the rotary motion is converted to linear motion, jacking the gun carriage left or right along the axle to aim the gun.
 
Very nice work. You are an amazingly patient man. I probably would have committed Seppuku by now. Mike
 
Wheel Construction Finally Done!
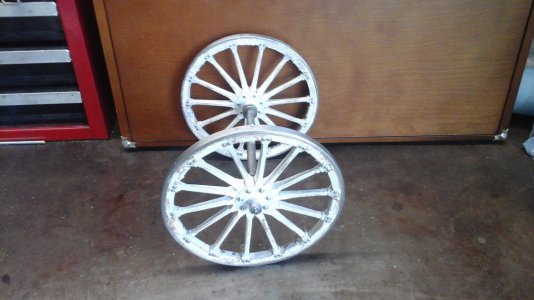
After six months making the cannon's wooden-spoked, steel-tired wheels, I'm finally done with their construction. I have finished with the woodworking! Now just good old metalworking.

Just need to do the finishing paint, a yellow-green acrylic. Thanks to hobby-machinist Tino doing a January photo recon mission to the West Point Museum, I have all the detail needed to match the original camouflage scheme. As I've mentioned before, this museum piece is the very one that my grandfather's gun battery used to fire the first American shot of WWI. So now I can start painting, the wheels will be a solid olive drab color. Talking to the museum's Arms Curator, I was surprised to learn the guns were camo painted at the French factory in a standardized manner. I had assumed it was more casually done in the field. Here is a link to Tino's package of 172 photos: https://www.flickr.com/photos/133495471@N08/sets/72157663157435569/ I'm in the process of compiling a table of contents/list of captions/cross reference to the images.

Again, I thank Rick Berk for his December 13th suggestion in this thread. He recommended not making the tire from bent and welded 14 gauge steel sheet, but to cut it from a solid plate and make it extra wide, then use the extra width to make an entry ramp. This would facilitate squeezing the wooden felloes down snugly into the tire. In my case, 6" Schedule 40 was almost the perfect OD! To minimize mucho metal munching, I ordered a few 5/8" slices of the pipe. For each slice, I bored it for the wooden felloes' OD and added the tapered entry ramp. This worked beautifully, after pressing the hub/spoke/felloes assembly into the tire, I put it all back in the lathe and cut off the ramp.
Each wheel assembly consists of 143 pieces. The tire, fellow, and spoke shoes are fastened with #0-80 hardware, the spoke/hubs are fastened with #2-56. So far, all stainless steel, since that was the only material I could find that came in the sizes needed. (I used www.microfasteners.com)
wheel hub ready to paint.jpg
Wheels on axle, ready for painting
wheel hub detail ready to paint.jpg
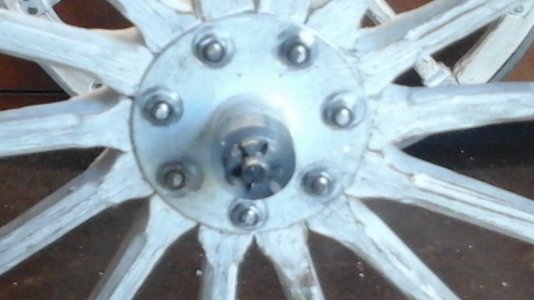
Wheel hub details, next up, making the lynch pin.
20160215_135040.jpg
Using jig to cross drill the axle for the lynch pin.
As you can see in the attached images, I have made the castle nuts (#8-32) that hold the wheels onto the axle. Today I made a simple jig to hold the axle thread ends as I cross-drilled them to 0.055" to accept the lynch pins.

The French Army drawings that are my primary reference source didn't make it clear how the lynch pin assembly worked. So I asked Tino to get some good detailed images of these, which he did. Now I need to figure how I'm going to make them.

As before, every single piece on the project has had its complications in design and implementation! That's what makes model engineering such an challenging and engrossing hobby.

Greg
 
Cannon Project Status Report - Lack of Progress

I haven't posted anything in a year, 'cause I haven't made any significant progress. I'm certainly not going to be done in time for the centennial of "The First Shot".

Last spring, I was working on making the wheel lynch pin assemblies. Spent two days with much filing and the result was a case of "trigger finger" - inflamed middle finger tendon.
This basically kept me away from the workbench for months. It might be healed now, but I suspect I'm susceptible to re-injury.

And problems with my CAD. As I've mentioned in my posts, the lack of dimensioned drawings means having to make my own, based on old French and US Army drawings (from tech manuals, not engineering drawings), and from my photographs, measurements, and sketches of actual guns. I had been using TurboCAD, and with much struggling, did have some success, but at a very low productivity.

Then I discovered Autodesk's Fusion360 and was very impressed. I have started using it to layout the gun's trail, but I really need to become more proficient. I was only familiar with 2D CAD, and only familiar, not really proficient.

Fusion360 is powerful, but complex. My efforts to learn it have been intermittent. There are various online tutorials, and in general they are good at what they are trying to show. But I really wish there was a reference manual. (From what I see on the users' forum, apparently many others agree.) But there really isn't! I am considering writing my own manual! BTW, I think TurboCAD's documentation is inadequate as well.

After I get our taxes done, I will really get back to work somehow. Rather than tackling another critical, complex part, I think I'll find some "low-hanging fruit", maybe parts of the shield. If I can't get a nice engineering drawing out of F360, I can just make hand sketches.

Greg
 
Hello Greg, I was wondering what happen to your build, sorry about your hands, I too realize that using my hands as a hammer on a milling vise was not the smartest thing, but quick and easy at the time. I remember when our company bought Pro E for all the draftsmen and within one year half of them had quit due to the stress of an old dog learning a new trick. I still do all my work on a envelope with a soft lead wood pencil. Looking forward to you making smoke some day. Regards.
 
Hello Greg, I was wondering what happen to your build, sorry about your hands, I too realize that using my hands as a hammer on a milling vise was not the smartest thing, but quick and easy at the time. I remember when our company bought Pro E for all the draftsmen and within one year half of them had quit due to the stress of an old dog learning a new trick. I still do all my work on a envelope with a soft lead wood pencil. Looking forward to you making smoke some day. Regards.

Thanks Rick,
My finger injury was caused by hours of filing using needle files that had no handles. Hopefully the wooden handles I made for them will prevent re-injury.
The only smoke I expect to make related to this project will be from welding, brazing, and hot cutting oil. Unless my plans change, this will be a non-firing model, but operable in as many details as possible. (e.g. operation of breech, elevation and traversal mechanisms, recoil mechanism, and brakes. If it was to be fire-able, I suppose I could design as chambered for something around 0.38 calibre. But I doubt a properly scaled firing spring and pin would have enough impact to ignite the primer.
Greg
 
Hello Greg I see you are building a scale model of the French 75 I have beennasked to build a barrel and recouperator assembly to go on a original carriage and was wondering if you hadva set if drawings available

Sent from my SM-G960F using Tapatalk
 
Hello Greg I see you are building a scale model of the French 75 I have been asked to build a barrel and recouperator assembly to go on a original carriage and was wondering if you hadva set if drawings available

Sent from my SM-G960F using Tapatalk
Hello Peter,
As you probably saw, I haven't posted any progress on this thread in 4+ years. Health issues, family stuff, and other interests have taken priority, but it's still on my mind.

You've probably read through my thread of posts on the M1897 and seen my mention that lack of machinist-ready drawings has been a major stumbling block. So I have to CAD my own drawings, and have stumbled from one CAD platform to another. That's a different problem.

My best source of info is a French document. I'm not sure what the actual purpose was, but its drawings, labelled in French, show most of the detail. Unfortunately, they lack the dimensioning needed to recreate the parts and they lack any indications on their scale. Each page is of a different scale.

So I'm trying to reverse engineer these French drawing dimensions, based a few different sources:
-- on published specifications like overall length, cannon barrel bore, ...
-- my notes, photos, and measurements taken on my visits to cannons at the Orange County, CA [old] courthouse, the museum at U.S Military Academy, West Point, New York, and at Camp Roberts, San Miguel, CA.
-- drawings from a U.S. Army Handbook of Artillery where, for example, page 84 shows a side view that has a scale of millimeters along the bottom.

Here is the source of those French drawings: Instruction militaire. Croquis du canon de 75 Mle 1897

On your project, the barrel I understand, but haven't seen anything called a "recouperator." I suspect that is part of the recoil mechanism.
Are you needing the entire barrel assembly, or just the "barrel" itself, (the part with the rifling)? The drawings, in Plate 1, show the "canon" as a having several pieces, not counting the breech mechanism.

Maybe we can share information and each make some progress,
Greg
 
Hi Greg yes I am making a barrel and breech ,recoil assembly where did you find the drawings with a mm scale ?

Sent from my SM-G960F using Tapatalk
 
Back
Top