- Joined
- Apr 4, 2018
- Messages
- 53
Didn't know anything about these types of ovens except what I gleaned from watching a few YouTube videos. How hard could it be, it looked so easy in the videos! Actually it wasn't too bad, but like every other venture into the unknown there were a few screw ups.
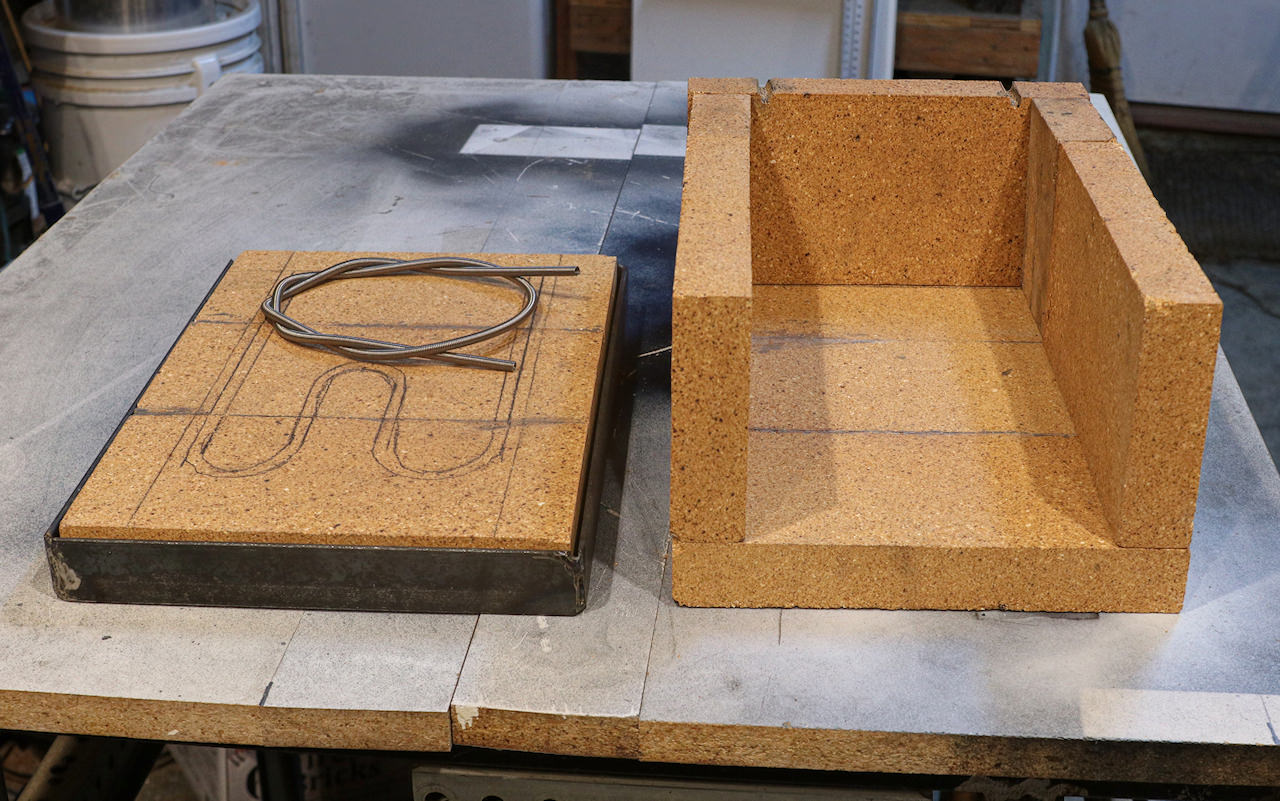
I thought the ceramic fiber bricks were ridiculously expensive, so I picked up some regular fire bricks instead. Cutting these turned out to be quite time consuming (they are very hard). The regular masonry disc didn't do any better than standard metal cutoff discs, so I used those.
I also bought some high temperature mortar which came in a tube (much like silicon seal). I used it to glue the bricks together and it worked OK. It’s water based and cures by drying out. This burned me later.
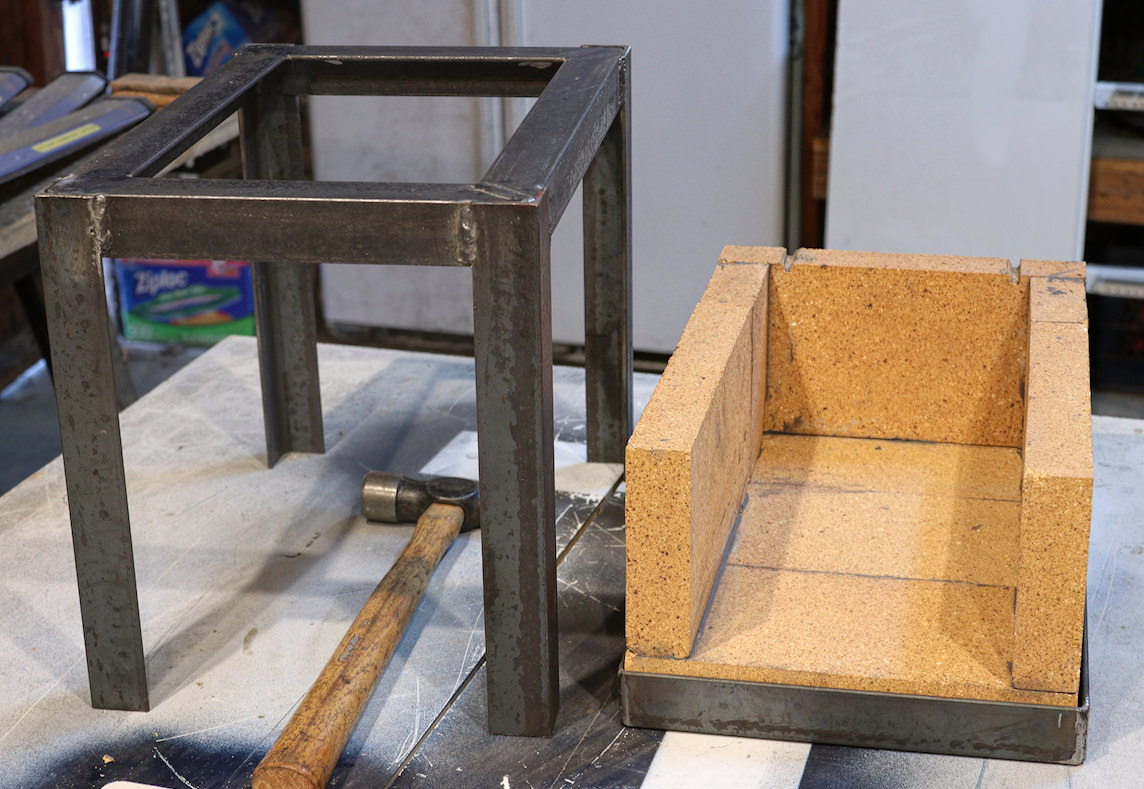
This is how it started out:
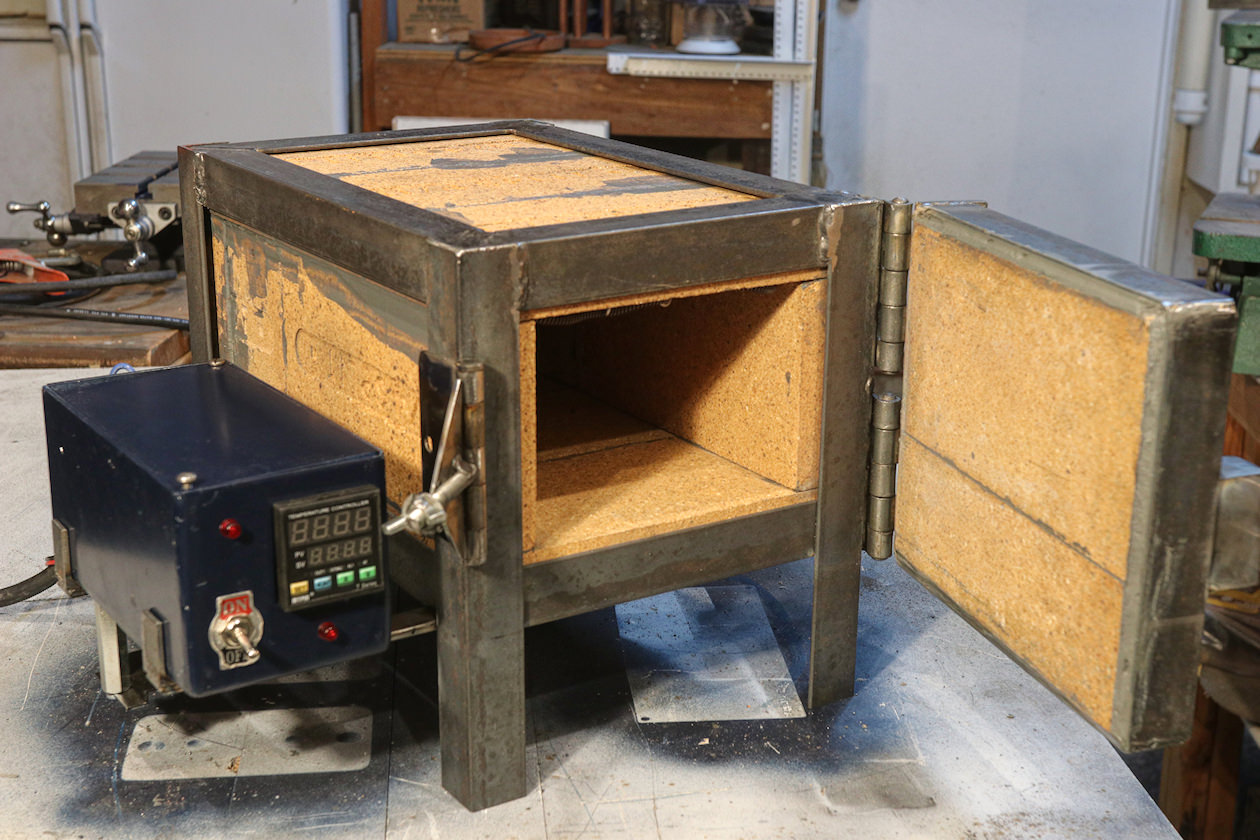
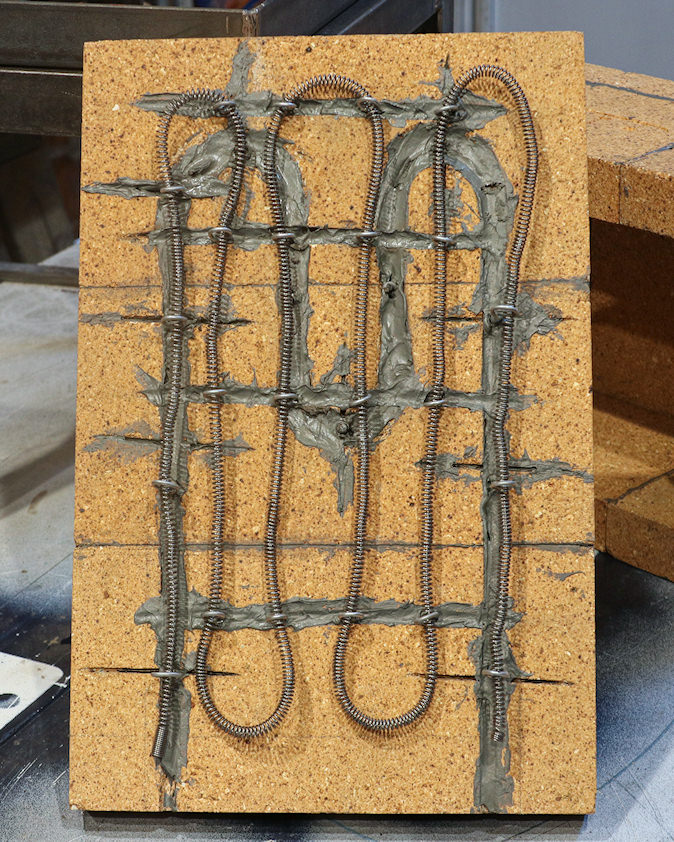
I traced out a groove in the top in which I was going to put the 1500 watt heating element. After hours of grinding out the groove, I found out that one must stretch the heating element coil out in order for it to work properly. So much for the groove.
I stretched out the coil and ran it through wire hangers that I “glued” into little slits I cut in the brick (F#@k the groove). I used the tube mortar for glue and it seemed to work OK.
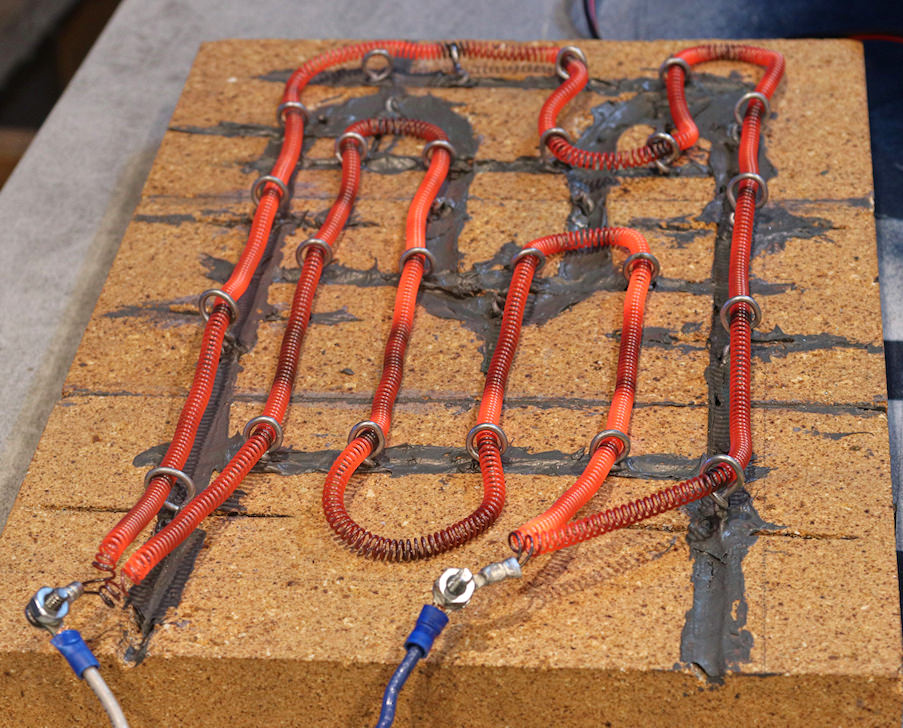
I then tested the coil and got very little heat from it. I measured the resistance and got about 26 ohms across the coil. This gives about 500 watts @120 Volts. Gee, I guess this element was meant for 220 Volts.
I didn’t want to run on 220V because my control box was all wired for 120. So, I cut the element in half and ran the two pieces in parallel. It lit right up to a nice glowing orange in that configuration. Nevertheless, I had to rerun my coils again. The top of my oven is starting to look ugly, but who cares as long as it works.
I mounted the thermocouple in the bottom rear of the oven. I enclosed it in a steel pipe and welded a piece on the end for it to screw it into.
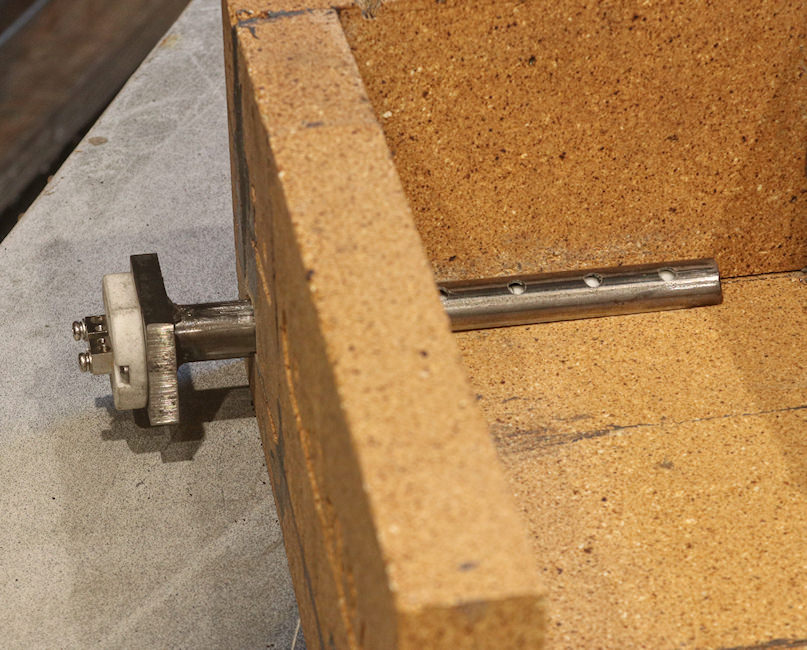
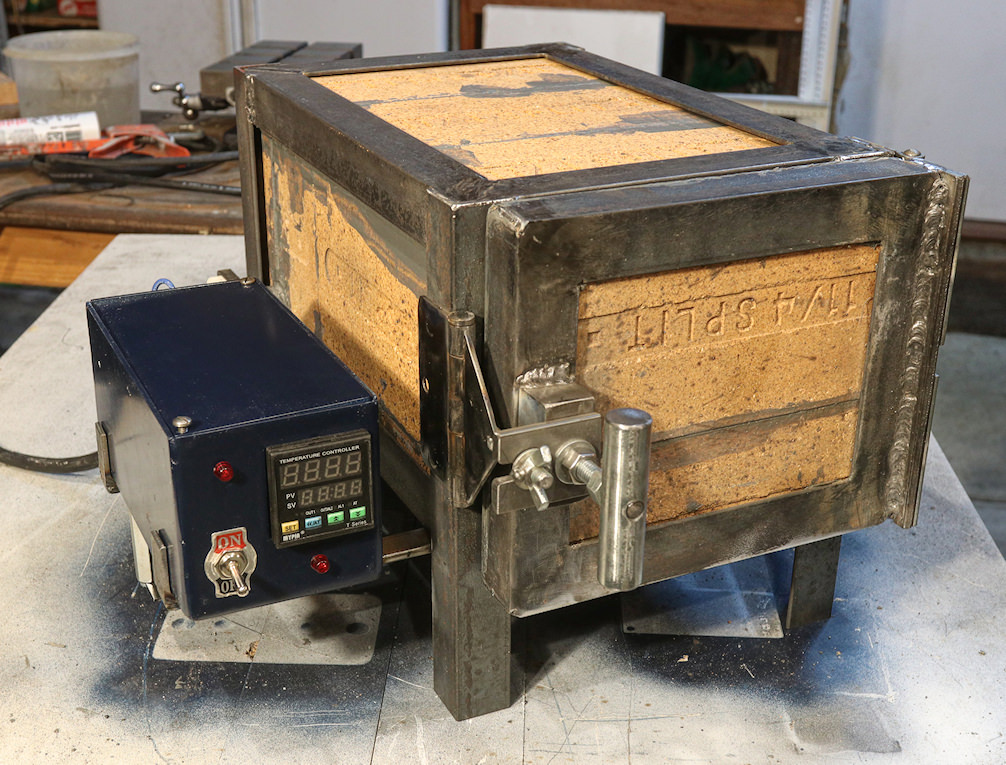
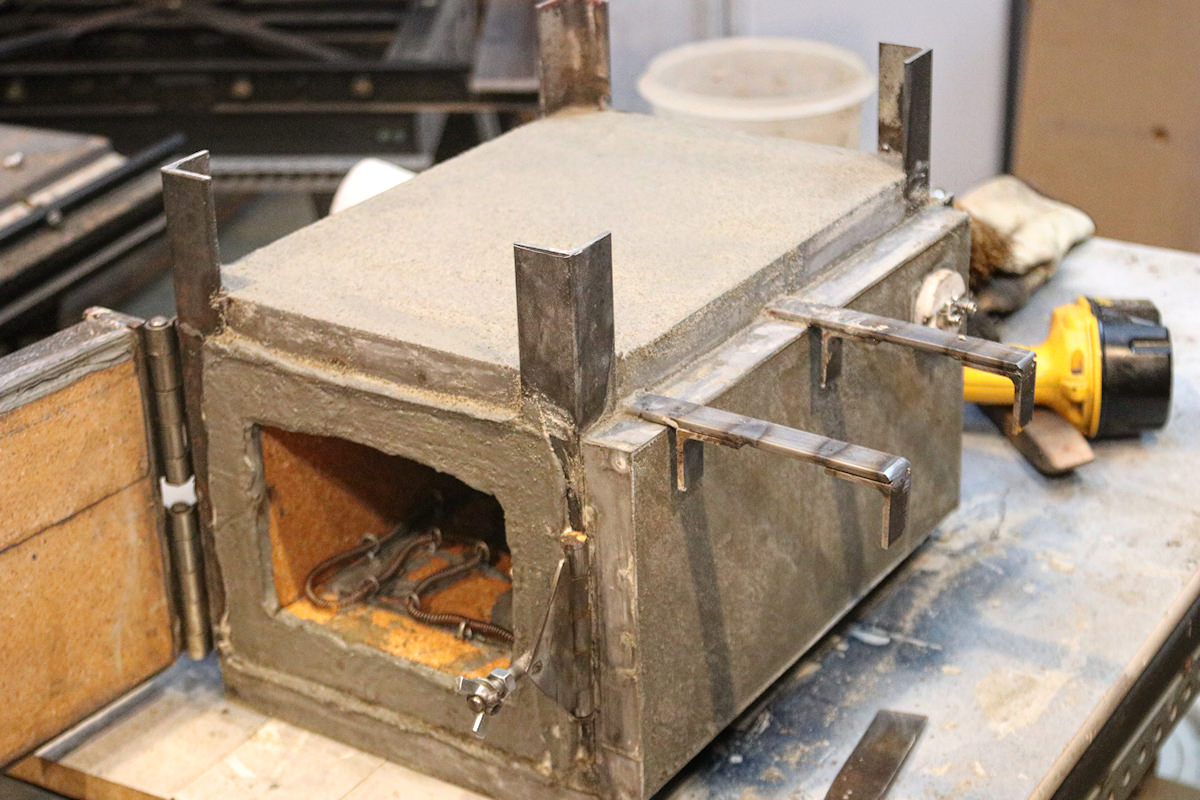
It sticks out a ways because I’ll be adding regular mortar to the outside for more insulation.
(continued in next post)
I thought the ceramic fiber bricks were ridiculously expensive, so I picked up some regular fire bricks instead. Cutting these turned out to be quite time consuming (they are very hard). The regular masonry disc didn't do any better than standard metal cutoff discs, so I used those.
I also bought some high temperature mortar which came in a tube (much like silicon seal). I used it to glue the bricks together and it worked OK. It’s water based and cures by drying out. This burned me later.
This is how it started out:
I traced out a groove in the top in which I was going to put the 1500 watt heating element. After hours of grinding out the groove, I found out that one must stretch the heating element coil out in order for it to work properly. So much for the groove.
I stretched out the coil and ran it through wire hangers that I “glued” into little slits I cut in the brick (F#@k the groove). I used the tube mortar for glue and it seemed to work OK.
I then tested the coil and got very little heat from it. I measured the resistance and got about 26 ohms across the coil. This gives about 500 watts @120 Volts. Gee, I guess this element was meant for 220 Volts.
I didn’t want to run on 220V because my control box was all wired for 120. So, I cut the element in half and ran the two pieces in parallel. It lit right up to a nice glowing orange in that configuration. Nevertheless, I had to rerun my coils again. The top of my oven is starting to look ugly, but who cares as long as it works.
I mounted the thermocouple in the bottom rear of the oven. I enclosed it in a steel pipe and welded a piece on the end for it to screw it into.
It sticks out a ways because I’ll be adding regular mortar to the outside for more insulation.
(continued in next post)