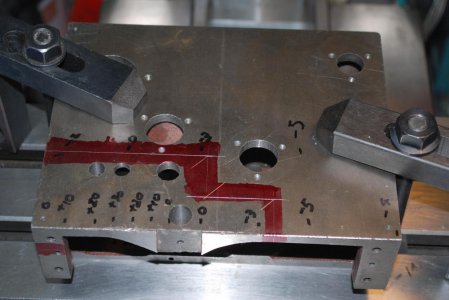
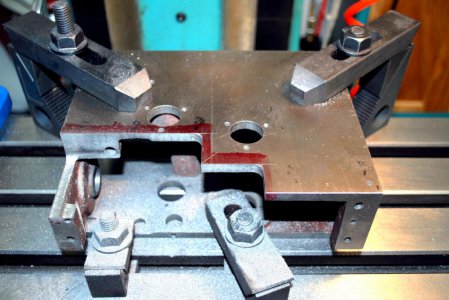
[How-To] Help Please. How would you repair this Cracked Cast Iron Lathe Apron (Off a Smithy Granite). Braze or Weld?

Those voids look like it was just lack of filler, Don't be afraid to build the filler up well above the finished height, You will machine off the excess anyhow but you will be less likely to have low spots.
If those were voids that only showed up after machining, then you may have been going to fast and trapped flux or air in the joint or there could have been porosity or inclusions in the cast iron that bubbled out into to the filler metal.
 
Regarding CRS - I've always heard that CRS has internal stress(es), due to the nature of cold working - and that it can warp a bit when machined. The fact that your assembly bowed a bit when you welded on it seems consistent with this idea. So I'm wondering if it might be worthwhile for you to anneal it somehow before brazing, just so you have less corrective machining to do afterward. ANY and all information from those of you who know would really be appreciated!
 
Thanks, John. Be interested in additional thoughts.

Made some more progress today.

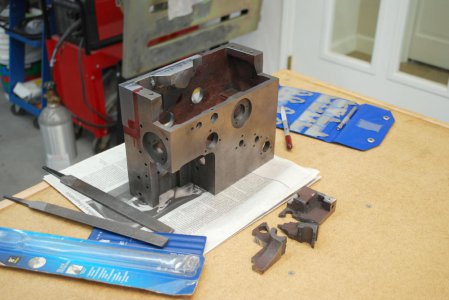
Carving up the casting to get it ready for the Replacement Part
Ready to Cut Out The Cracked Bulge.jpgDamage Cut Out.JPG

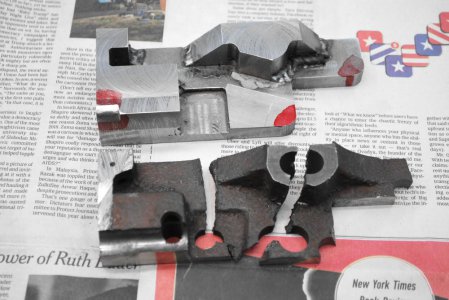
The Replacement Part vs the old, which crumbled once cut out
New vs Old.jpg

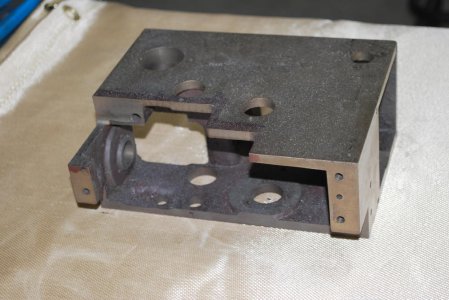
Part fits pretty well - proud all around to allow for final machining
A Little Proud All Around.jpgFrom the Back.jpg

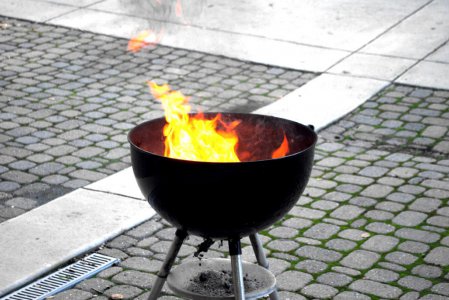
Cook at 500F for an hour. Last steps: bevel edges for brazing, braze both sides, do final machining then drill and line bore shaft holes
Getting Ready to Grill.jpgDone One.jpg
 
Last edited:
Now the BIG question is, did those cracks actually go beyond the area you cut out?If they did you will need to find the end of the crack, drill a stop hole, grind it out and braze it in.
 
Now the BIG question is, did those cracks actually go beyond the area you cut out?If they did you will need to find the end of the crack, drill a stop hole, grind it out and braze it in.
Jeff:
Fortunately, it's all good metal at the cut lines, at least as far as I can tell looking at it through a loupe. I'll check it again once it cools down. Thanks for all of your help. I appreciate that.
Bill
 
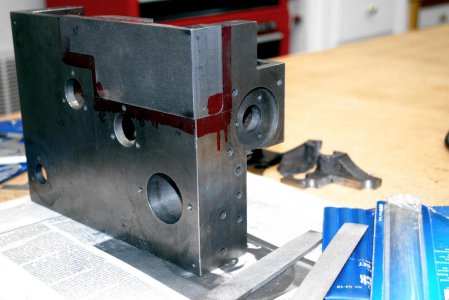
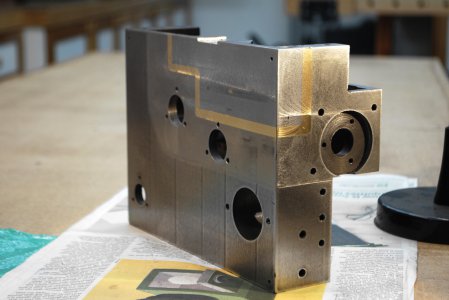
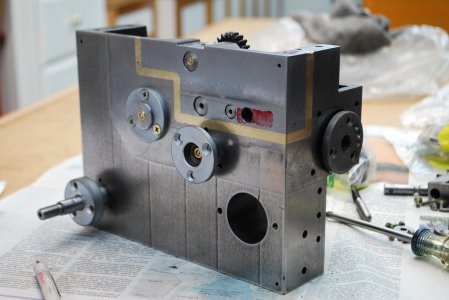
Finished brazing in the new part and machined to dimension.
Braze Complete - Frt.jpg

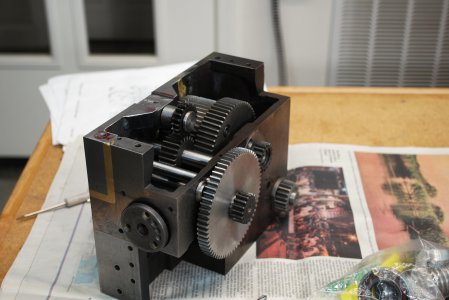
Partially assembled to check gear mesh - Front view
Checking Gear Fit - Frt.jpg

Partially assembled to check gear mesh - Back view. Everything looks good. Just need to take it back apart, lube, reassemble and install.
Checking Gear Fit - Back.jpg
 
Spectacular results!

It looks ready to drop back onto the lathe for years of service.

Plan the work and then work the plan.
Planning pays off.

I can't wait for final test results.

-brino
 
WOWSERS!!! Congratulations on an excellent (and excellently documented) juo.
 
Wow ! That is a proper repairing job!
 
Back
Top