- Joined
- Mar 30, 2014
- Messages
- 115
OK, this is possiably a good one. I have not been able to figure anything out yet. I have something that I need to get set up in a 4 jaw chuck and have it be true on the outside. Only problem is its a toothed wheel.
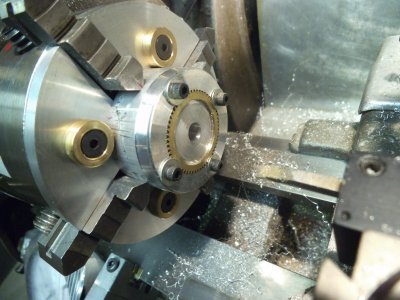
What I have is a crankshaft reluctor wheel for a automotive fuel injection system. This partcular one started life as a crankshaft that was cut in two and then the wheel cut out of it. (wheel is cast as, and machined as part of the crankshaft) I took and cut the crankshaft apart and got it down to just the wheel. One side of the wheel is a main journal, so its centered, I left it there to have something to clamp on with a lathe chuck. The other side was a rod journal, I cut it flush. This will be mounted on the center hub (not the rubber isolated part) of a harmonic balancer on a older engine to retrofit it with modern fuel injection/DIS ignition.
Here are a couple pictures showing the wheel:


So I have already taken a facing cut off the rod journal side to clean it up. Now I am to the point of needing to bore out a center hole. Only problem is, I need this to be exact. The OD of the wheel must ride true, otherwise it will either send bad signals or not work at all. The crankshaft position sensor must stay a specific distance away from the teeth for a proper reading, the wheel must ride true, it can not wobble or run in a eccentric pattern. So basicly I need to set it up in my 4 jaw chuck and indacate off the OD. Now there is my problem. Anything else I could just stick the dial indacator on it and dial it in. But this has teeth, so I can not use a dial indacator. SO, how in the world do I get this trued up on the (toothed) OD?


What I have is a crankshaft reluctor wheel for a automotive fuel injection system. This partcular one started life as a crankshaft that was cut in two and then the wheel cut out of it. (wheel is cast as, and machined as part of the crankshaft) I took and cut the crankshaft apart and got it down to just the wheel. One side of the wheel is a main journal, so its centered, I left it there to have something to clamp on with a lathe chuck. The other side was a rod journal, I cut it flush. This will be mounted on the center hub (not the rubber isolated part) of a harmonic balancer on a older engine to retrofit it with modern fuel injection/DIS ignition.
Here are a couple pictures showing the wheel:


So I have already taken a facing cut off the rod journal side to clean it up. Now I am to the point of needing to bore out a center hole. Only problem is, I need this to be exact. The OD of the wheel must ride true, otherwise it will either send bad signals or not work at all. The crankshaft position sensor must stay a specific distance away from the teeth for a proper reading, the wheel must ride true, it can not wobble or run in a eccentric pattern. So basicly I need to set it up in my 4 jaw chuck and indacate off the OD. Now there is my problem. Anything else I could just stick the dial indacator on it and dial it in. But this has teeth, so I can not use a dial indacator. SO, how in the world do I get this trued up on the (toothed) OD?


