- Joined
- Feb 7, 2014
- Messages
- 90
I have a 1957 Dodge with the 325 CID "Poly" engine. I recently picked up a 354 Hemi from a 56 Chrysler. I'll be putting the Hemi in the Dodge but time got too tight and I already wasted much of this summer so I'm going to put my Poly engine back in for this summer and put the Hemi in over the winter. ANYWAY...
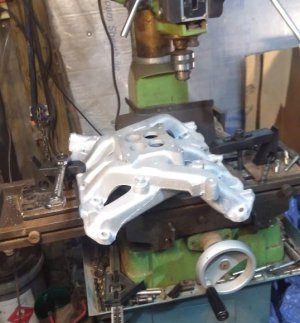
So sometime back I purchased a 4 barrel intake for the Poly but didn't have a carb for it. I figured we had one around in all the junk and I'd rebuild it. Turns out we didn't have anything that old....except for the carb on the 354 Hemi. But there was a problem, the Poly carb was shorter and squarer so the hole pattern to bold the carb down was in much closer than the holes were on the Hemi's carb. It's kind of strange because when you see the pics you'll see that they used the exact same pattern as on the Hemi intake. The Hemi carb lays over the flat surface for the carb perfectly! All I had to do in order to make it work was drill and tap 4 holes! Simple right? Famous last words...
I had some good transfer punches so I plopped the Hemi carb down on the poly intake and it turned out only 3 holes could be directly transferred as there was something on the carb in the way. It was an easy fix. I just measured the distances between the holes, plugged them into my calipers, swung an "X" and centerpunched all four. Instead of being careful and doing the drilling with a had drill I looked over at my mill and said to myself, "just think how much better that would work!" Bad idea! It turned out there were no flat surfaces other than the one the carb mounts on. I had to use a bunch of shims and clamps, had to remove my vice....what a job. It was a real pain getting it level. It wasn't until later that I realized just how NOT level the mill was. I'd been meaning to level it since I put it there 4 years ago but just never got to it. It turns out it's so far out of level I'm lucky my project worked at all and didn't ruin my very spendy intake manifold. I guess the moral of the story on this one is, "just because you have a milling machine doesn't mean you should insist on using it!" I think the results would have been much more accurate had I done it by hand!
Anyway, here's a couple of pics...
Thanks,
Wayne