

- Joined
- Jan 27, 2017
- Messages
- 16
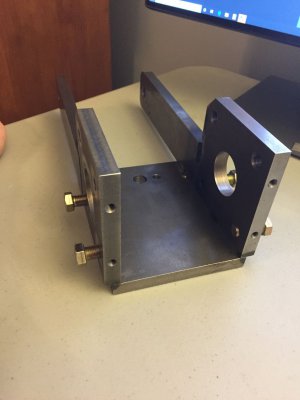
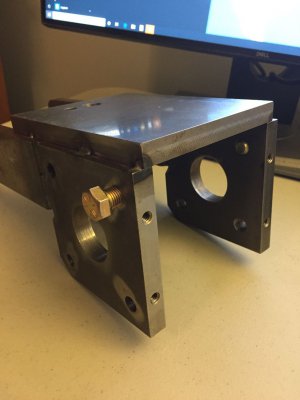
I tack welded this bracket and would like tips on keeping the joints square after final cool down. This brackets main function is to restrain two mounted bearings. I know shrinkage will occur, hole should i minimize it, to maintain squareness.
I plan on M.I.G. welding with miller 211 welder. I have access to large c-clamps, and a 4x4x1/4 square tube that can "nest" inside the bracket to keep the joints from closing. also have a oxy acetylene setup if i need to heat and straight.
I was thinking of tack welding corner joint 1 at the middle inside location, and letting it cool and than do the same tack weld on the outside of corner joint 1 (just 1/2" away). I was thinking i could just alternate the welds like this and monitor the squareness.
Please disregard the drilled and tapped thru holes that i should have left until the weldment was finished. I did "T.I.G" weld 1/4 from the edge of the threaded hole without distortion.
-Thanks for you time, Ryan
![IMG_3010[1].jpg](/data/attachments/271/271170-9ae00dc51ab102816d85bae7bd8d88be.jpg)
![IMG_3012[1].jpg](/data/attachments/271/271171-3edf2658d129e04253891e56a794997d.jpg)